If you are studying for CCNP Wireless or CWNP Certification, an essential part of the study process is actually getting to lab it all out so as to understand the concepts. I noticed that my Wireshark output lacked the 802.11 management or control packets while trying to capture Open System Authentication process. This blog will explain how to set up Wireshark for WLAN Capturing so that you do not miss the vital packet exchanges.
So far, I have just installed and opened Wireshark. I have done nothing more. Select your WiFi interface that we will use to capture traffic.

As you can see, the Capture starts from DHCP request process.
Where are the 802.11 Auth frames? Well, when capturing with Wireshark (or other tools using libpcap/WinPcap) there are two ways in which 802.11 can be supplied by the system and stored in a capture file:
- “real” 802.11: the hardware/driver provides the actual protocol data that travels over the air, complete with 802.11 headers.
- “fake” Ethernet: the hardware/driver translates the 802.11 headers into Ethernet headers so that the whole packet looks like a normal Ethernet packet.
We seem to be using Option 2. We see user data packets with fake Ethernet headers. We do not see 802.11-specific management and control frames as they are discarded because there’s no equivalent to them in Ethernet

To capture the real 802.11 packets and radio layer information, then we have to capture in “monitor mode”. We need to disable the translation/filtering and see what’s “really” going on inside your WLAN. Then I read: Note that Monitor mode is not supported by WinPcap, and thus not by Wireshark or TShark, on Windows. It is supported, for at least some interfaces, on some versions of Linux, FreeBSD, NetBSD, OpenBSD, DragonFly BSD, and Mac OS X. Bummer!! Coffee Break. Will be back once I install Ubuntu 🙂
Getting Wireshark to work on Ubuntu
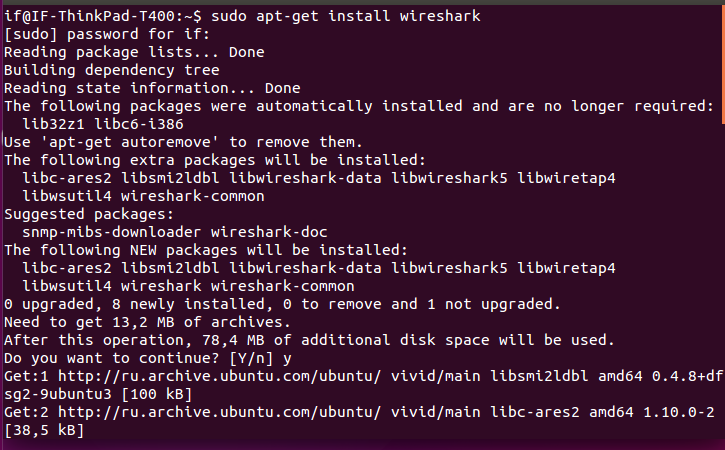
AM BACK with an Ubuntu desktop and ready to Install Wireshark. I must admit that Linux administration is not one of my strengths, but with google, nothing is impossible :).
To install wireshark, simply run the following command:
sudo apt-get install wireshark
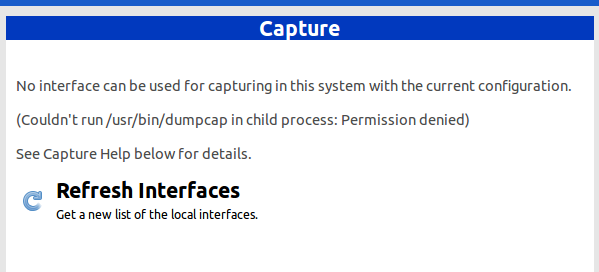
After Installation, I opened the application and noticed the error “No interface can be used for capturing in this system with the current configuration.”
To fix this, simply run the following commands:
- Create the wireshark group.
- Add your username to the wireshark group
- Change the group ownership of file dumpcap to wireshark
- Change the mode of the file dumpcap to allow execution by the group wireshark
- Grant capabilities with setcap
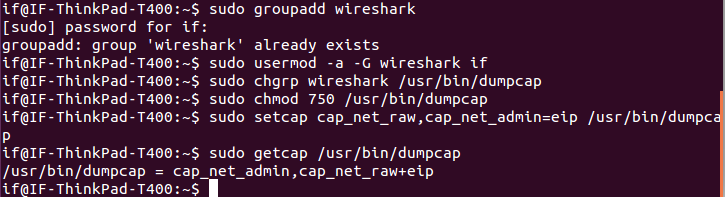
Verify the change


Now we are able to capture packets but I still see that Monitor Mode is disabled for WLAN Interface.
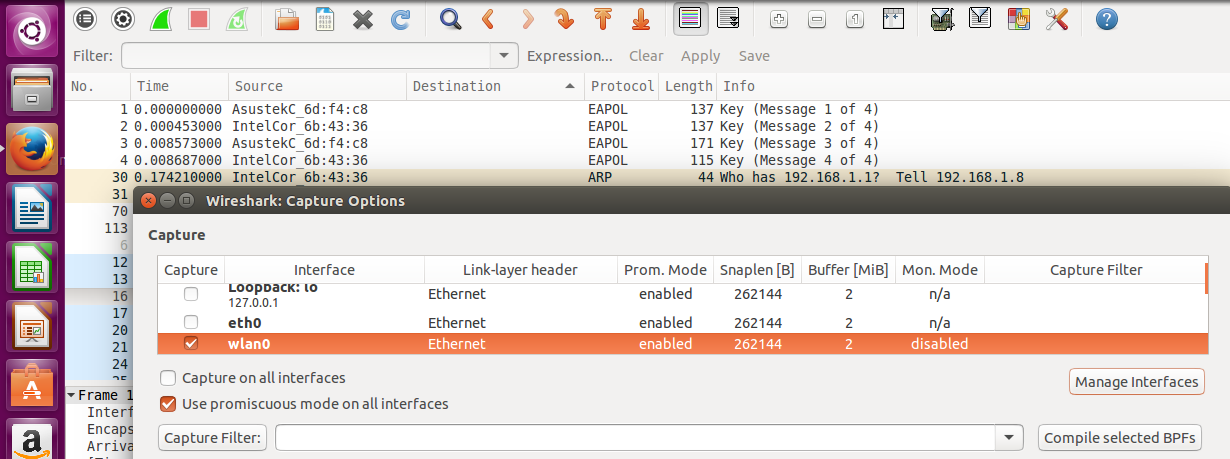
Enable Monitor mode for the wlan interface by double-clicking on it and checking the capture packets in monitor mode box.
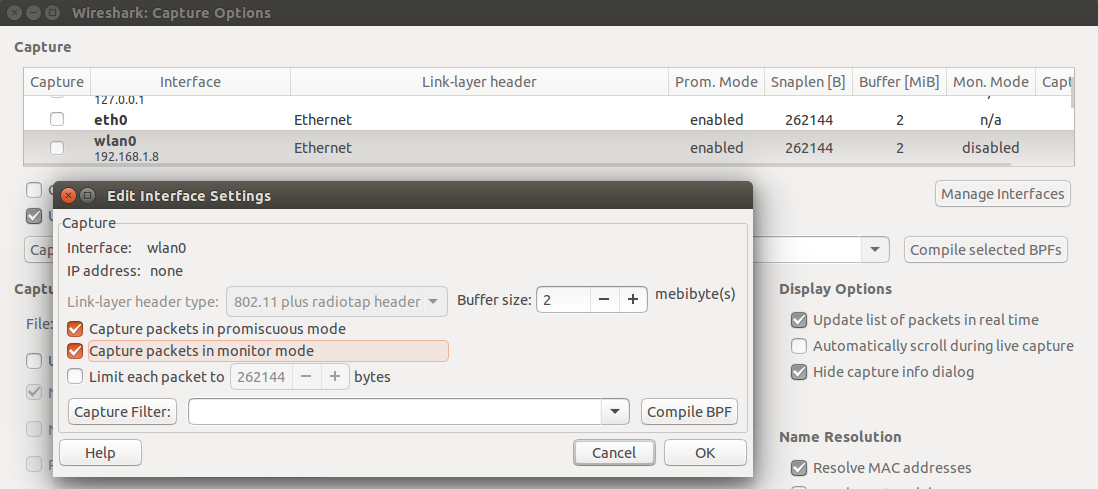
Verify that Monitor Mode is now set to enabled.

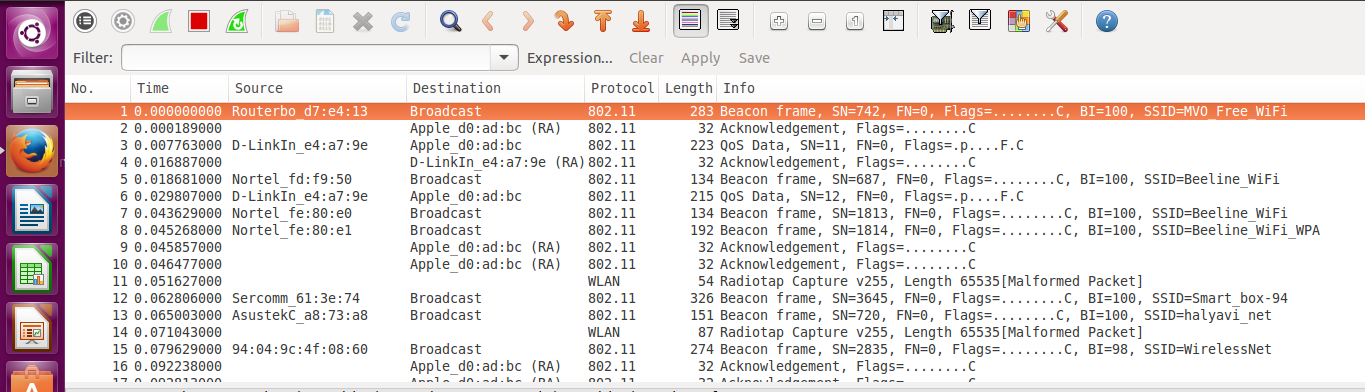
When you start a capture file, you should be able to see 802.11 protocol packets.
Now that everything is set, let’s get started with the Wireless labs :).
Adios!
