In the previous section, we looked at deploying the hypervisor, firewall and router. This part focuses on emulating a realistic office network consisting of multiple endpoint OSs. The aim is to deploy one system each as a template that we can then clone to their respective networks as needed. We will setup an active directory lab using the newly released Windows 2022 domain controller server and a couple of macOS, linux and windows end-hosts. We’ll also create an SMB file share and some users on the AD just as in normal office networks.
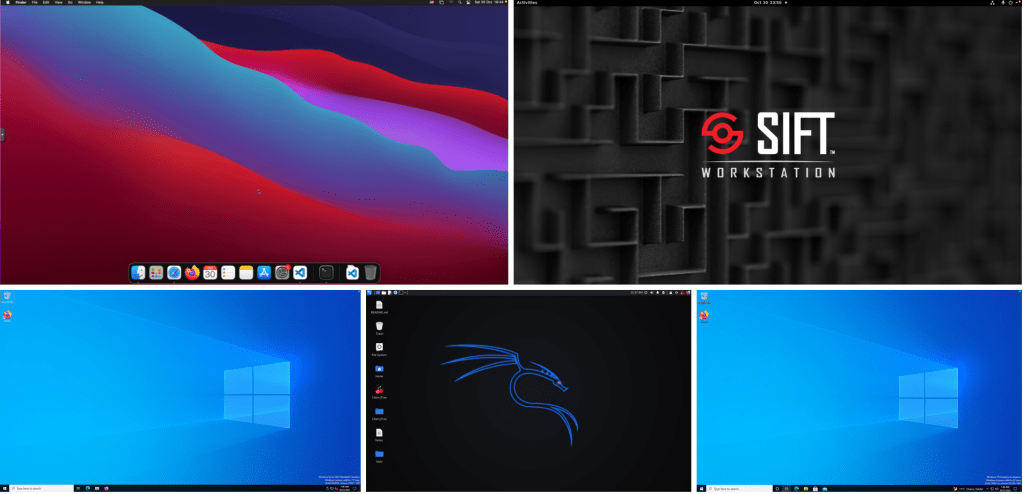
At the end of this section, we will have the following endpoints:
- macOS VM
- SIFT Workstation + Remux combined (2-in-1 analysis VM)
- A Windows 2022 Domain Controller
- A Windows 10 64 bit Client VM with WSL2 enabled
- Kali Linux Attacker machine
Ps. The active directory part of this blog was inspired by Heath Adams‘s Udemy Ethical Hacking Training that I am going through.
Table of Contents
- Deploying macOS BigSur on Proxmox
- Deploying SIFT Workstation combined with Remnux
- Deploying an Active Directory Lab with Windows 2022 Domain Controller
- Deploying Attacker machine using Kali Linux
- References
Deploying macOS BigSur on Proxmox
We will follow along with the steps detailed in this guide to setup our macOS VM. Nick’s setup used Proxmox 6 but we will adapt it to Proxmox 7 where neessary. A catch for this installation though is that you actually do need a real Mac to fetch the OSK keys. The reason for this is that macOS checks that it is running on real Mac hardware before it can boot. Apparently, every Mac has the same identical OSK which can easily be retrieved.
Preparing BigSur and OpenCore bootloader image files
Let’s start by downloading the OSX-KVM repository.
# wget https://github.com/thenickdude/OSX-KVM/archive/refs/heads/master.zip
# unzip master.zip
# cd OSX-KVM-master/
We will need to build the ISO on our Linux box (Proxmox), so let’s install make package. If you do not have qemu-utils, you will also need to install that too. In my case, I will attempt to build the file on Proxmox server since it is just Linux under the hood.
# apt install makeNow, let’s navigate into the folder we just downloaded. There are a couple of scripts there to help build the image. We will be building a BigSur image.
# cd scripts/bigsur
# make BigSur-recovery.img
This initiates the fetch-macOS-v2.py script which then downloads the installer files from Apple and builds the recovery image as seen in the script output below.
../../fetch-macOS-v2.py --action download --board-id Mac-E43C1C25D4880AD6
Downloading 694-35959...
Saving http://oscdn.apple.com/content/downloads/41/28/071-71279/5djpevqmc2w0ti2c4n1m8mkz7fm791t1ic/RecoveryImage/BaseSystem.dmg to BaseSystem.dmg...
Note: The total download size is 637.20 MB
Download complete!
Saving http://oscdn.apple.com/content/downloads/41/28/071-71279/5djpevqmc2w0ti2c4n1m8mkz7fm791t1ic/RecoveryImage/BaseSystem.chunklist to BaseSystem.chunklist...
Note: The total download size is 2596 bytes
Download complete!
rm -f BigSur-recovery.dmg
qemu-img convert BaseSystem.dmg -O raw BigSur-recovery.dmg
ln BigSur-recovery.dmg BigSur-recovery.img || cp BigSur-recovery.dmg BigSur-recovery.img
We can see the image that has been created in the BigSur directory. We can now move that raw image file to the ISO folder.
# ls | grep -i recovery
BigSur-recovery.img
# mv BigSur-recovery.img /mnt/pve/ssd/template/iso/
Next, we need to download the latest version of OpenCore Image from here that is compatible with BigSur. I got version 14, which was the latest as of today. This is actually a hard disk image. We can simply decompress the file then move it to the ISO repository.
# wget https://github.com/thenickdude/KVM-Opencore/releases/download/v14/OpenCore-v14.iso.gz
# gzip -d OpenCore-v14.iso.gz
# mv OpenCore-v14.iso /mnt/pve/ssd/template/iso/
Next, we will need to read the OSK key. This can only be done on a real Mac. We need to use the first code from here and save the file as smc_read.c file.
$ gcc -o smc_read smc_read.c -framework IOKit
$ ./smc_read
We now have the 64 character OSK authentication key to use. Copy and save it for later.
Creating a BigSur VM
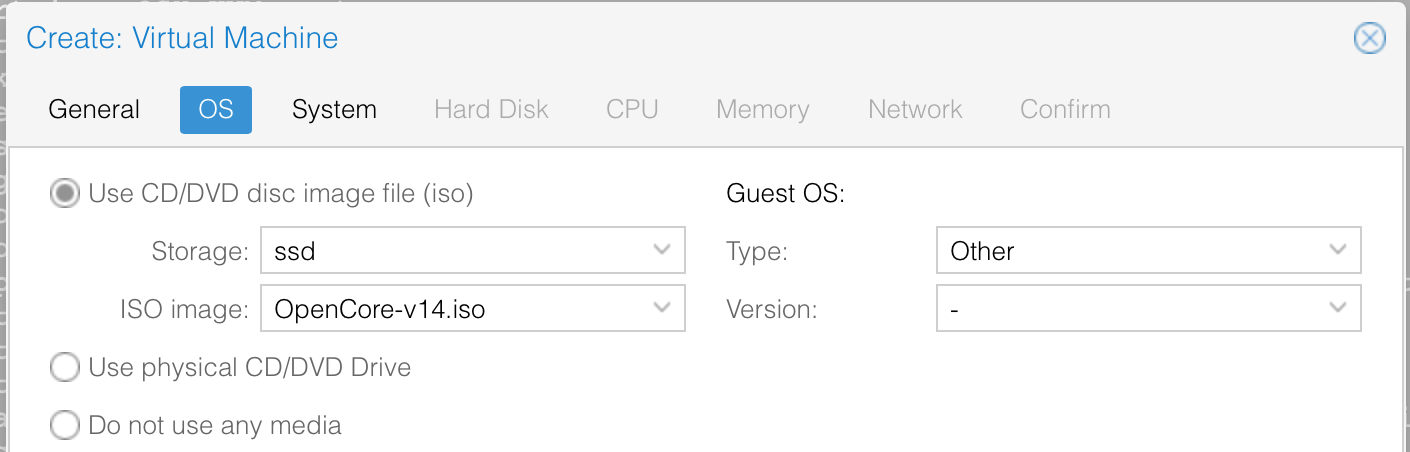
Let’s now move on to creating the VM. For the OS, we will select the OpenCore ISO we uploaded.
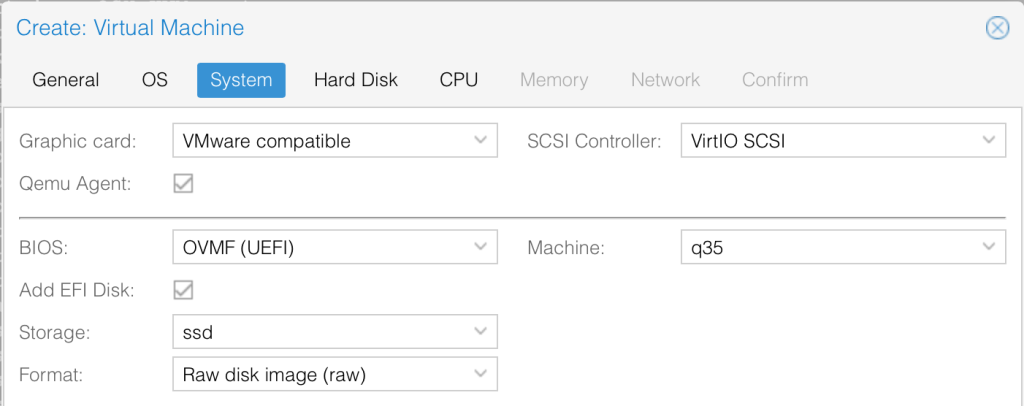
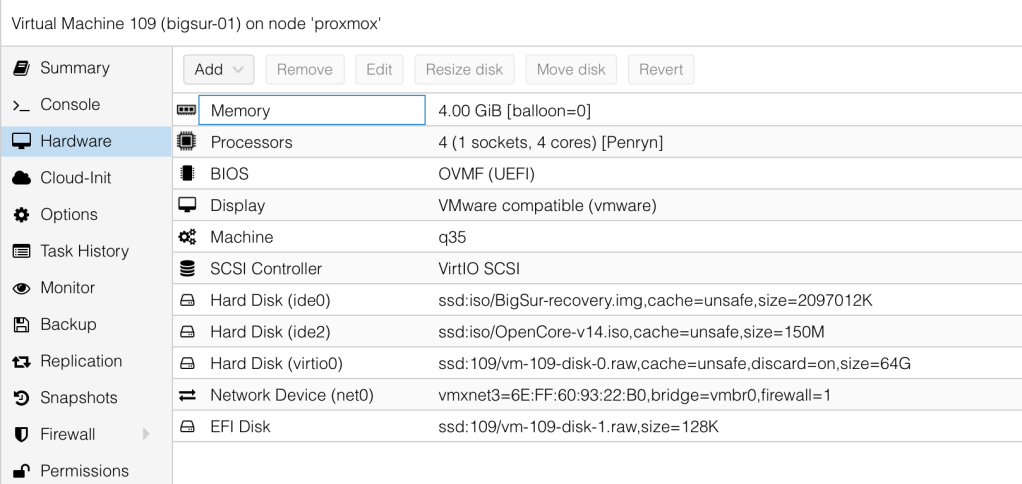
We will use Vmware Compatible graphics card, enable QEMU Agent, set the BIOS to OVMF (UEFI), machine to q35, enable EFI disk and select our preferred storage.
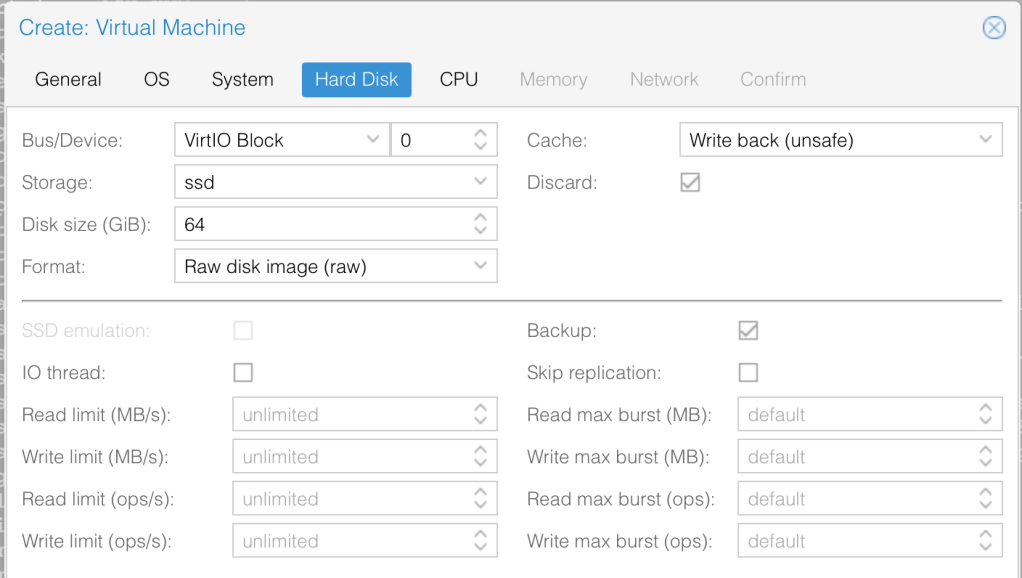
For the hard. disk, we will set it to 64GB and enable discard to support TRIM. With Discard set, when the VM’s filesystem marks blocks as unused after deleting files the storage will shrink the disk image accordingly.
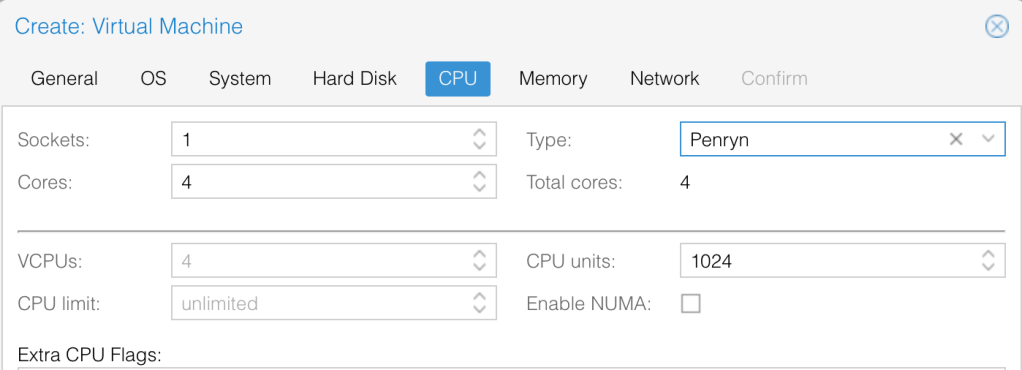
We will set the CPU to 4 cores and specify its’ type as Penryn.
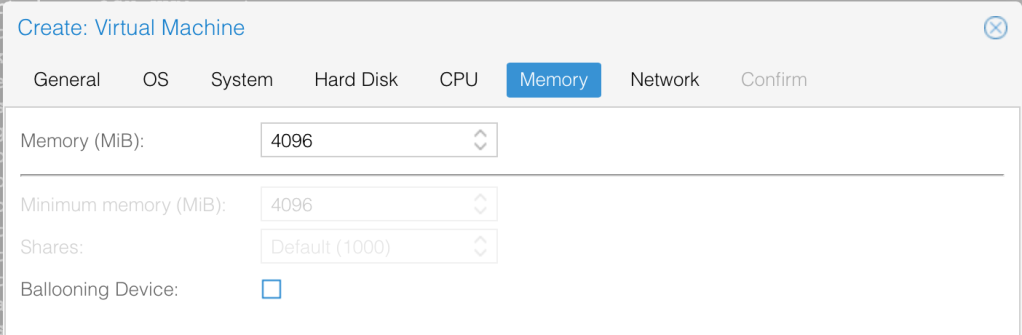
We will give it 4GB RAM and disable ballooning of the device.
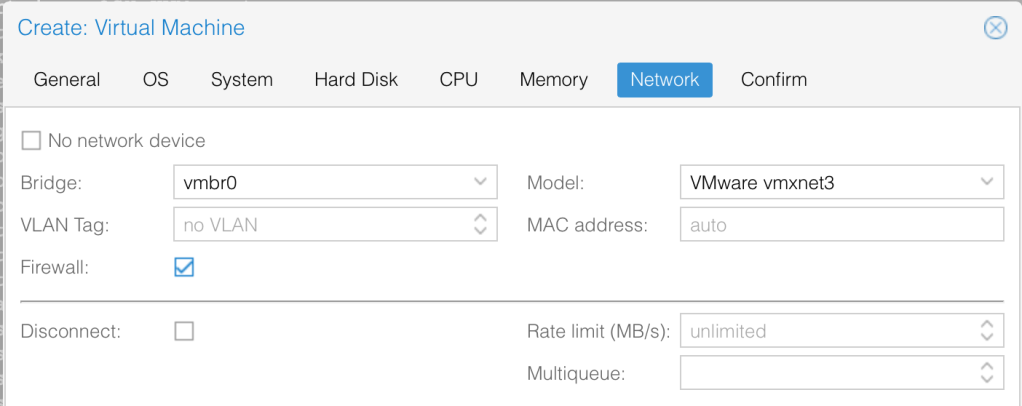
Finally, for networking, let’s use VMWare vmxnet3.
Once we are happy with the settings, we can click finish to deploy the VM. Next, let’s add a new DVD Drive at IDE0 and point it to the BigSur image.

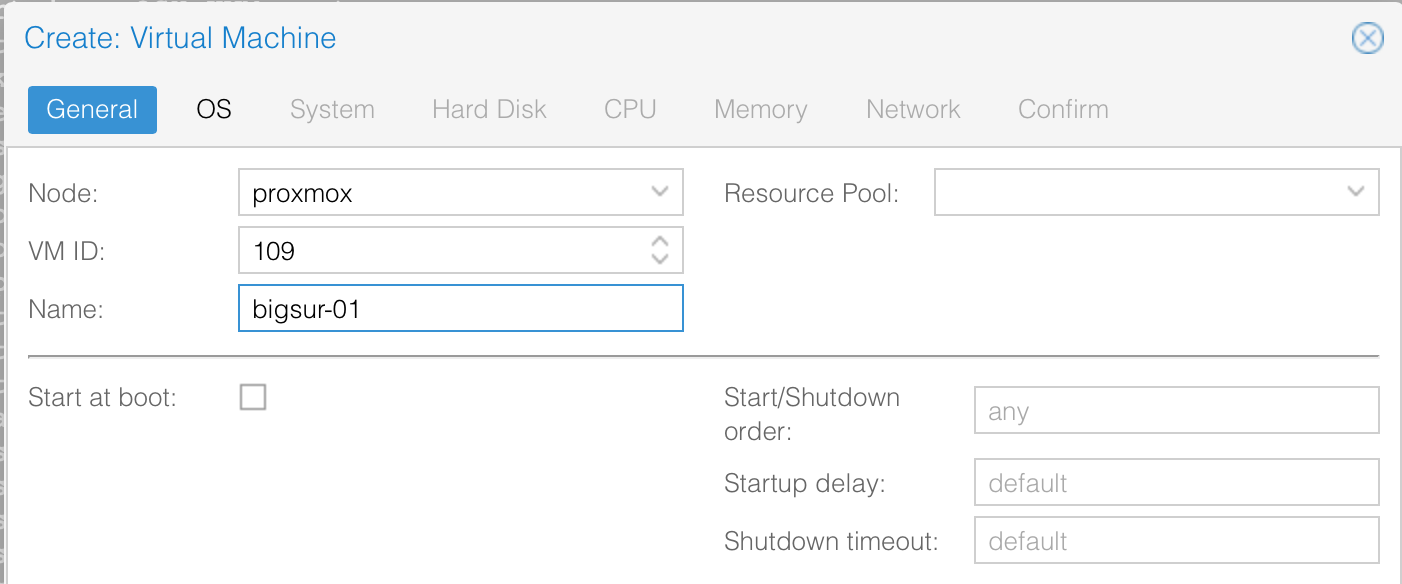
Before we can actually start the VM, we need to make a couple of edits to the config files via the proxmox shell. Take note of the VM ID. In our case, it’s 109. Let’s edit and add the below line to the configuration file. Since I’m using Ryzen, the CPU specifications here are for AMD. You can check the one to use for Intel here.
# vim /etc/pve/qemu-server/109.conf

args: -device isa-applesmc,osk="PUT YOUR OSK KEY HERE" -smbios type=2 -device usb-kbd,bus=ehci.0,port=2 -cpu Penryn,kvm=on,vendor=GenuineIntel,+kvm_pv_unhalt,+kvm_pv_eoi,+hypervisor,+invtsc,+pcid,+ssse3,+sse4.2,+popcnt,+avx,+avx2,+aes,+fma,+fma4,+bmi1,+bmi2,+xsave,+xsaveopt,check
So that proxmox sees the IDEs as hard drives, we will also modify the ISO files specifications as shown below.
# before
ide0: ssd:iso/BigSur-recovery.img,media=cdrom,size=2097012K
ide2: ssd:iso/OpenCore-v14.iso,media=cdrom

# after
ide0: ssd:iso/BigSur-recovery.img,cache=unsafe,size=2097012K
ide2: ssd:iso/OpenCore-v14.iso,cache=unsafe,size=150M
The saved results of the changes are shown below.
# cat /etc/pve/qemu-server/109.conf
agent: 1
balloon: 0
bios: ovmf
boot: order=virtio0;ide2;net0
cores: 4
cpu: Penryn
efidisk0: ssd:109/vm-109-disk-1.raw,size=128K
ide0: ssd:iso/BigSur-recovery.img,cache=unsafe,size=2097012K
ide2: ssd:iso/OpenCore-v14.iso,cache=unsafe,size=150M
machine: q35
memory: 4096
name: bigsur-01
net0: vmxnet3=6E:FF:60:93:22:B0,bridge=vmbr0,firewall=1
numa: 0
ostype: other
scsihw: virtio-scsi-pci
smbios1: uuid=4a51f833-8dd6-4764-b3d5-002f9b69d9b3
sockets: 1
vga: vmware
virtio0: ssd:109/vm-109-disk-0.raw,cache=unsafe,discard=on,size=64G
vmgenid: b71d887c-5092-4d47-989f-39b1264b1b1a
args: -device isa-applesmc,osk="PUT YOUR OSK KEY HERE" -smbios type=2 -device usb-kbd,bus=ehci.0,port=2 -cpu Penryn,kvm=on,vendor=GenuineIntel,+kvm_pv_unhalt,+kvm_pv_eoi,+hypervisor,+invtsc,+pcid,+ssse3,+sse4.2,+popcnt,+avx,+avx2,+aes,+fma,+fma4,+bmi1,+bmi2,+xsave,+xsaveopt,check
Lastly, we will put OpenCore image to boot first by modifying the boot order.
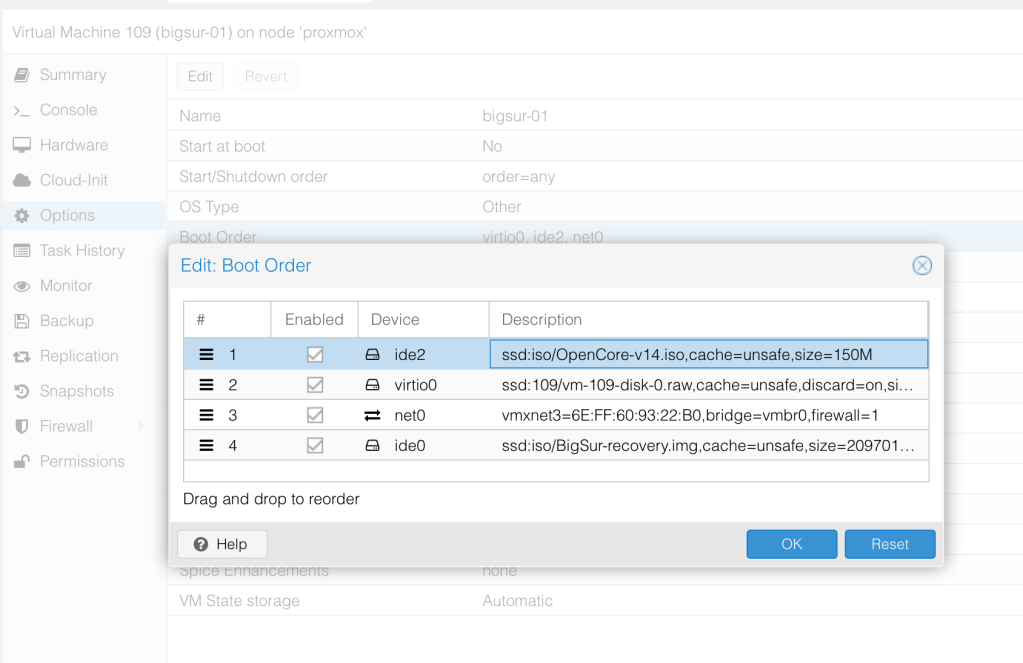
Our final hardware settings are as shown.
To avoid a boot loop during macOS boot, we will enter the following command on the proxmox server. The second command makes the change persist across during Proxmox boots.
# echo 1 > /sys/module/kvm/parameters/ignore_msrs
# echo "options kvm ignore_msrs=Y" >> /etc/modprobe.d/kvm.conf && update-initramfs -k all -u
Installing macOS BigSur
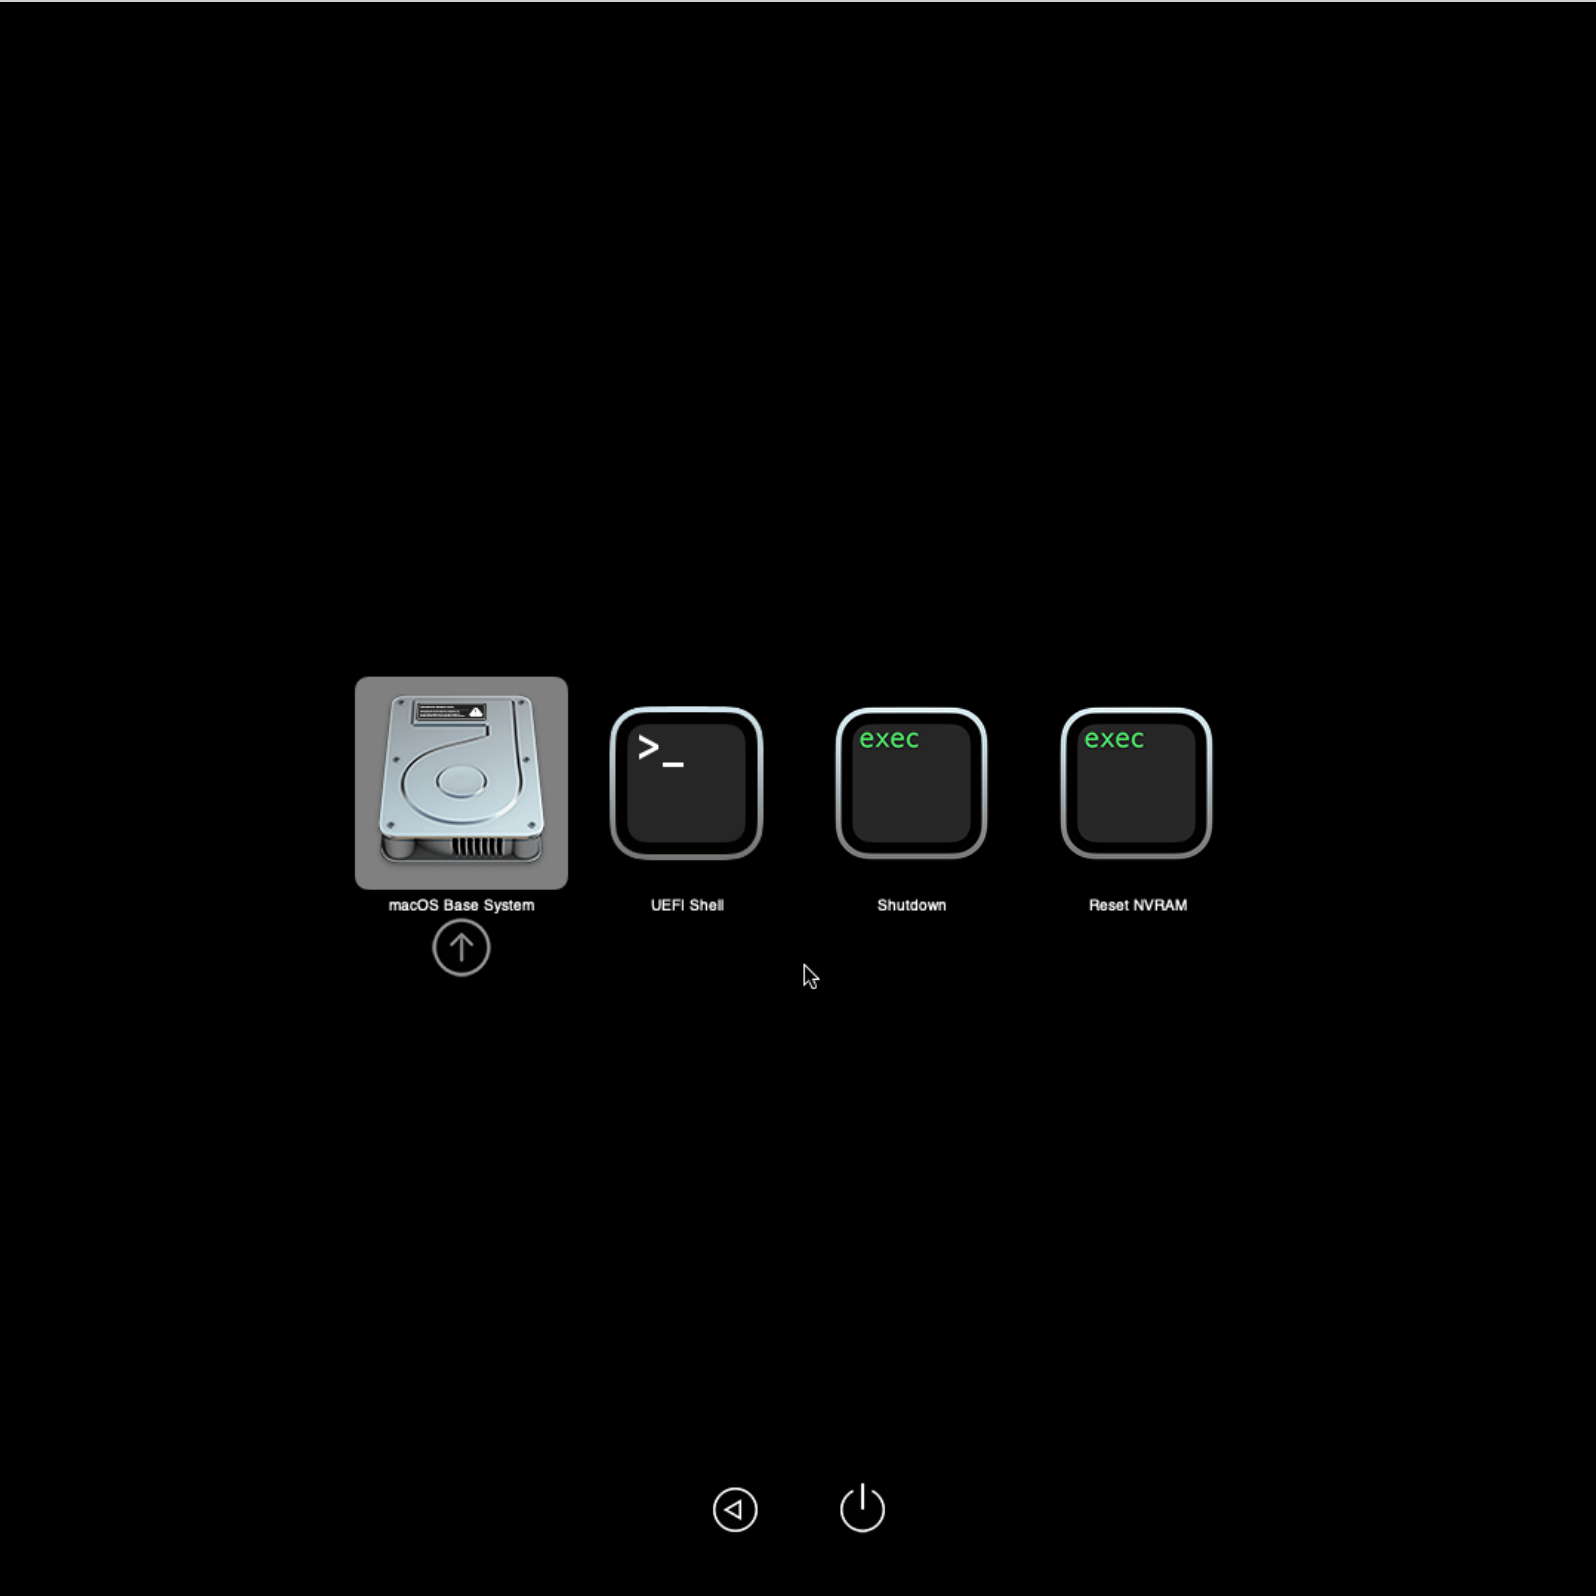
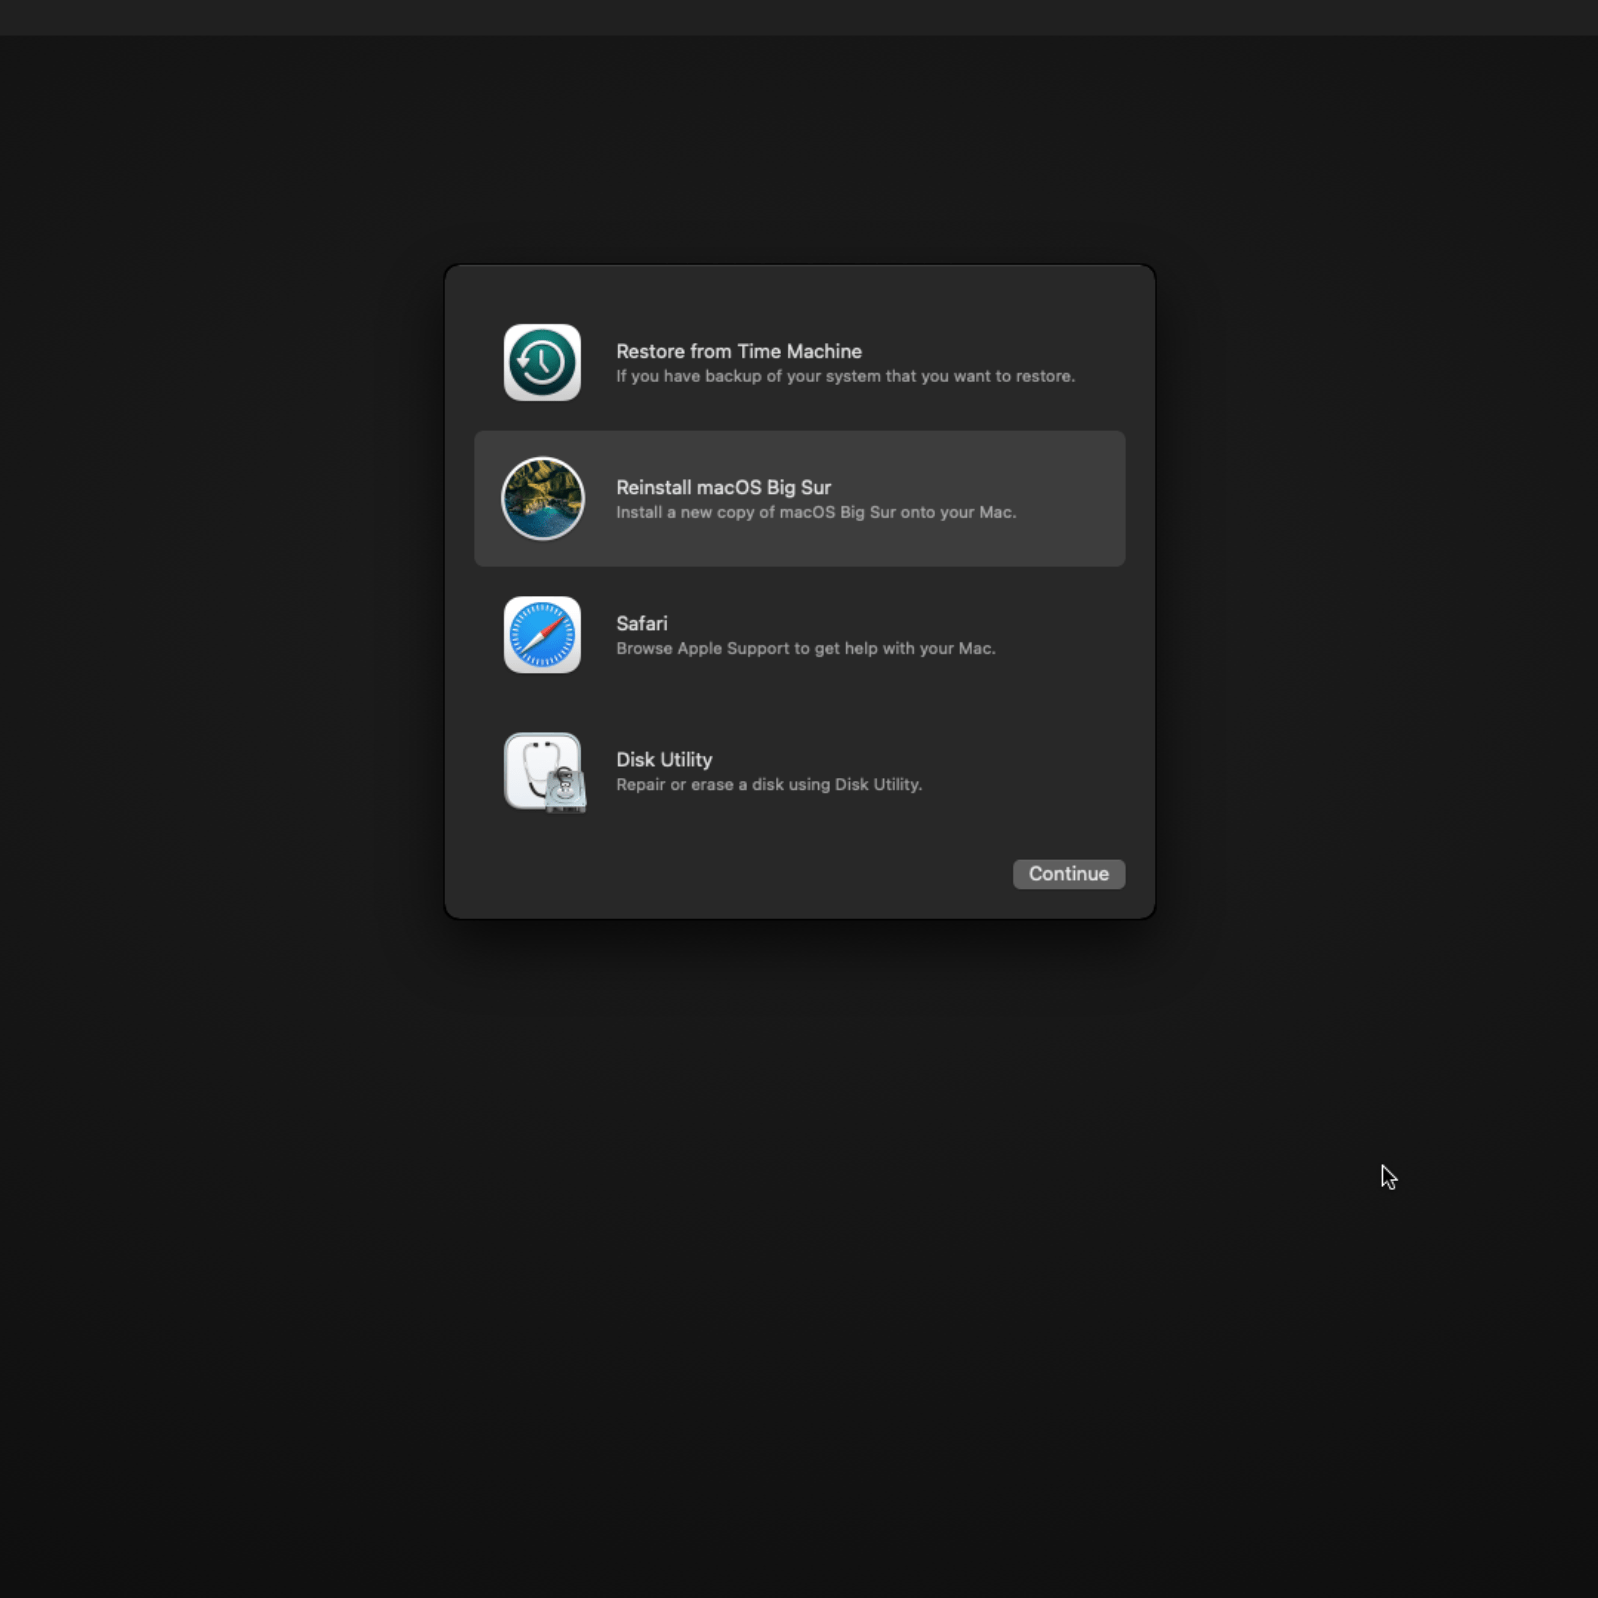
We can now start the VM to Install BigSur. When we start the VM, we are presented with the following screen. Select the macOS Base System. The first thing we need to do is format the disk, so let’s select the Disk Utility.
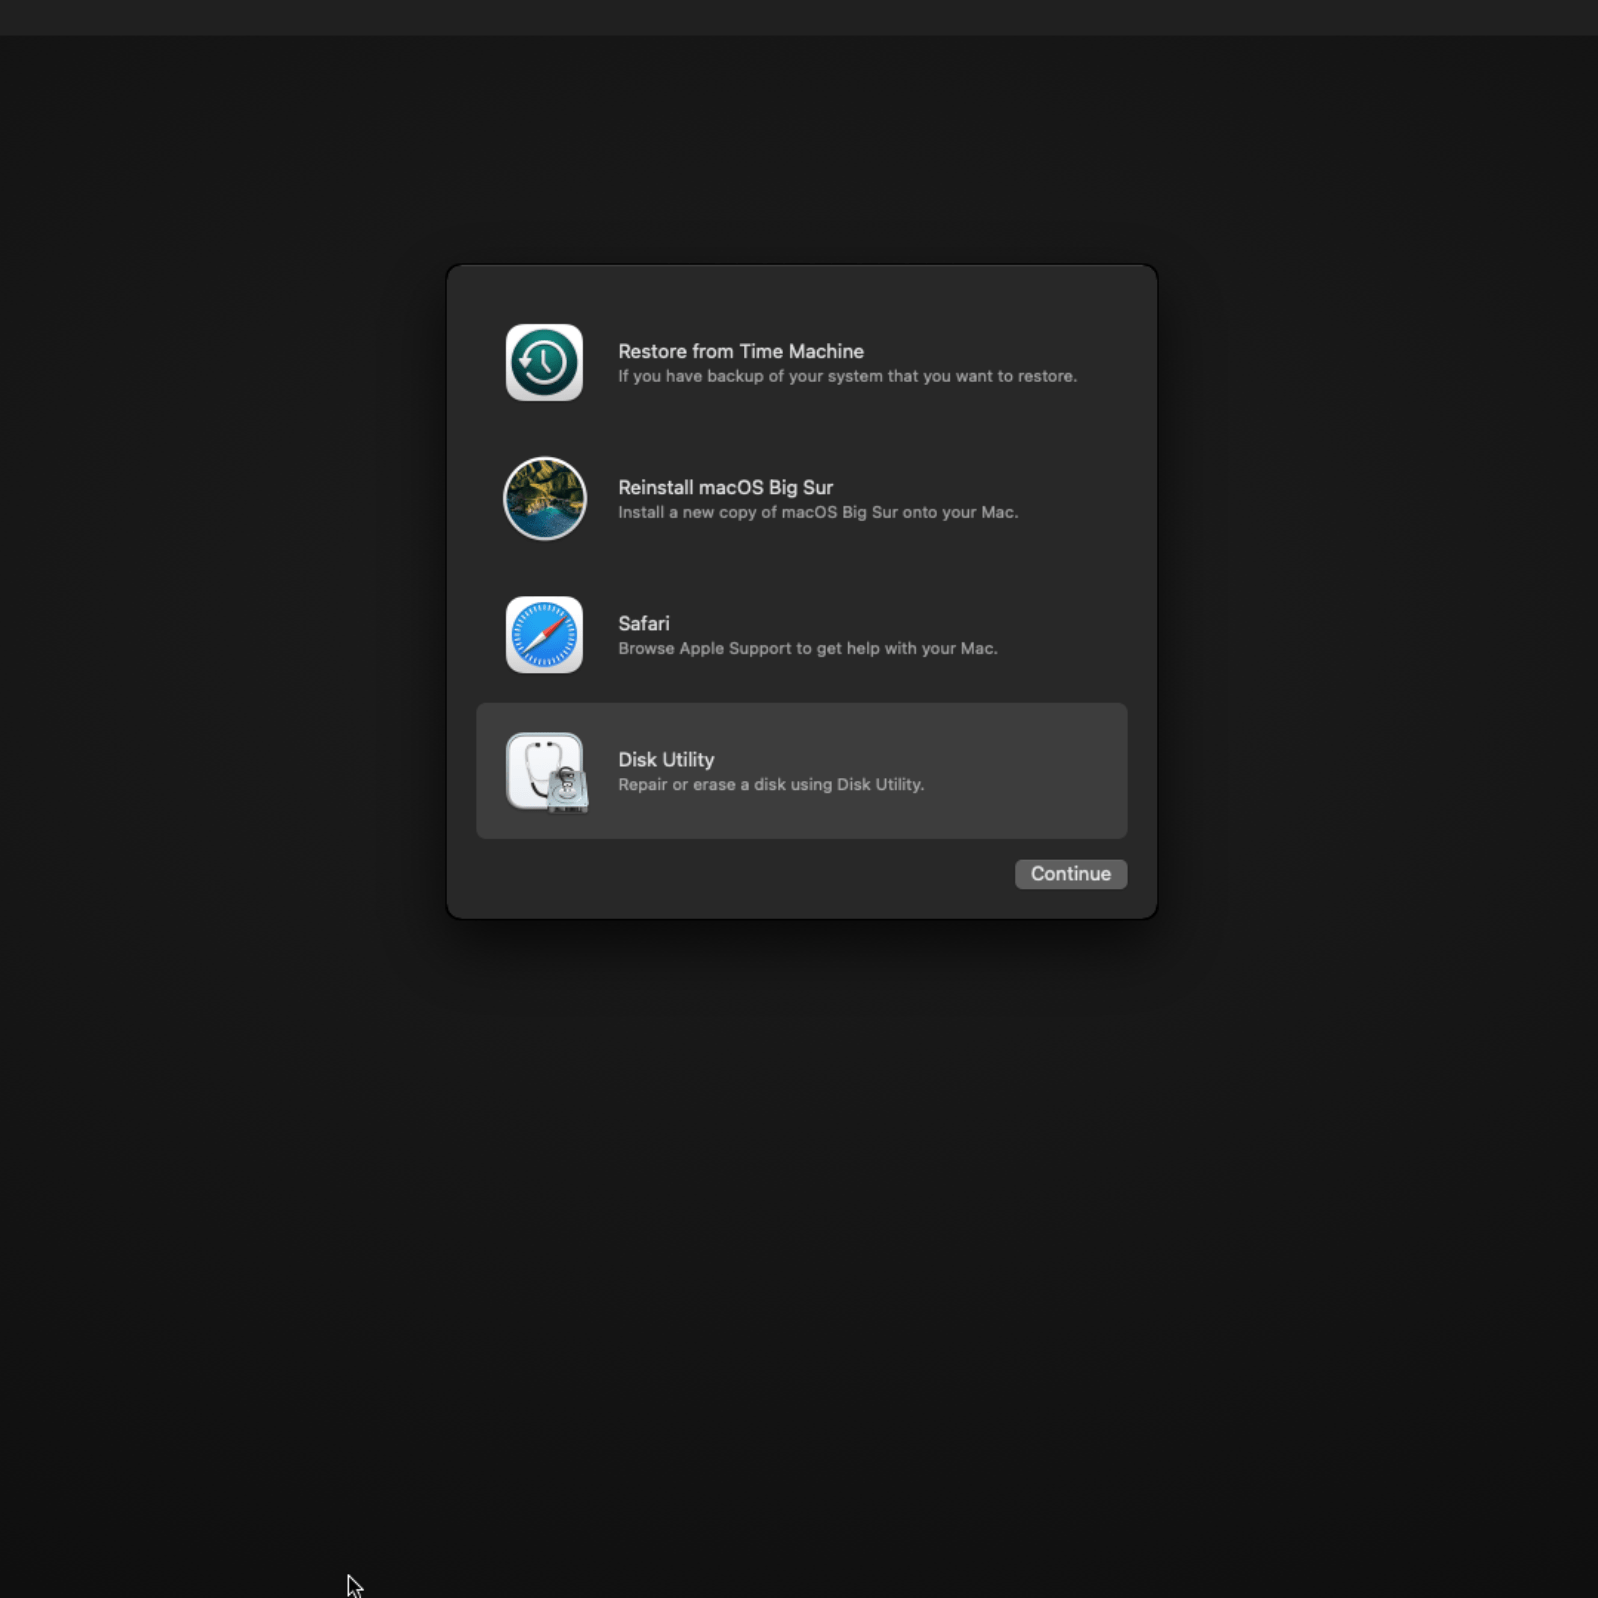
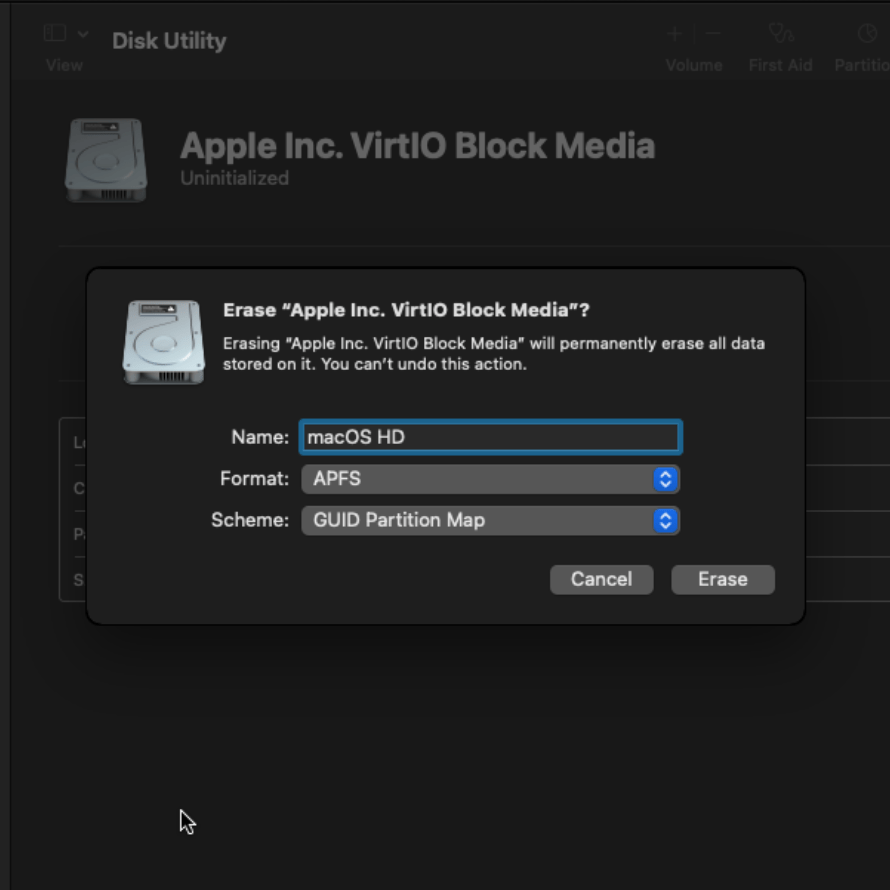
We select the VirtIO media that we attached, select erase, Specify the name of the chosen name of the media and leave the default format of APFS. Click erase.

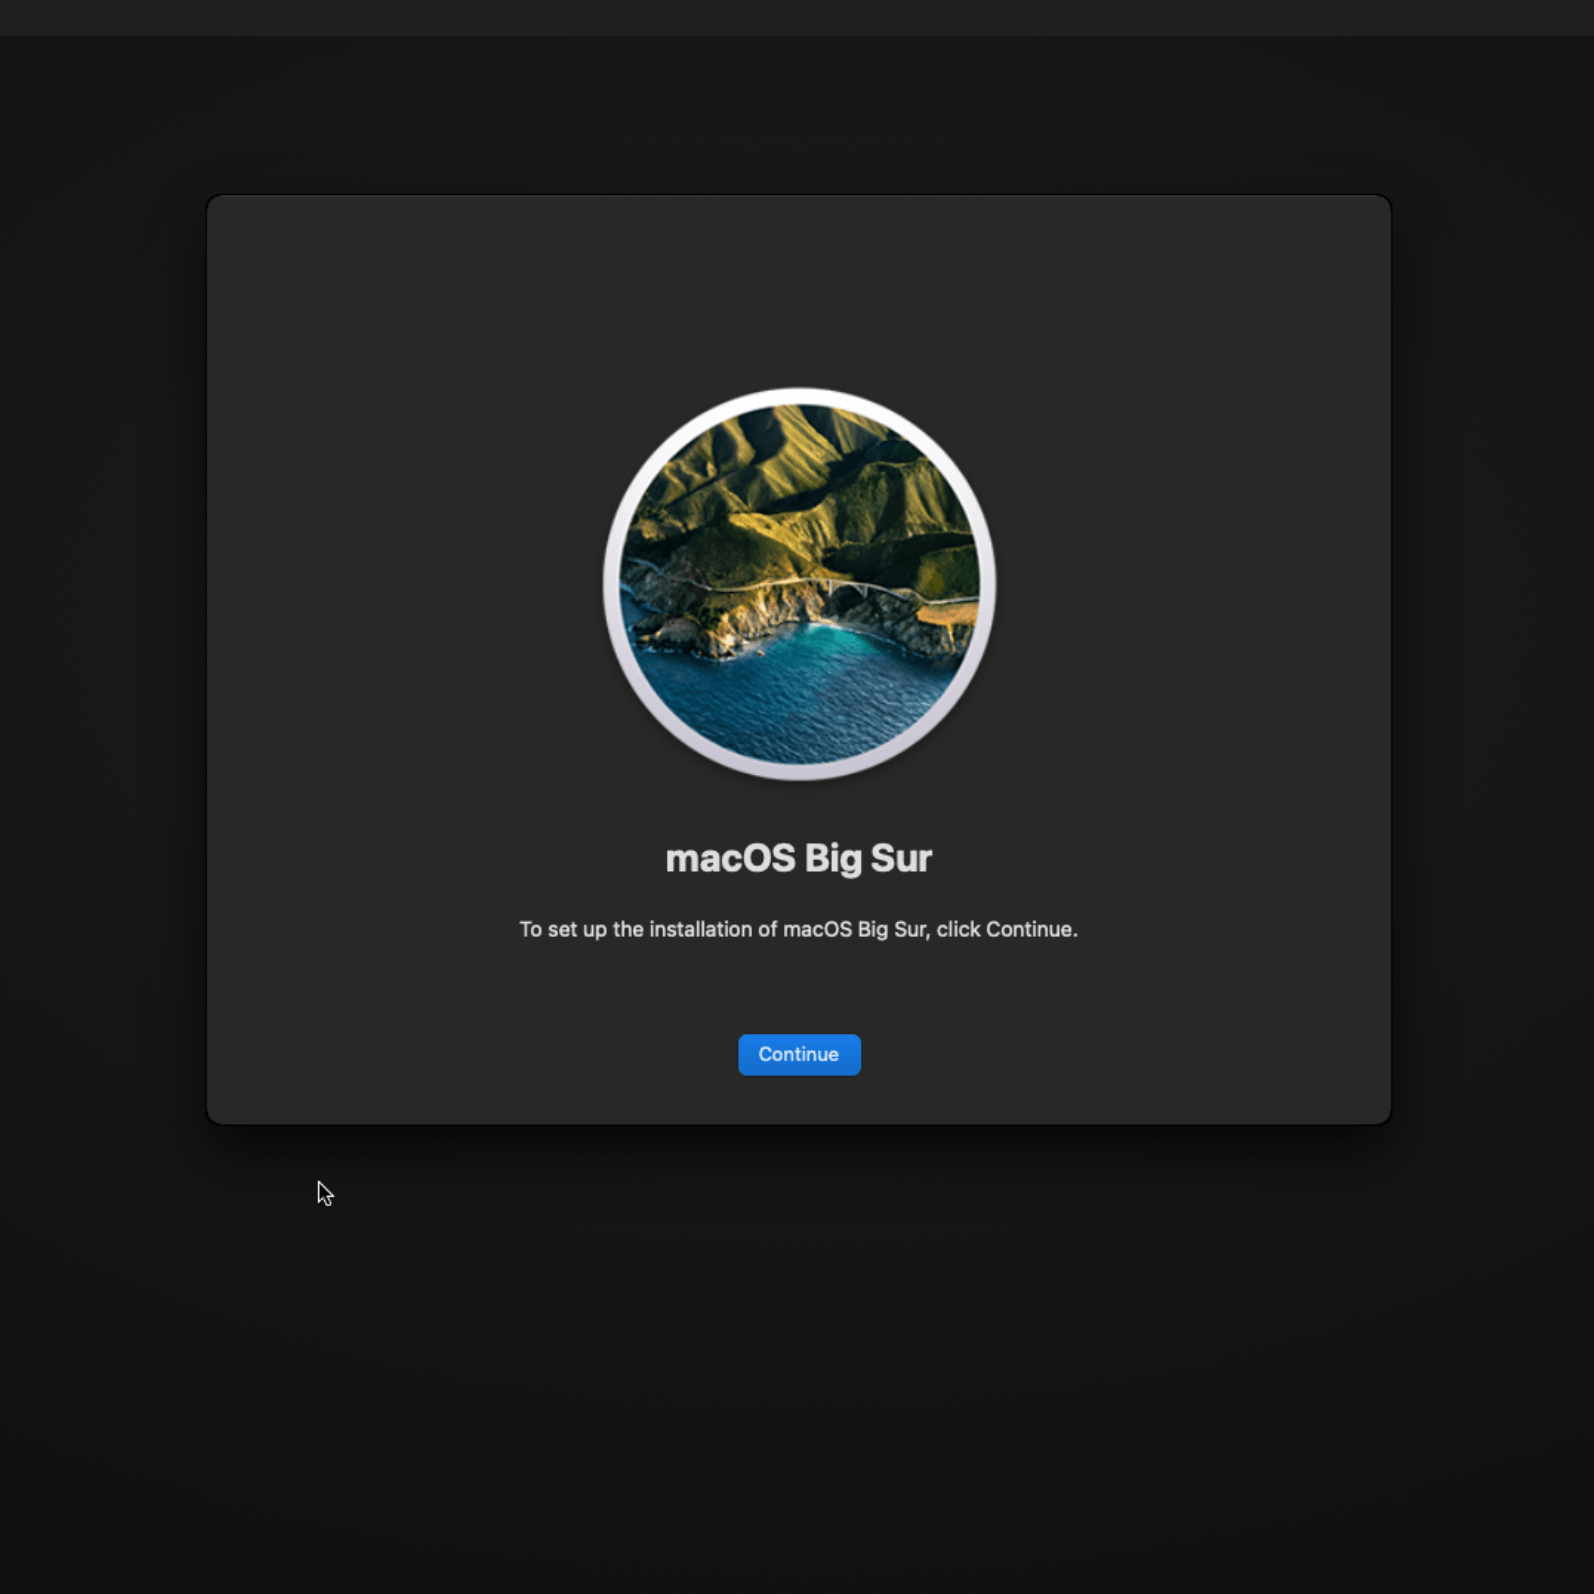
Once formatting is done, we can go back to the original screen and click to ReInstall macOS BigSur.
Wow! Looks like its’ going to take forever to install this – almost 2 hours from the screenshot.

The VM rebooted and I had to select the macOS installer manually for the installation to continue.


Yet another reboot. Let’s choose the installer again. My keyboard was stuck a couple of times. Exiting the console and re-entering it solved the issue.


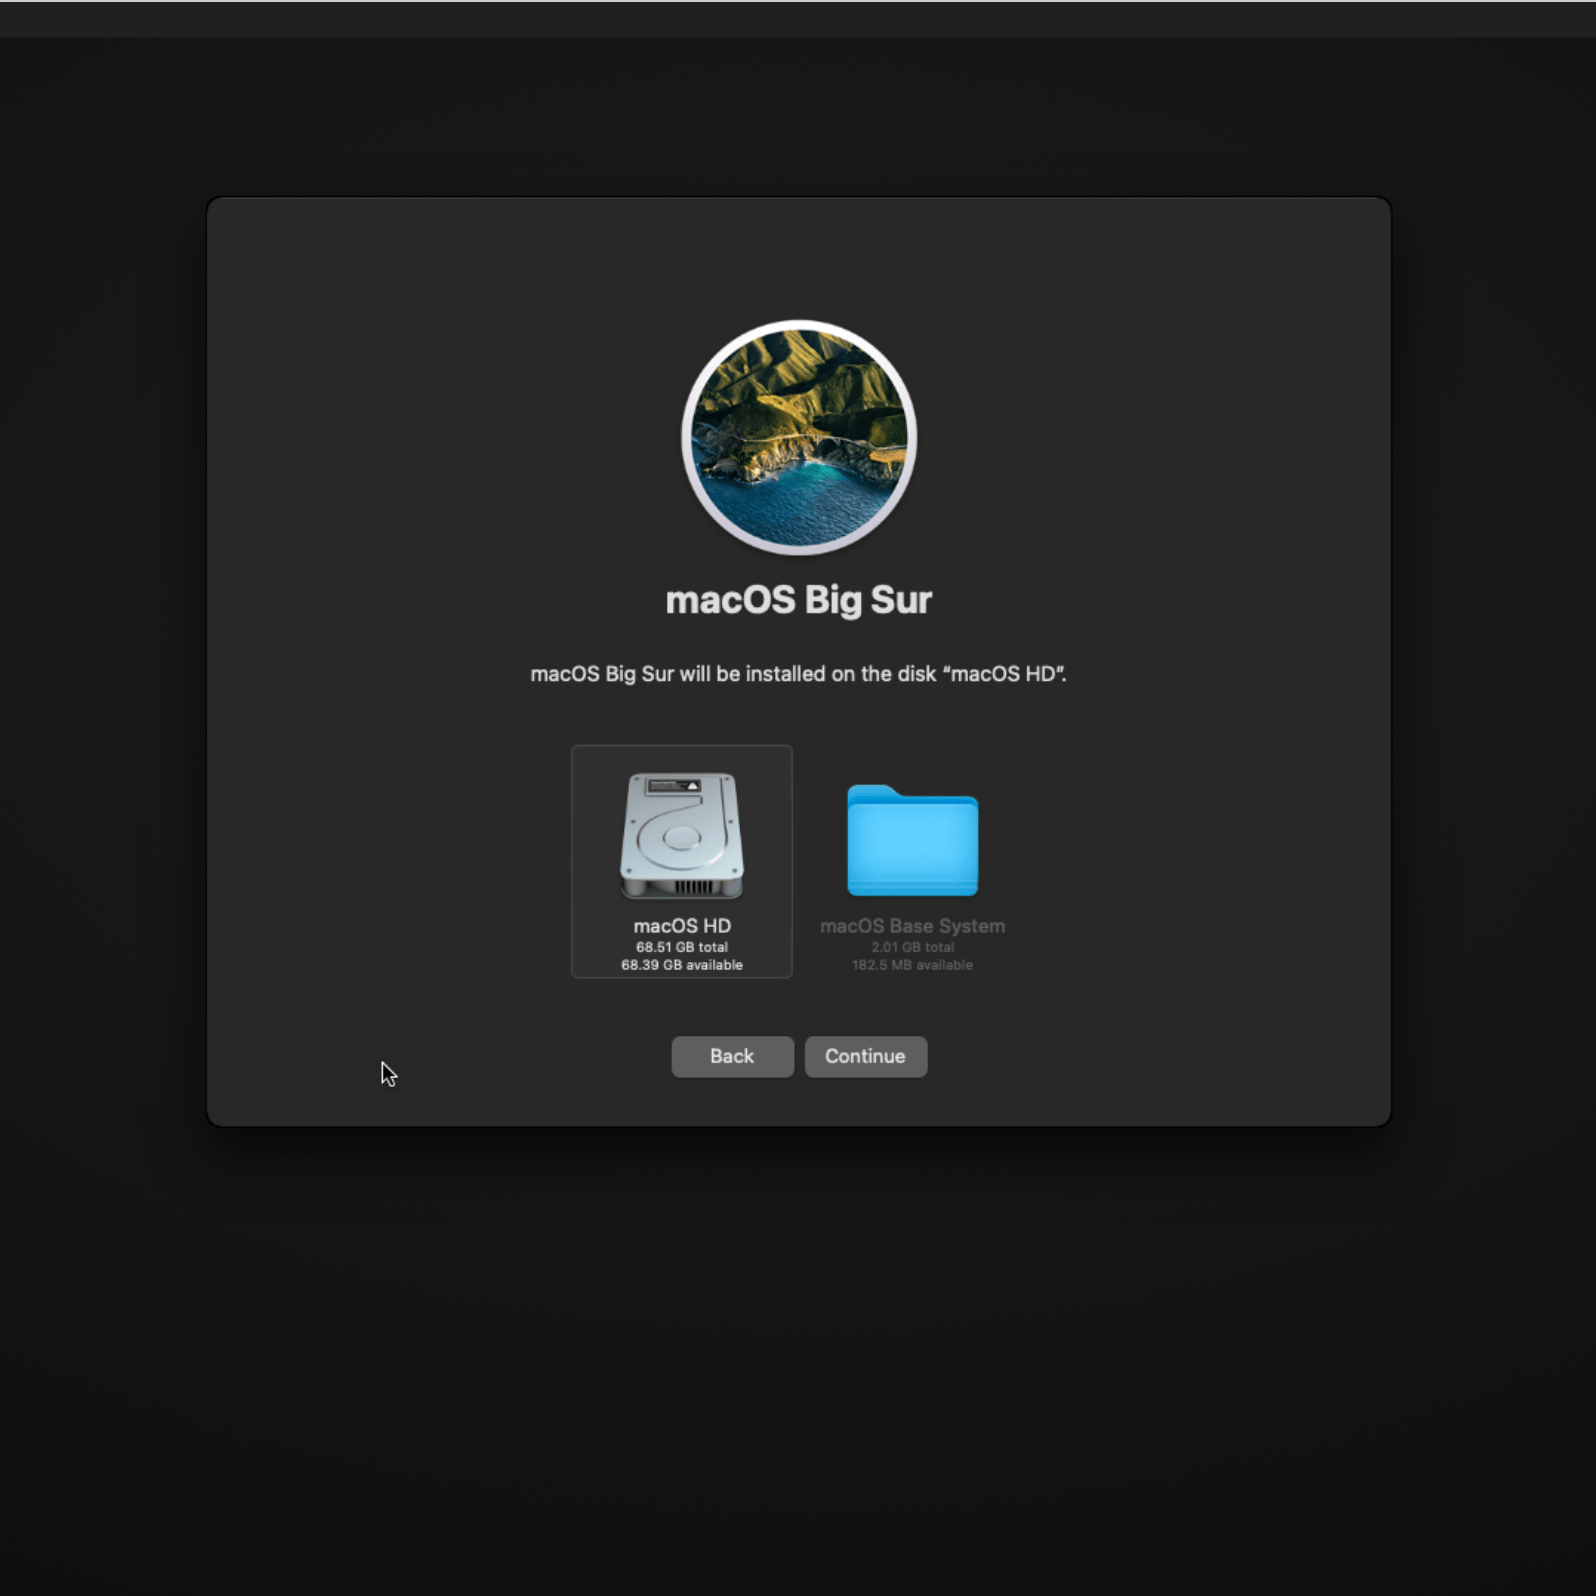
Finally, we see the name has changed to macOS HD. This was the name we assigned to the drive and indicates that the installation is now complete. Let’s select it and go. I had to do it twice in my case.


The initial setup of the system is pretty straight forward. I skipped entering my appleID and created the user for the machine and wow! It’s up!
Configure Booting without OpenCore ISO
To make our changes permanent and remove the OpenCore ISO, we will need to install that to the hard drive. Let’s run the diskutil list command to see the hard drives we have.
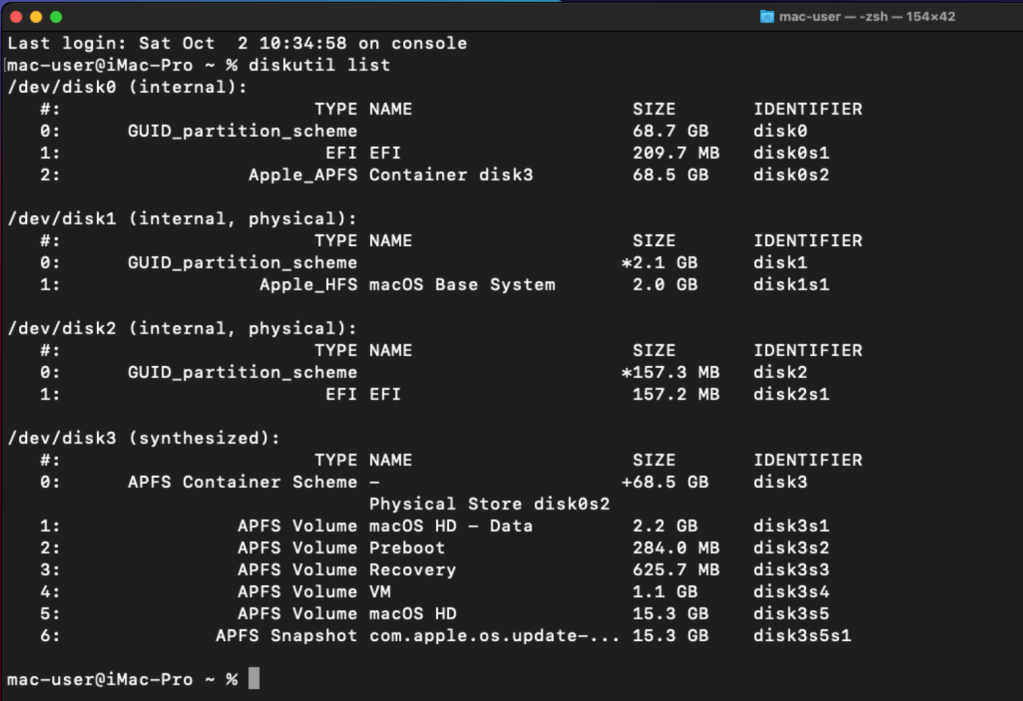
From our output, the OpenCore partition is disk2s1 and our main disk is the one with Apple_APFS. We therefore need to copy the OpenCore EFI from disk2s1 to the EFI partition on our main drive disk0s1.
$ sudo dd if=/dev/disk2s1 of=/dev/disk0s1
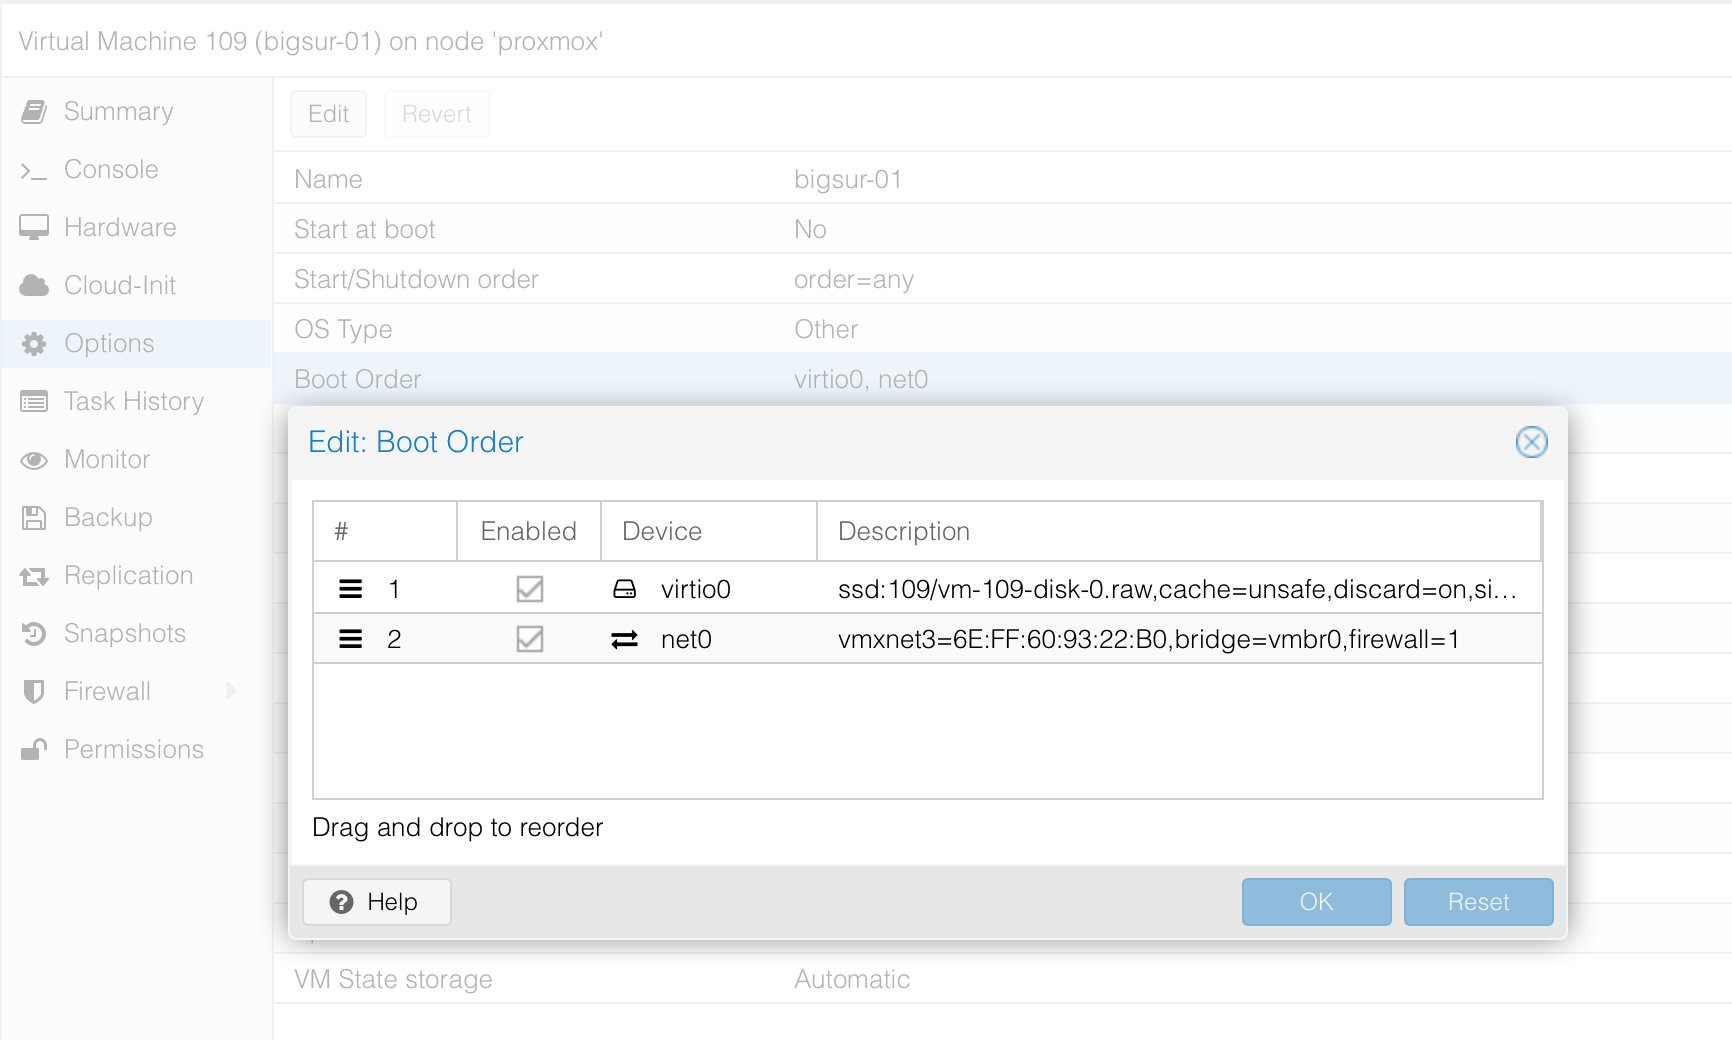
We can now shutdown the VM. Let’s detach the BigSur and OpenCore hard drives from the list and ensure that VirtIO disk is the first to boot.

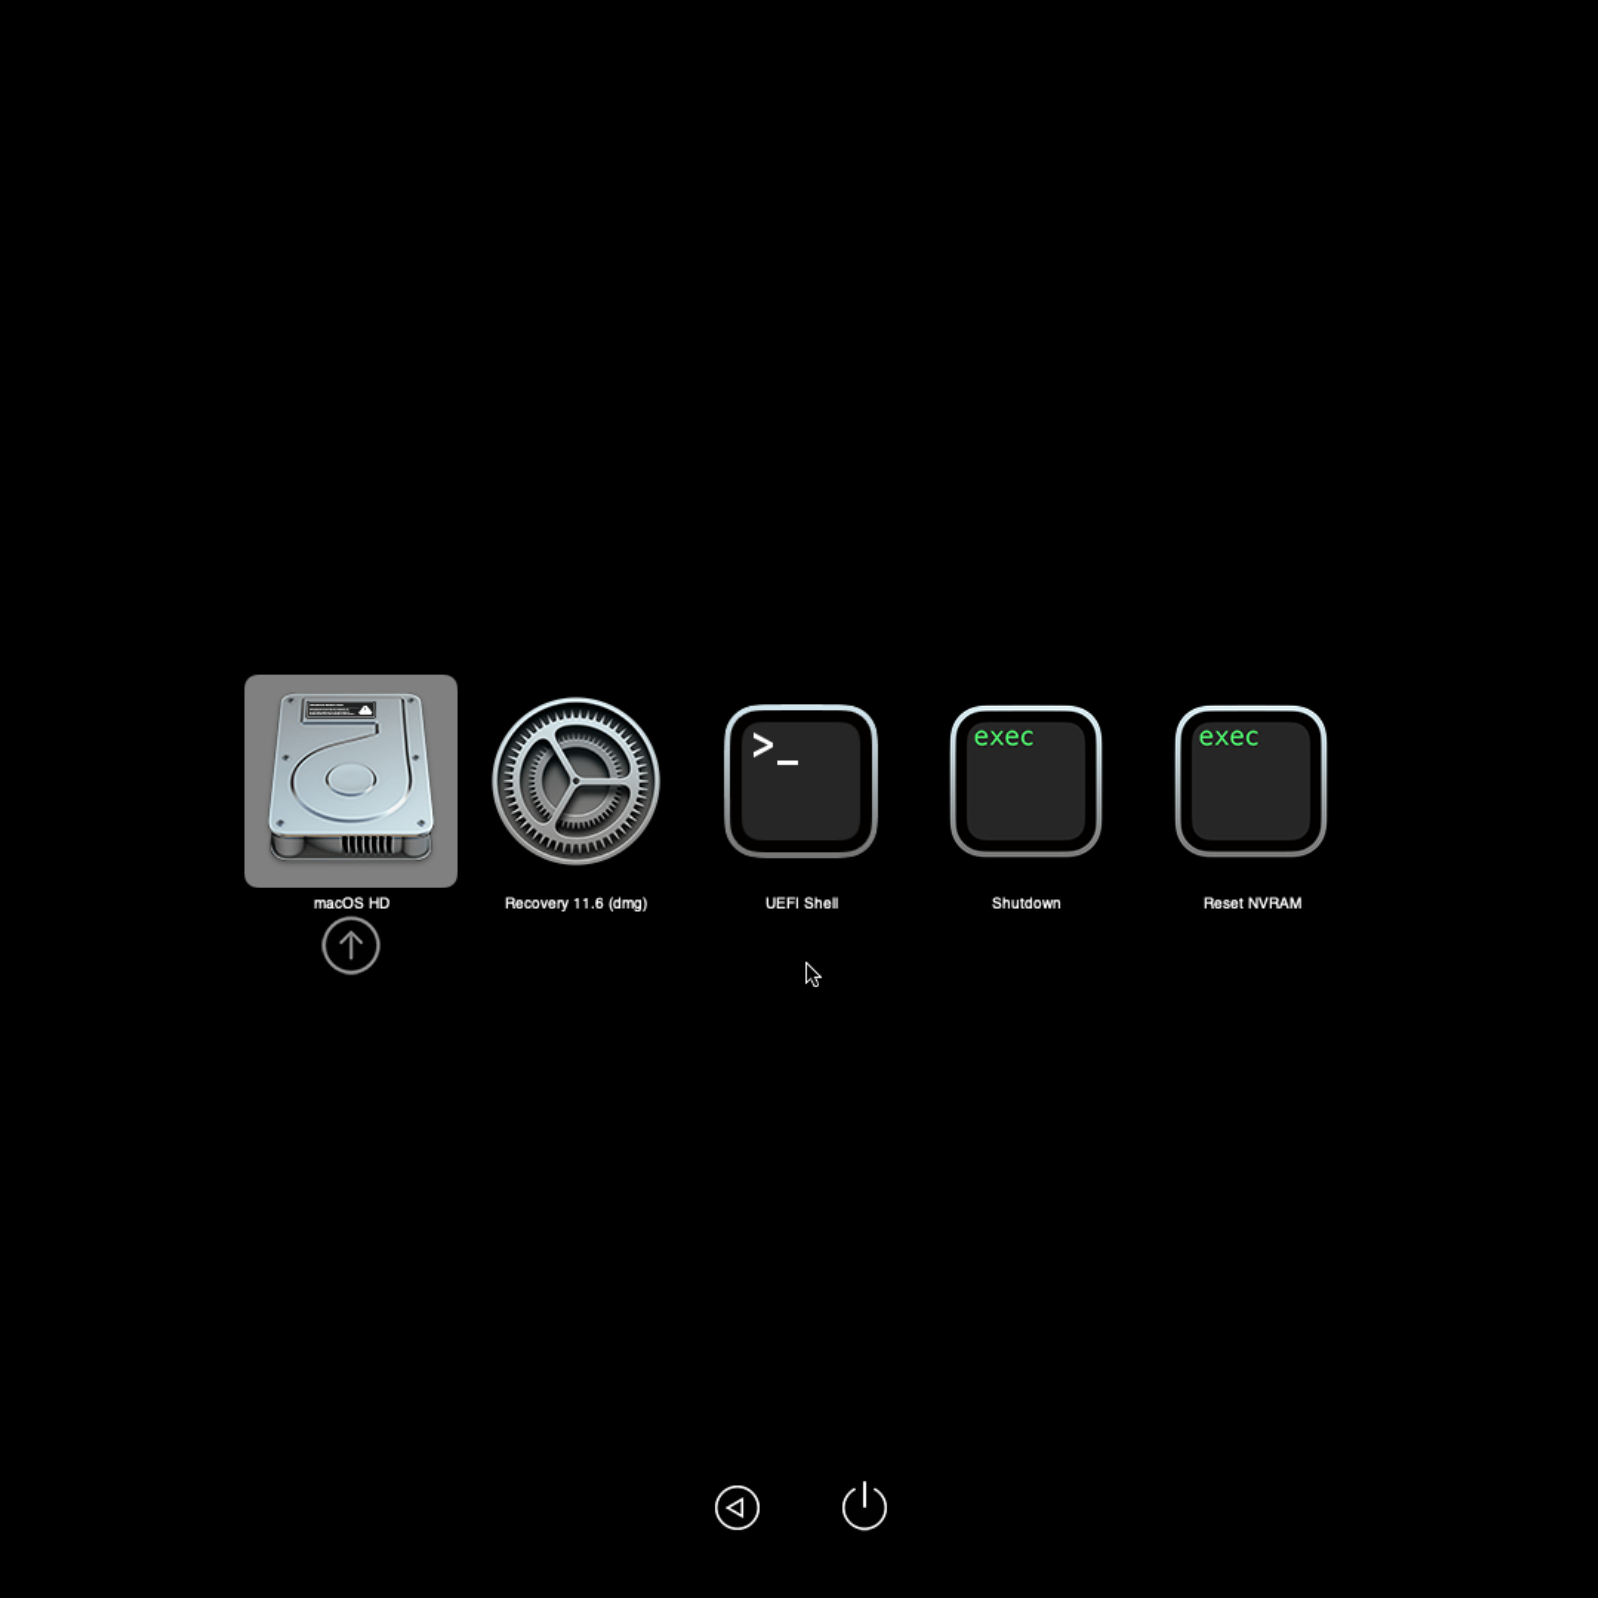
We can now boot up the VM and cross our fingers. Select out macOS HD image and Whoop!

MacOS Final Touches
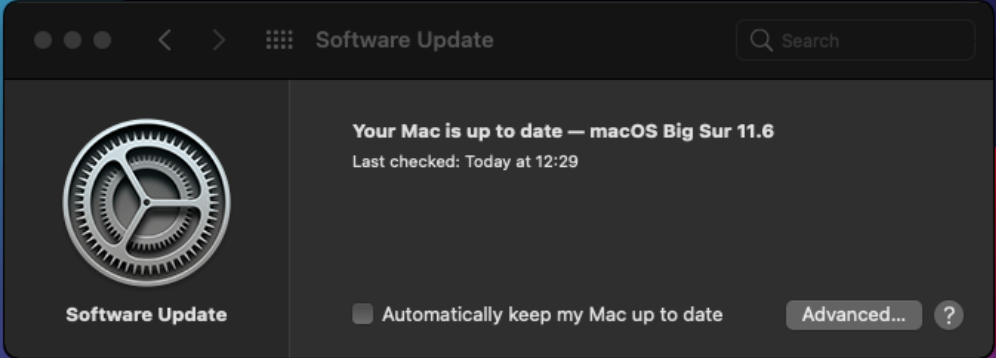
I always start with a system update to ensure that everything is up to date. You can do that under System Preferences > Software Update.
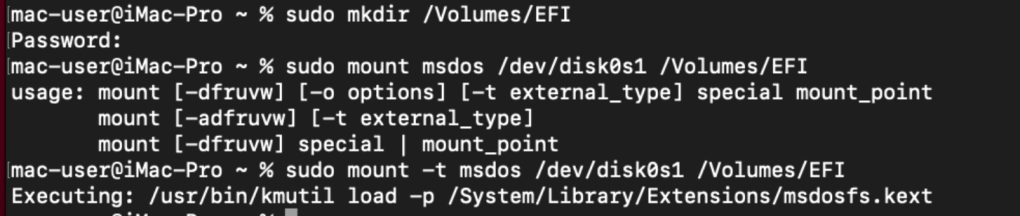
Next, I would like to have the system boot without me selecting the hard drive. We can set that up by editing the EFI settings. For that, we will need to mount that disk first.

To mount it, we need to first create a directory where we can do that.
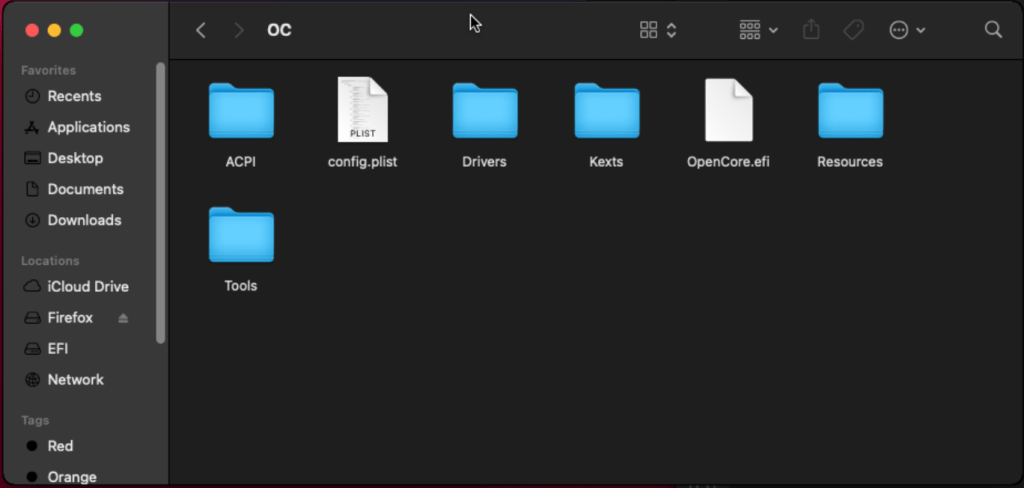
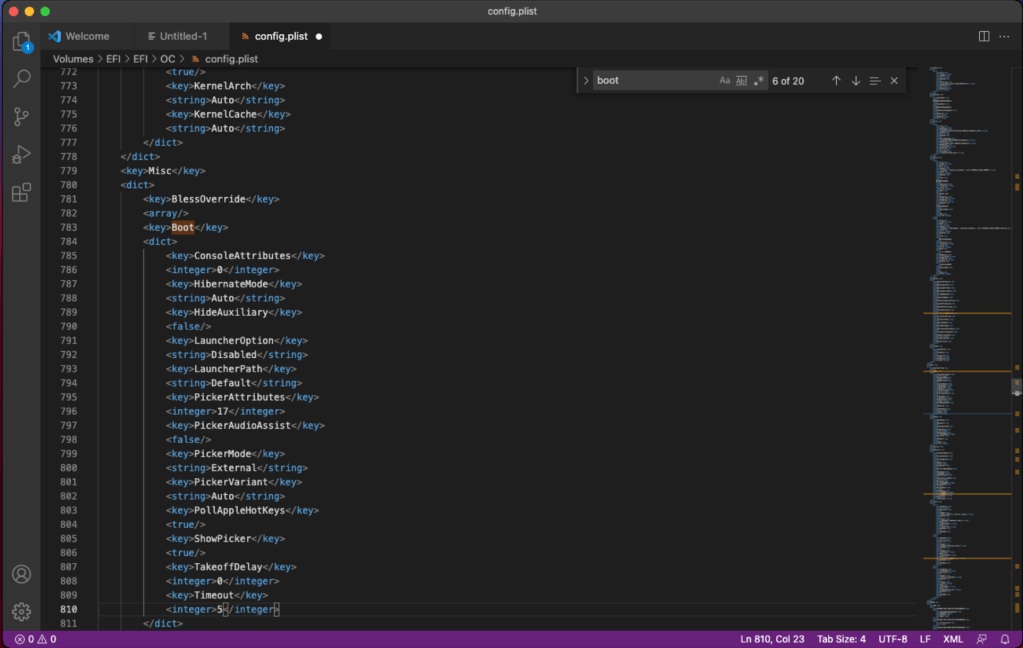
We can now see the config.plist file. We will use vscode to edit it.
We will set the Timeout value to something other than 0 under Misc > Timeout > Value. This way, the system will boot automatically without having to select the hard drive to boot on. Save the file. We can test this by rebooting the system.
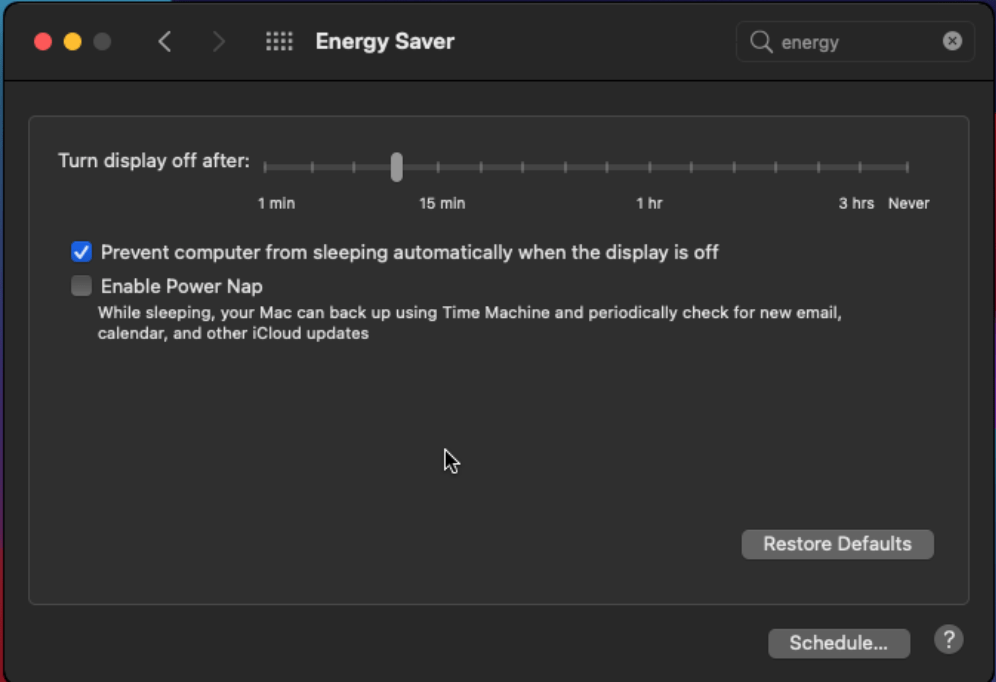
Disable the sleep feature under System Preferences > Energy Saver.
Enable screen sharing so that we can remotely connect to the system via VNC or other. This can be done under System Preferences > Sharing.

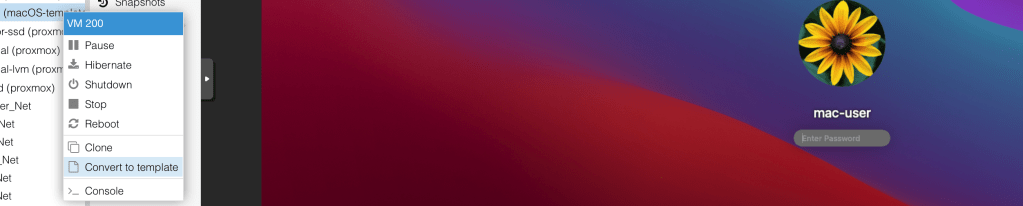
Finally, we will shutdown the VM and convert it to a template so that we can easily create another system and not go through the whole installation process over again.
You can now create a VM from the template and wallah! We are all set.
Deploying SIFT Workstation combined with Remnux
We will reference Lenny Zeltzer’s post here to create a combined system with Remnux and SIFT. Since the purpose of the lab is DFIR focused, we will start with SIFT Workstation and the add REMnux to it as he advised.
Let’s start by downloading the SIFT .ova file from the SANS website. It’s always good to validate the checksum matches that from the original site.
$ shasum -a 256 SIFT-Workstation.ova
27fac07e95498db5eaaa2c6c0b85ef9ca96090fb0964e552a7792a441ebe4d74  SIFT-Workstation.ova
Preparing a VM for Remnux + SIFT
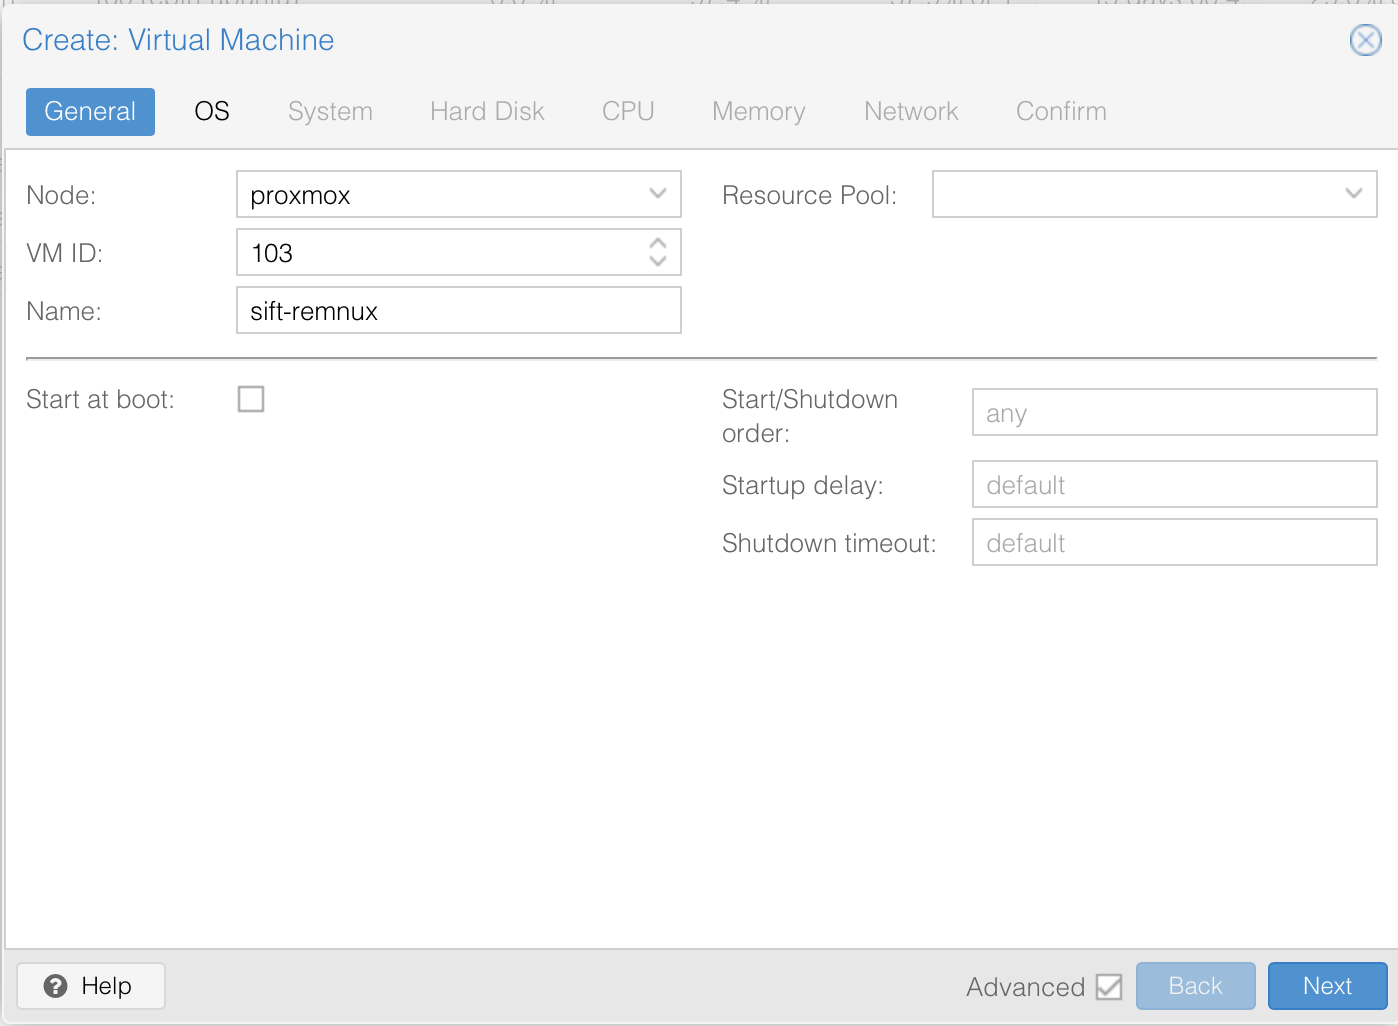
We will follow the steps in this article here to import the OVA into Proxmox. For that, we need to first create a VM for the Installation. We need not specify a disk.

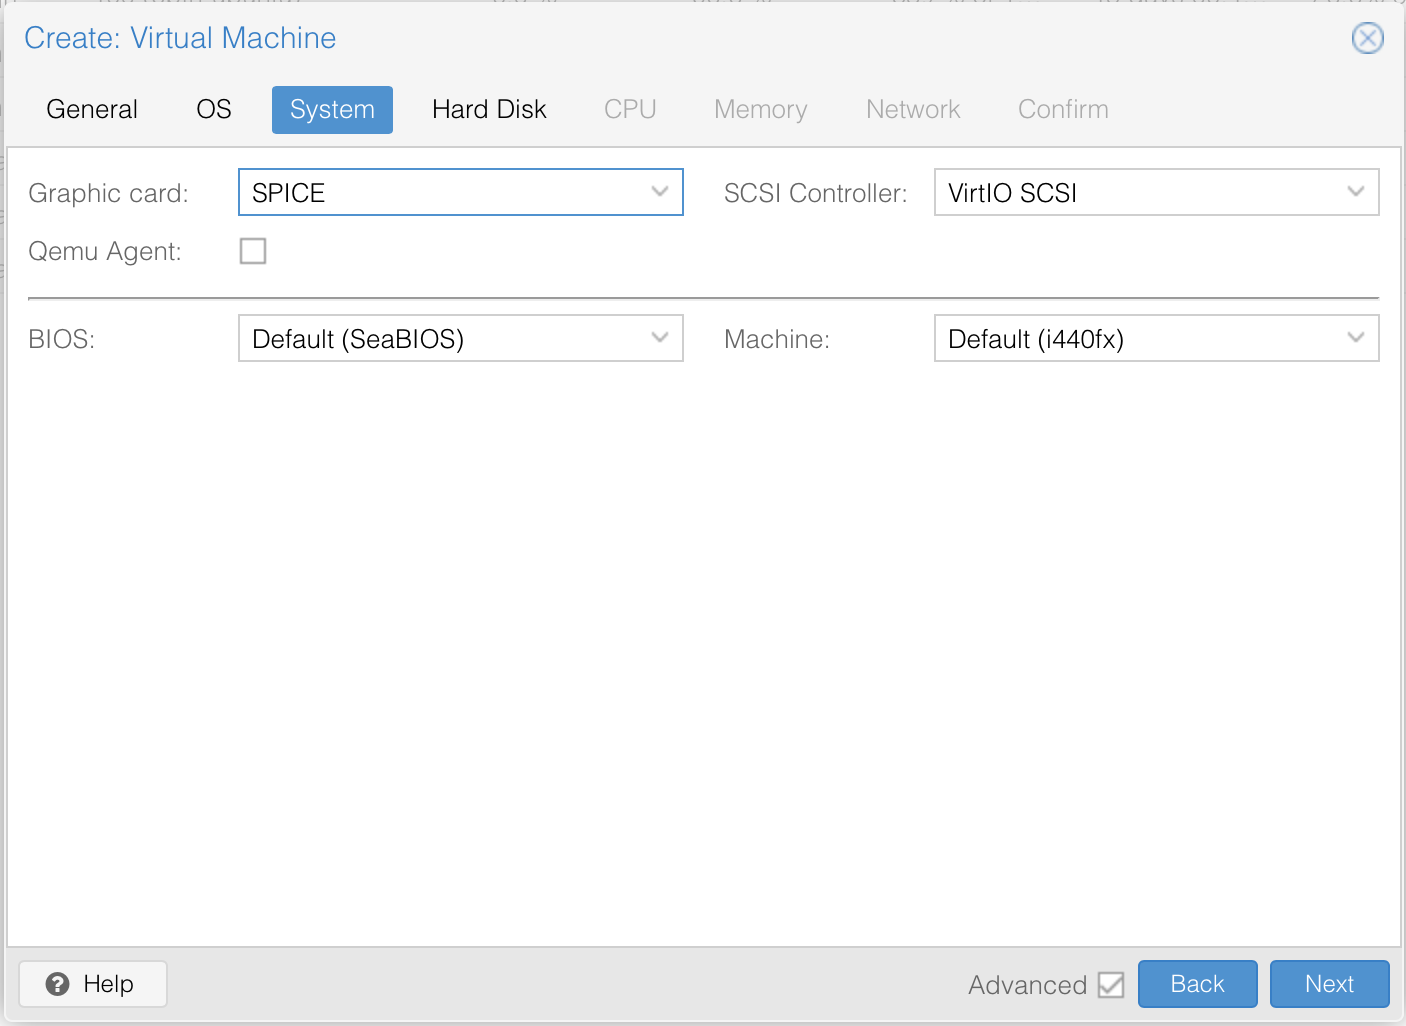
Change the graphics card to SPICE. Harddisk settings are not important because we will delete them anyway.
We will set this to 2 cores and change the type to host. We will give it 2GB RAM. [Edit: I actually ended up updating this to 4GB RAM based on this article to match the default Remnux VM. The reason for this is that I am going to use this as a server]. 2GB would definitely be more than enough but I don’t want to have to update unnecessarily.


We will drop this onto the LAN network for now to ensure that we have internet access. Happy with the setting. Click finish to install.
Change settings for videostreaming to ALL as advised here.

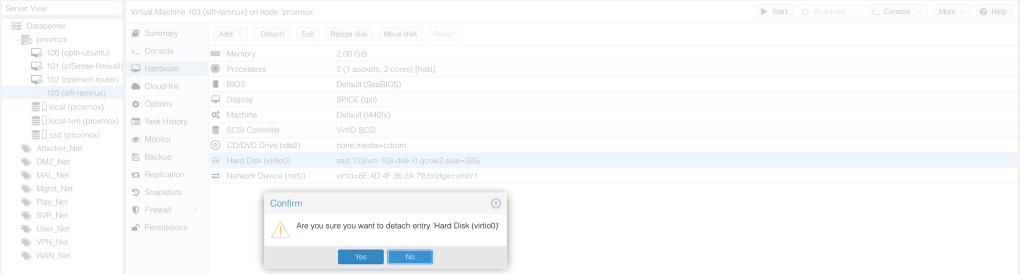
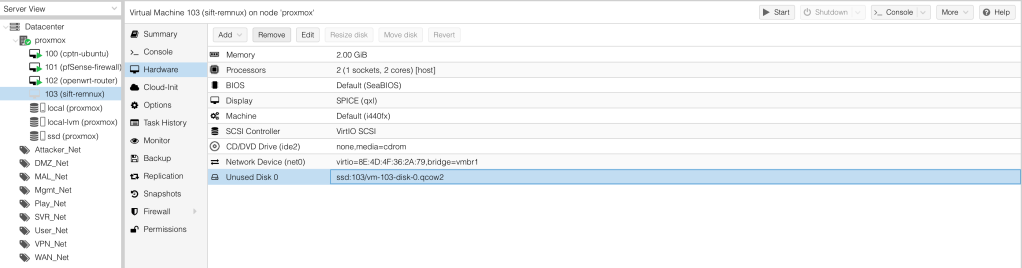
Let’s now delete the disk that we created with the VM by first detaching the Harddisk.
Then remove the unused disk. We are now ready to import the OVA into this VM.
Importing OVA to the VM
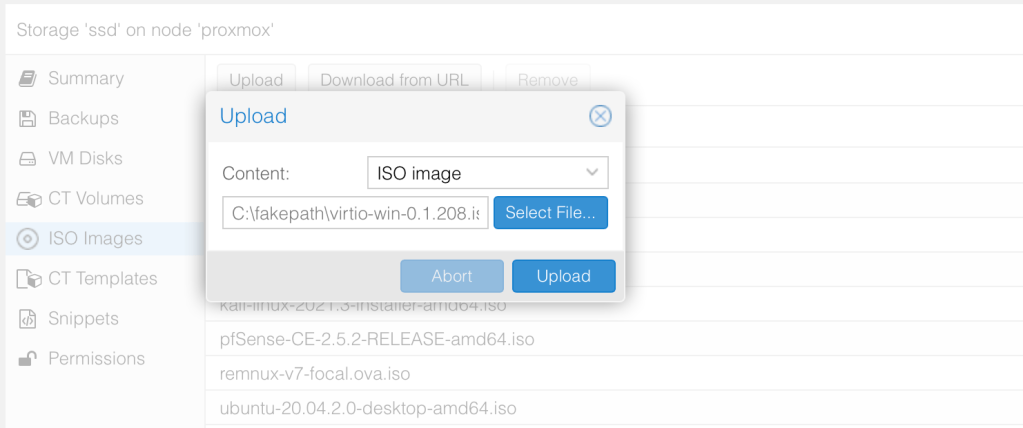
The first step is to get the OVA to Proxmox. We can use some secure transfer like SCP or just upload via the GUI. A slight catch is that Proxmox GUI only accepts .iso files. In order to upload the file via GUI, we need to rename it to have the .iso extension in the end of the file.
$ mv SIFT-Workstation.ova SIFT-Workstation.ova.iso
$ ls | grep SIFT-Workstation.ova.iso
SIFT-Workstation.ova.iso
We can now try and upload the file.

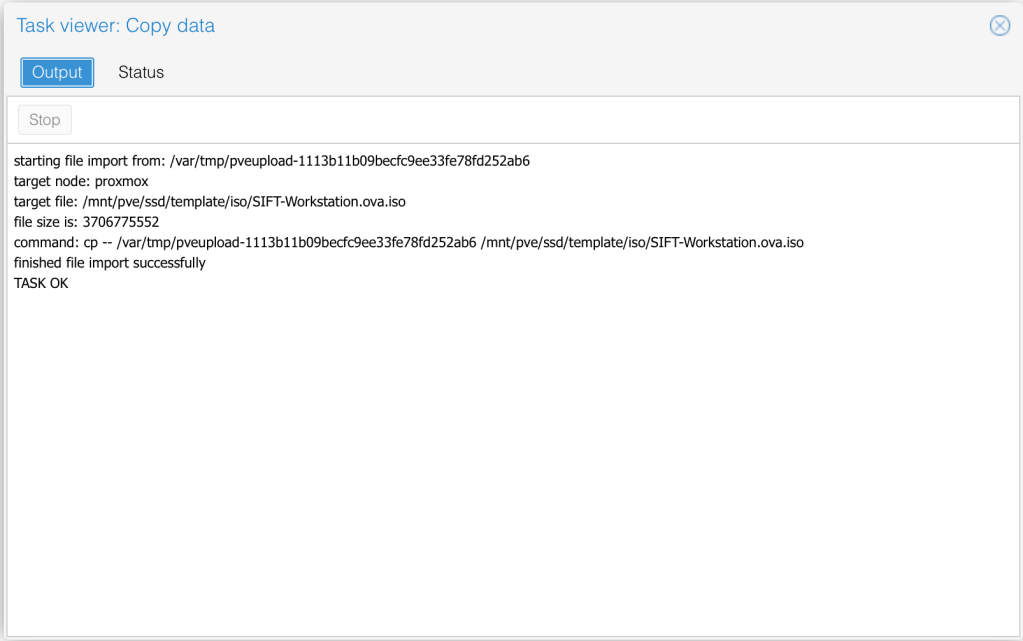
If we check the task viewer, we see exactly where the file has been uploaded.
If you are not sure of the upload path, you can also use the find command to locate the file then navigate to that path.
proxmox:/# find ./ -iname SIFT*
./mnt/pve/ssd/template/iso/SIFT-Workstation.ova.iso
proxmox:/# cd /mnt/pve/ssd/template/iso/
proxmox:/mnt/pve/ssd/template/iso# ls
SIFT-Workstation.ova.iso
Apparently, an OVA is simply a .zip file so we can unzip it to locate the .ovf file and the .vmdk which refer to the VM definition and disk respectively. The file that is useful for us is the disk itself.
# tar -xf SIFT-Workstation.ova.iso
# ls
sift-vmware-iso-full.mf   SIFT-Workstation.ova.iso
sift-vmware-iso-full-disk1.vmdk     sift-vmware-iso-full.ovf
The .ovf file has the disk definition that we can confirm using the following command.
# cat sift-vmware-iso-full.ovf | grep -e "Memory RAMSize" -e "CPU count" -e "Netw" -e "Disk"
<DiskSection>
<Disk ovf:capacity="500000" ovf:capacityAllocationUnits="byte * 2^20" ovf:diskId="vmdisk1" ovf:fileRef="file1" ovf:format="http://www.vmware.com/interfaces/specifications/vmdk.html#streamOptimized" ovf:populatedSize="10490347520"/>
</DiskSection>
<NetworkSection>
<Network ovf:name="nat">
</Network>
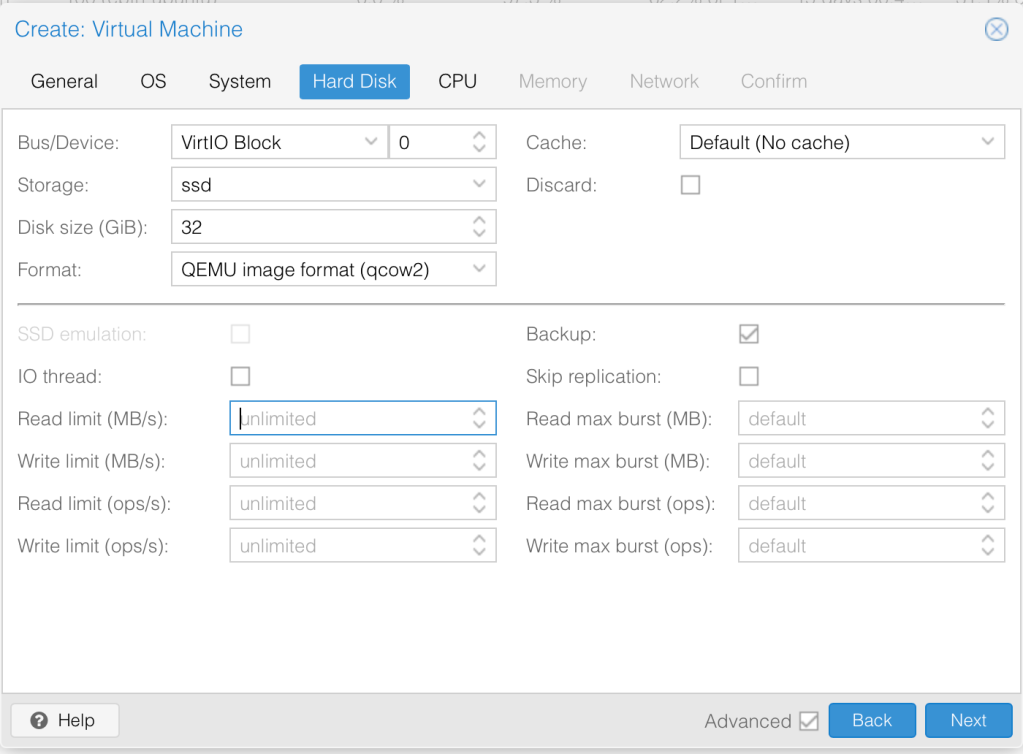
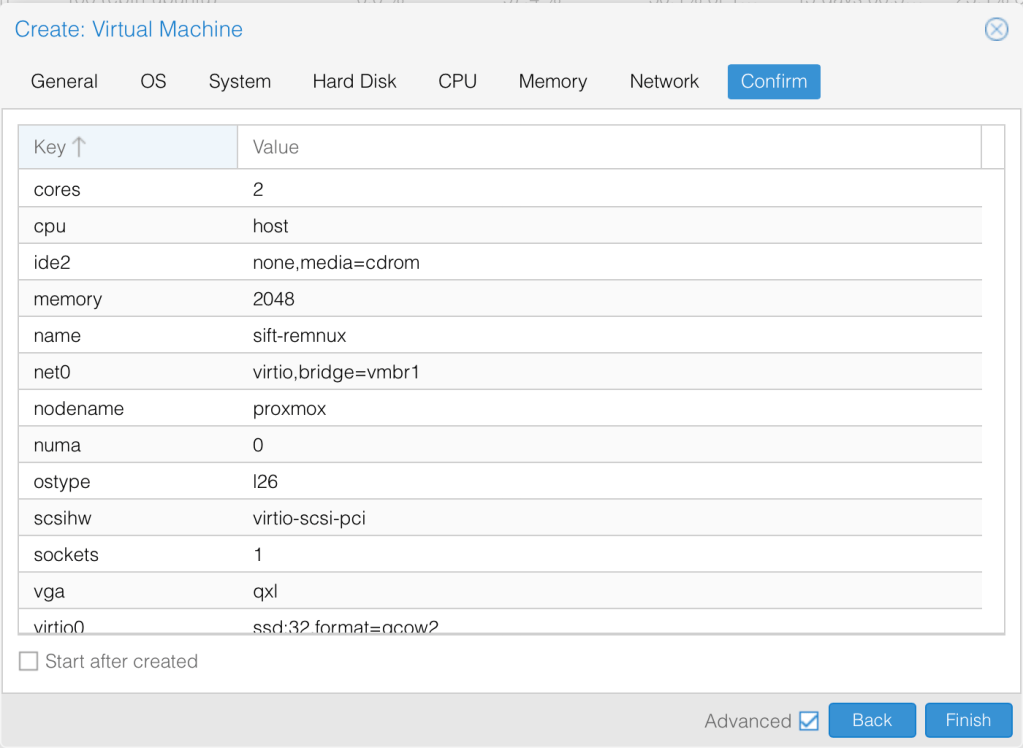
</NetworkSection>We need to import the disk sift-vmware-iso-full-disk1.vmdk to the VM that we created. In our case, the VM ID is 103 and the storage we are using is called ssd.
# qm importdisk 103 sift-vmware-iso-full-disk1.vmdk ssd -format qcow2
importing disk 'sift-vmware-iso-full-disk1.vmdk' to VM 103 ...
Formatting '/mnt/pve/ssd/images/103/vm-103-disk-0.qcow2', fmt=qcow2 cluster_size=65536 extended_l2=off preallocation=metadata compression_type=zlib size=524288000000 lazy_refcounts=off refcount_bits=16
transferred 0.0 B of 488.3 GiB (0.00%)
//
transferred 488.3 GiB of 488.3 GiB (100.00%)
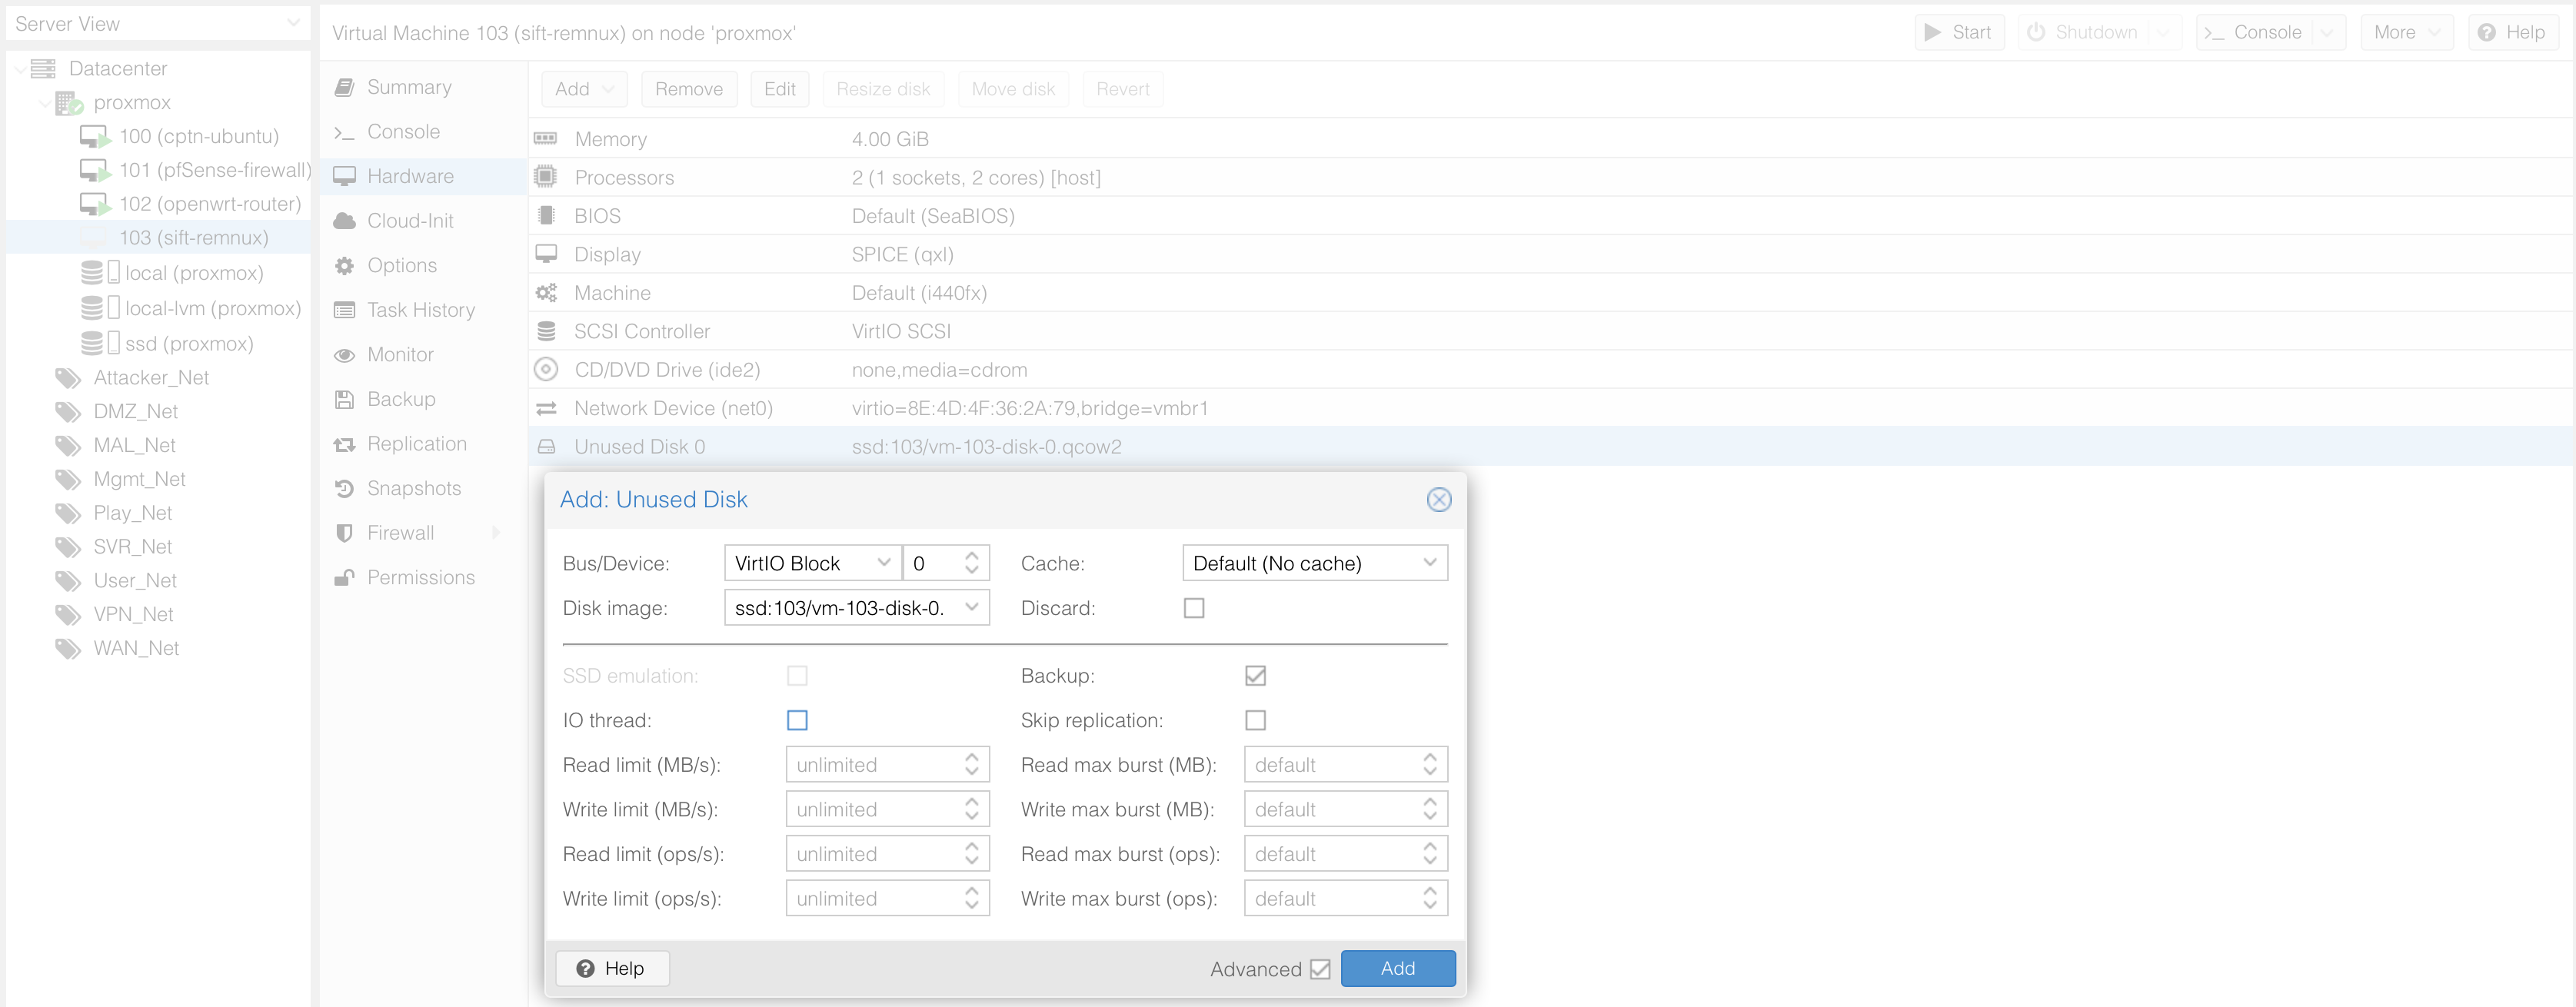
Successfully imported disk as 'unused0:ssd:103/vm-103-disk-0.qcow2'We now see the disk in the storage. We also see that it shows up on the VM as an unused disk.


Let’s now assign the disk to the VM so that it can be useable. Once that is done, we can see the hard disk.

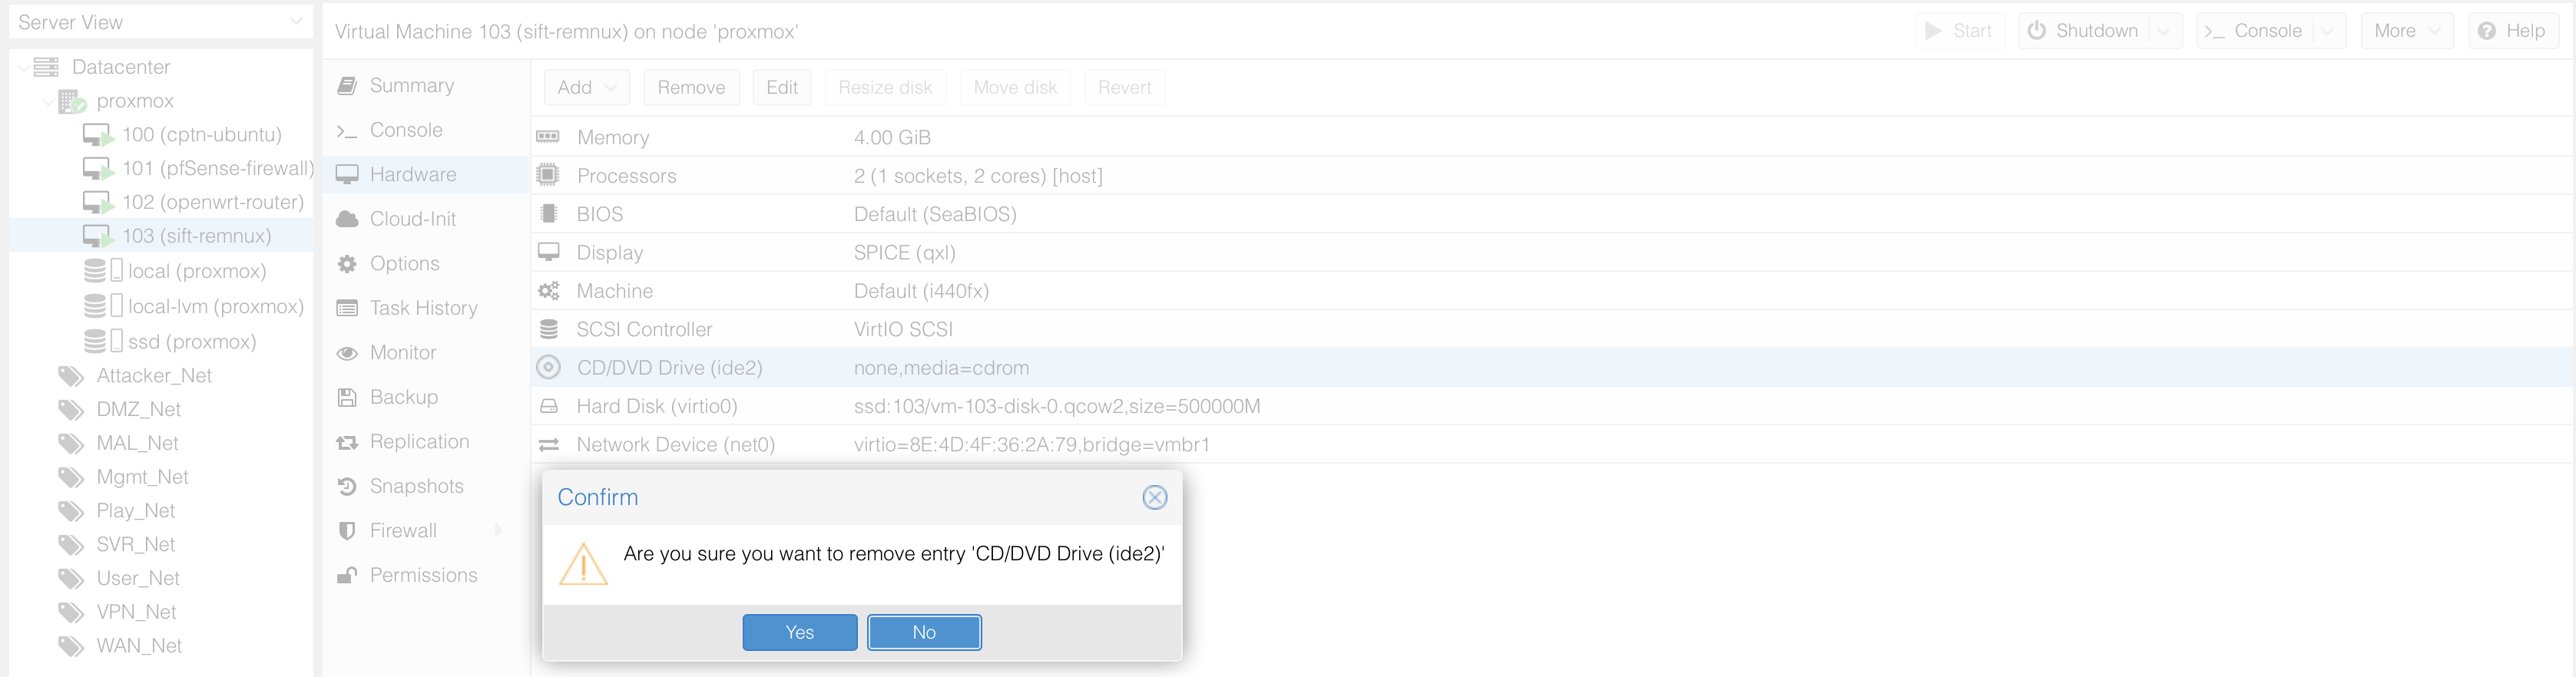
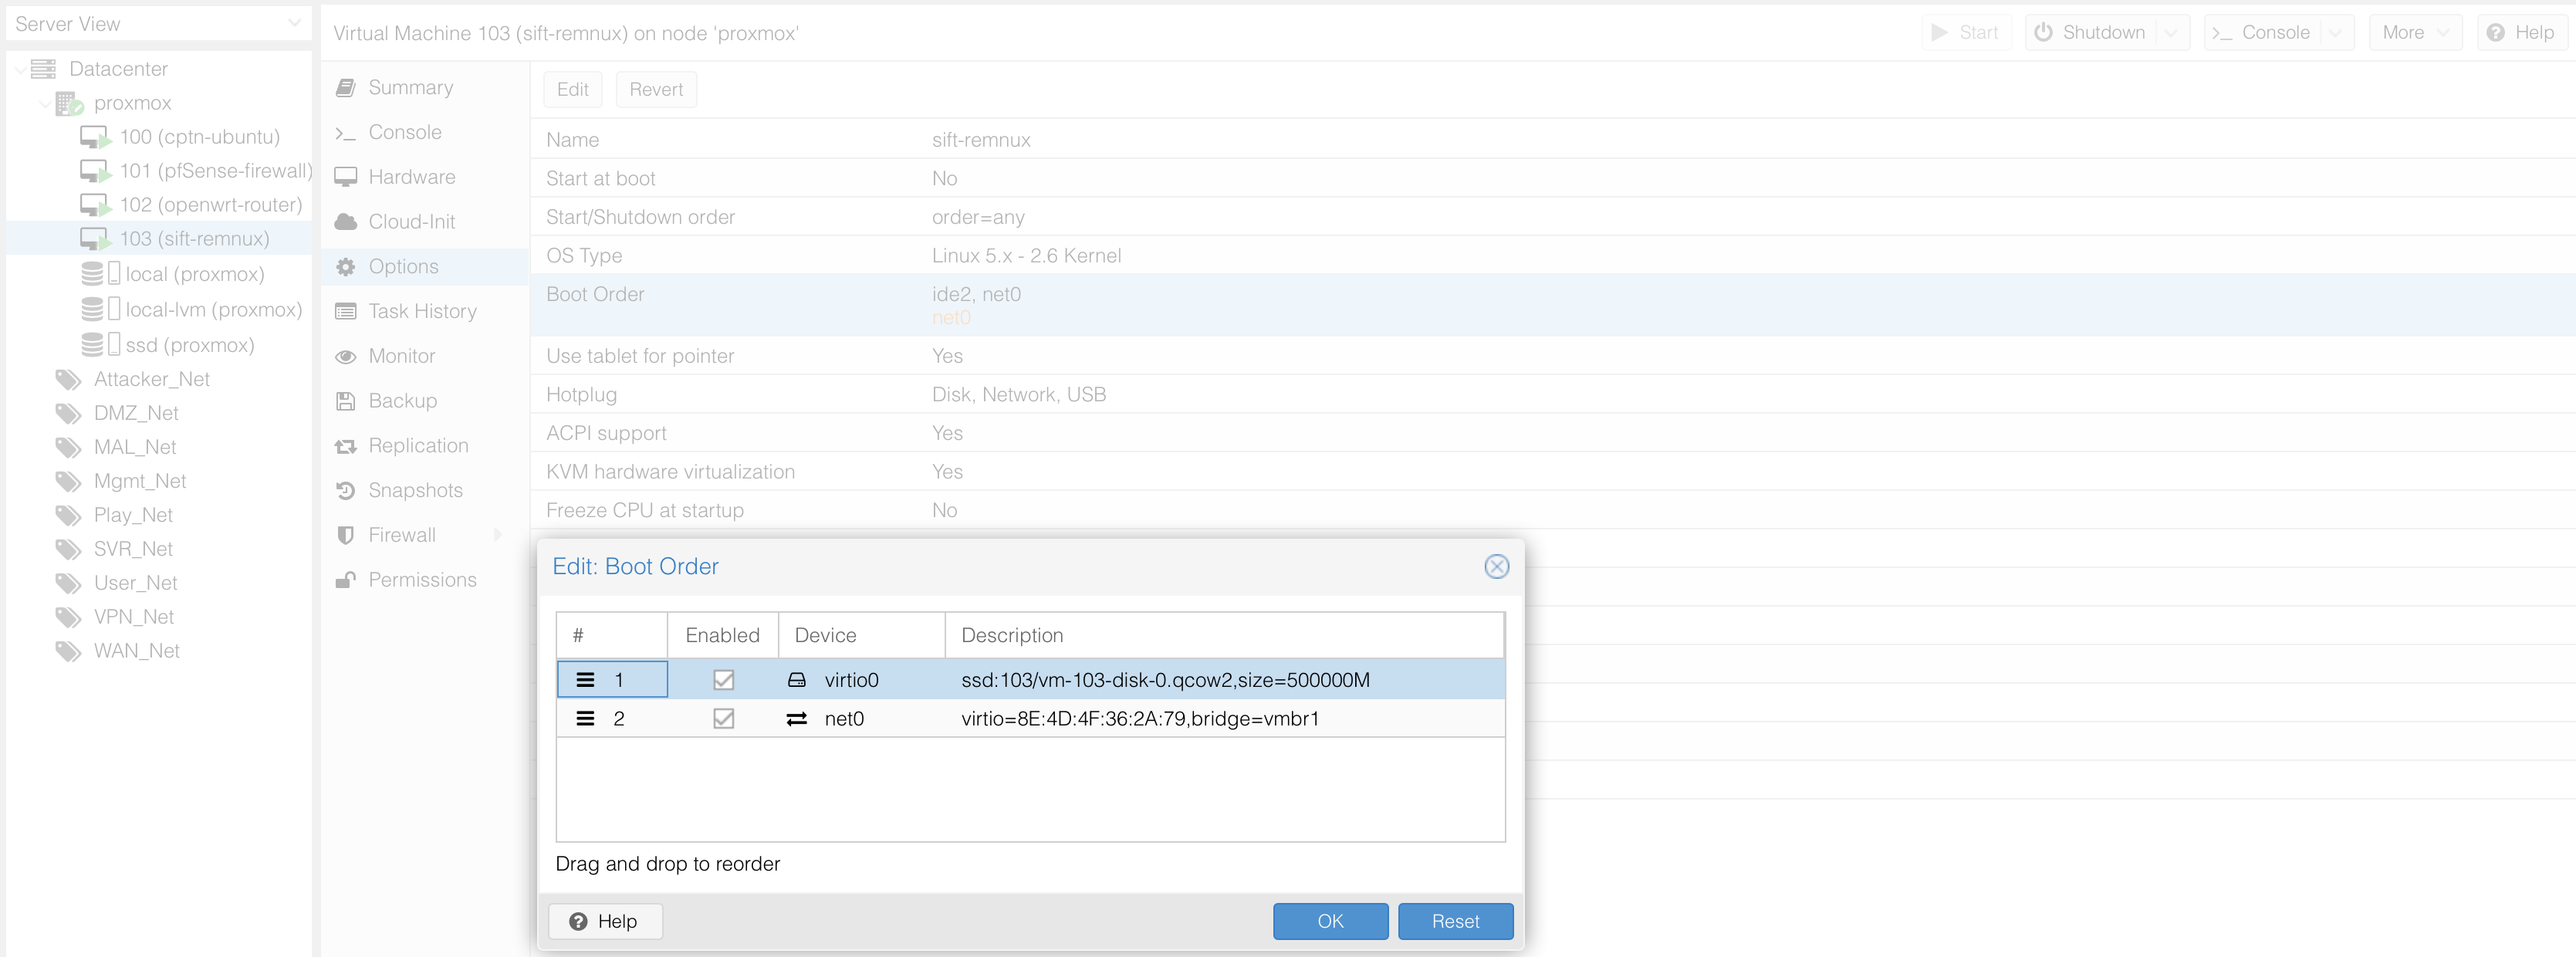
Let’s also remove the CDROM as that is unnecessary. Finally, let’s enable the disk under boot order then drag the disk to ensure it’s the first one to boot.
We can now turn on the VM.
Use the default login and password to access the VM. We now have the SIFT VM ready. As we no longer need the .ova files, lets delete the old files from this install.
# cd /mnt/pve/ssd/template/iso/
# ls
sift-vmware-iso-full.mf   SIFT-Workstation.ova.iso
sift-vmware-iso-full-disk1.vmdk     sift-vmware-iso-full.ovf
# rm sift-vmware-iso-full*
root@proxmox:/mnt/pve/ssd/template/iso# l
It appears that the sift cli is missing in this installation so let’s go ahead and add that to the new VM. We need to first download all the release files to the same directory then give it execute permissions.
$ sudo curl -Lo /usr/local/bin/sift https://github.com/sans-dfir/sift-cli/releases/download/v1.11.0/sift-cli-linux
$ sudo chmod +x /usr/local/bin/sift
Add Remnux to SIFT VM
For the next step, we sill simply follow the instructions detailed here. Let’s first make sure that the VM has internet access.
# ping 8.8.8.8
PING 8.8.8.8 (8.8.8.8) 56(84) bytes of data.
64 bytes from 8.8.8.8: icmp_seq=1 ttl=116 time=12.1 ms
We need to ensure that there is no unattended upgrade running on the VM.

Following the instructions here, let’s download the Remnux installer to the SIFT VM.
$ wget https://REMnux.org/remnux-cli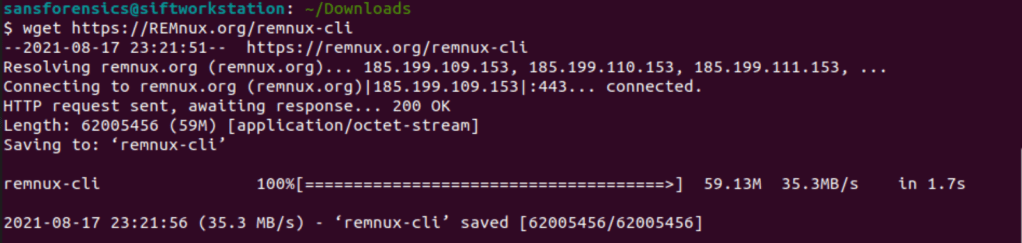
Validate that the hash matches with the original file.
$ shasum -a 256 remnux-cli
8193df477c0e0f14b53d018db141b969ab48f8da550384ef6d6e51482ebdda9d  remnux-cli
Setup the remux installer by first of all renaming it to remnux, giving it execute permissions then moving it to the /usr/local/bin folder.
$ mv remnux-cli remnux
$ chmod +x remnux
$ sudo mv remnux /usr/local/bin
Let’s now install the remnux distribution. We want the VM not to stop looking as a SIFT VM so we will use the --mode=addon switch. The installation process is expected to take around an hour.
$ sudo remnux install --mode=addonOption B: Add SIFT to Remnux VM
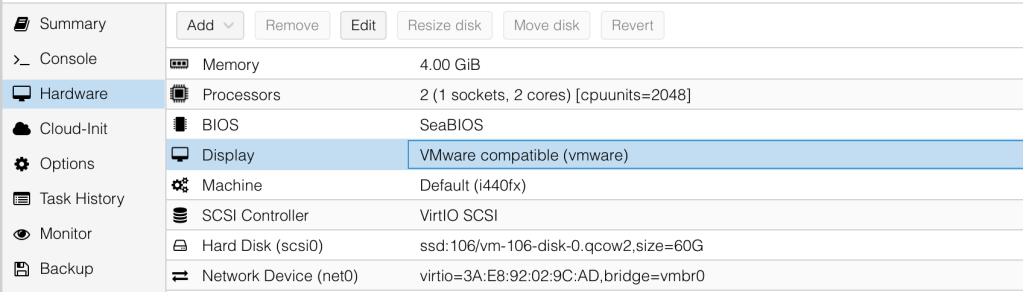
If you chose to install remnux first, the instructions on setting up the VM are similar to how we installed sift vm first. The only difference that I ran into was that I had to change the display to VMWare compatible (VMware) to get the console display working for me.
Install the sift-cli on remnux as we did previously.
$ sudo curl -Lo /usr/local/bin/sift https://github.com/sans-dfir/sift-cli/releases/download/v1.11.0/sift-cli-linux
$ sudo chmod +x /usr/local/bin/sift
Then install SIFT using the SIFT-cli in “packages-only” mode.
$ sudo sift install --mode=packages-only
Update the SIFT + Remnux system
To keep the VM up to date, we would need to update both SIFT and remnux packages periodically.
$ sudo apt update -y && sudo apt upgrade -y && sudo apt dist-upgrade -y && sudo apt full-upgrade -y && sudo apt autoremove -y && sudo remnux upgrade && sudo sift upgradeInorder to access the systems remotely, let’s Install xrdp on the machine. We will use the xrdp package. I found this guide useful when setting this up.
$ sudo apt install xrdp
$ sudo systemctl status xrdp
$ sudo adduser xrdp ssl-cert
$ sudo nano /etc/xrdp/startwm.sh
I also had to add the two unset lines to the starts.sh script as per the guide above because of the black ubuntu screen error when I logged into the machine.

Once the script was saved, a restart of the xrdp process is necessary.
$ sudo systemctl restart xrdpWe can then login to the system using our credentials. One time verification is not enough :).
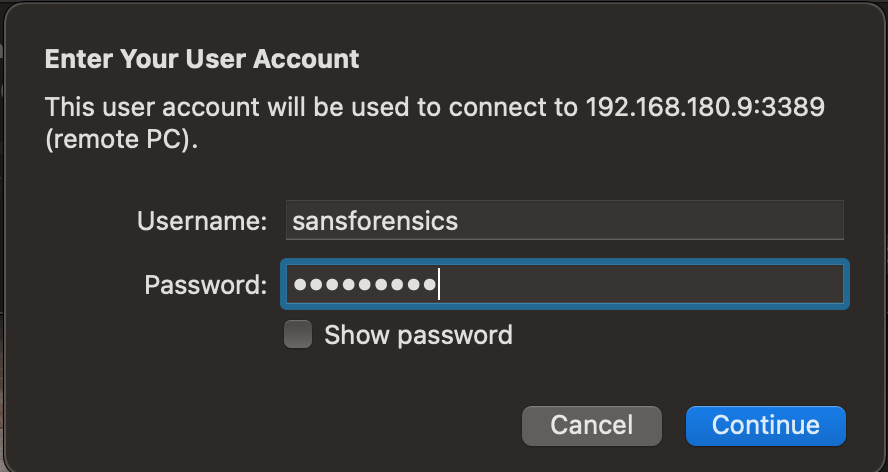
And wallah! We are now back in business.
Deploying an Active Directory Lab with Windows 2022 Domain Controller
I was planning on using Windows Server 2019 but saw that a newer version was out so we will give it a try. You can get the Windows 2022 ISO from here and the Windows 10 Enterprise one from here.
Setting up Windows 2022 Server
Upload the image to the ISO store as we have done previously. We also need the VirtIO drivers that we can obtain from the official site here.
We can then start deploying a VM for the Domain Controller. The Server requirements are specified here. We will specify the location of the iSO. Proxmox currently does not have an OS version for win 2022, so we will go with Win 2019.
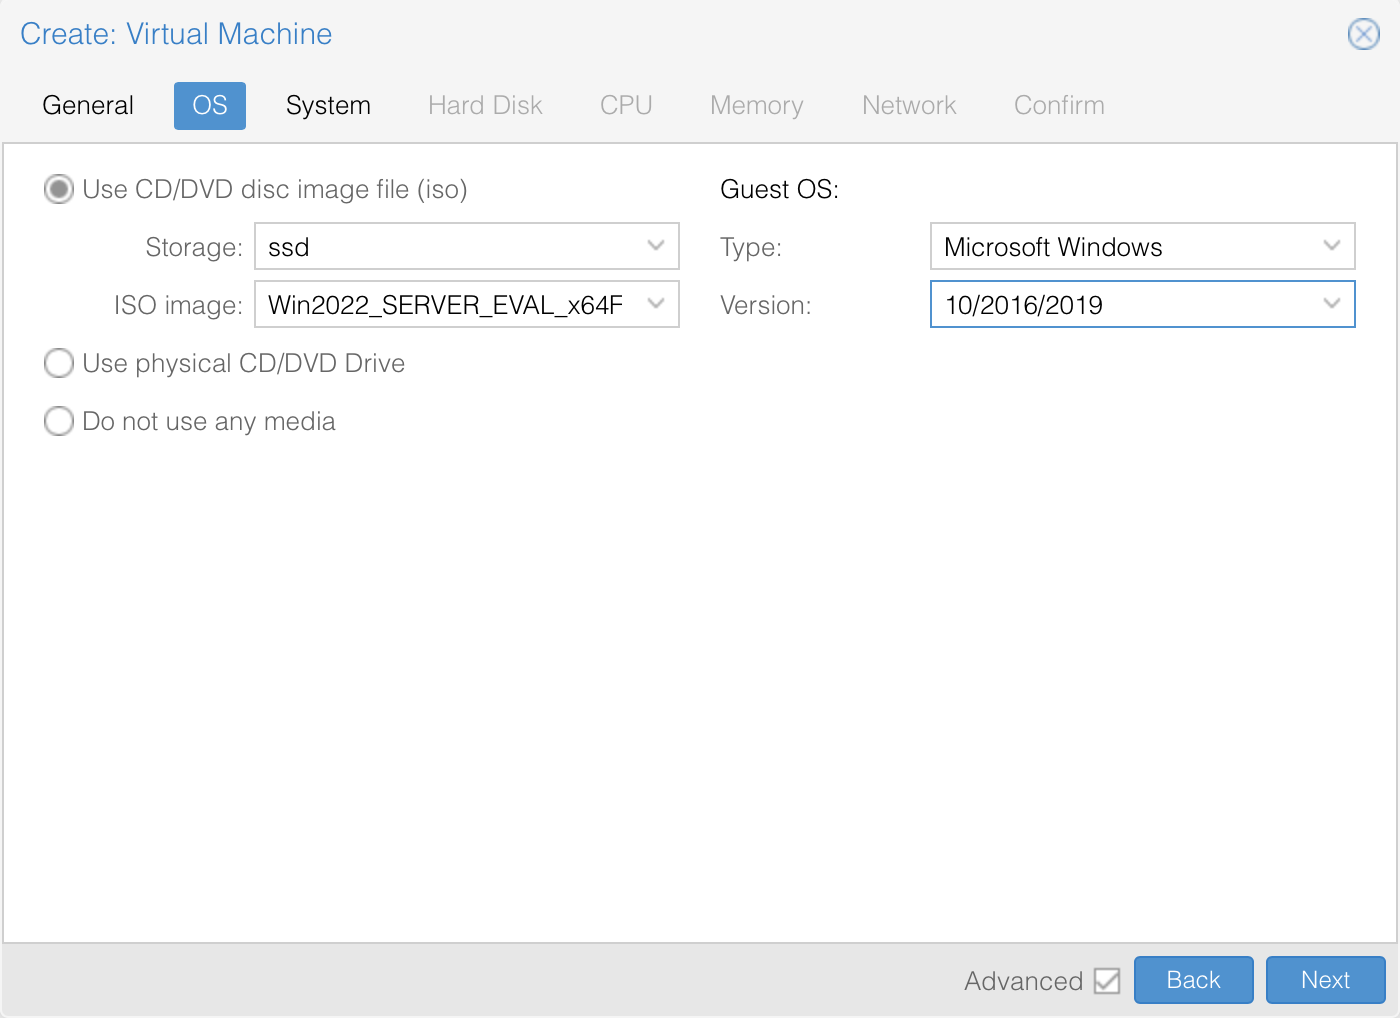
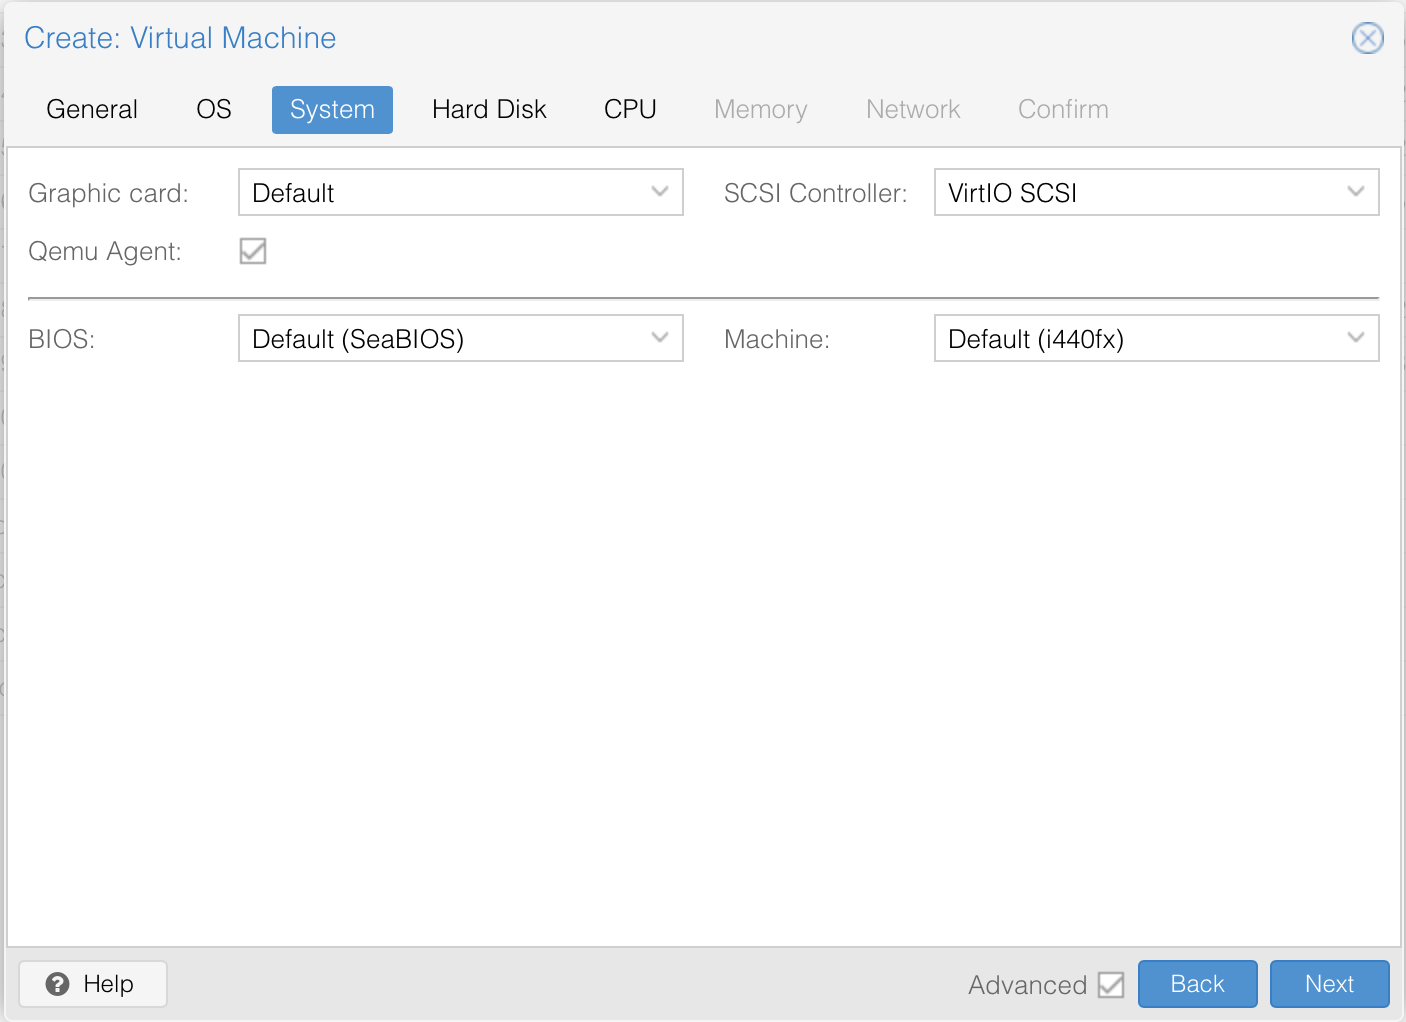
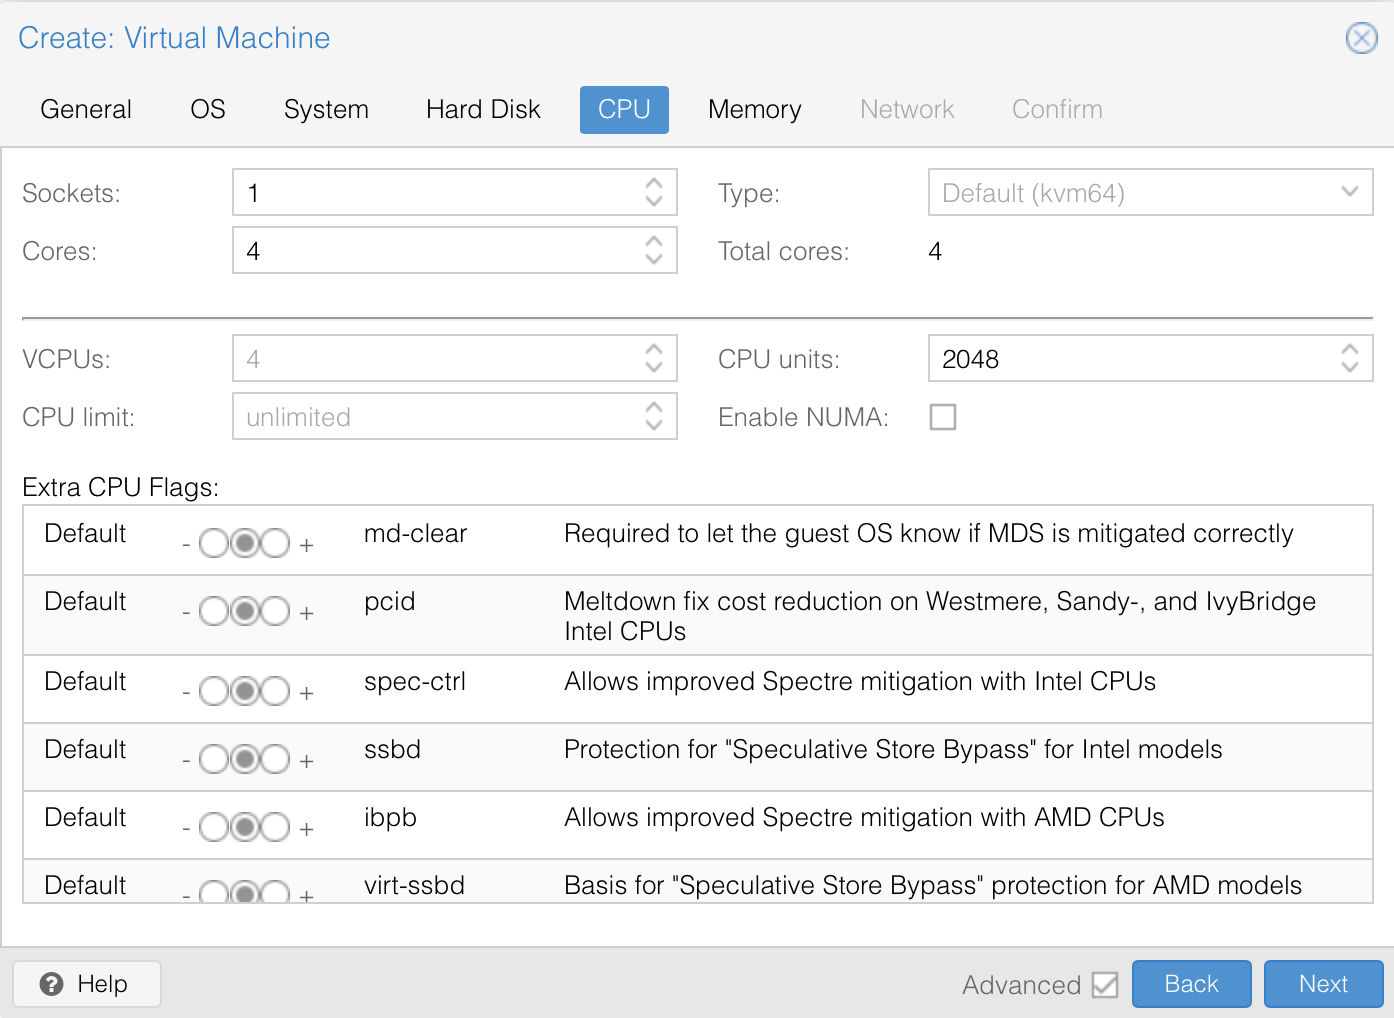
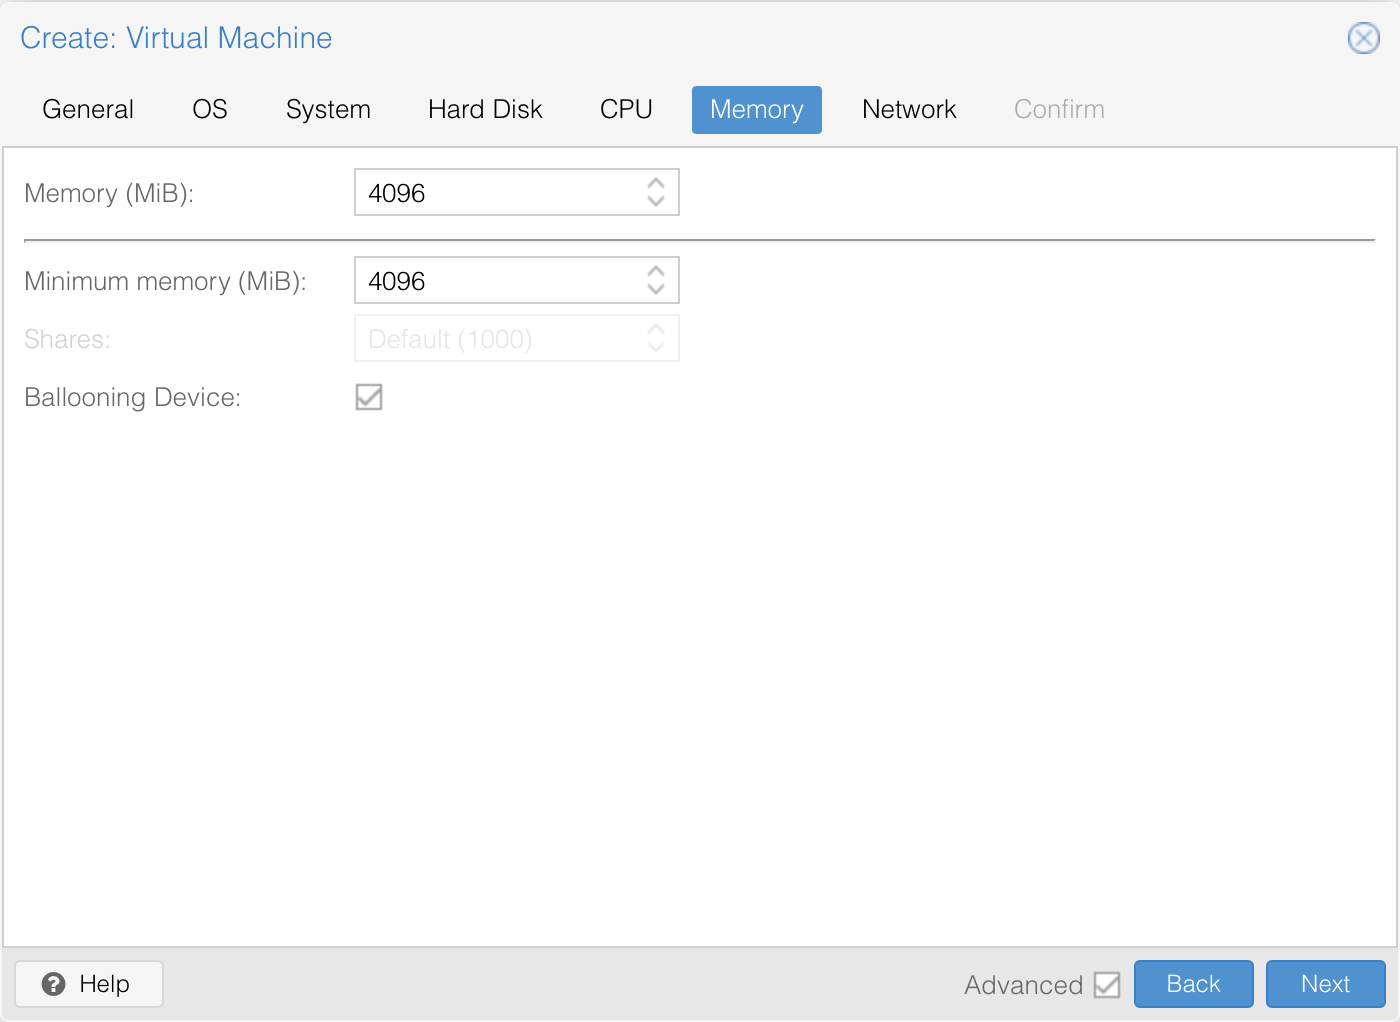
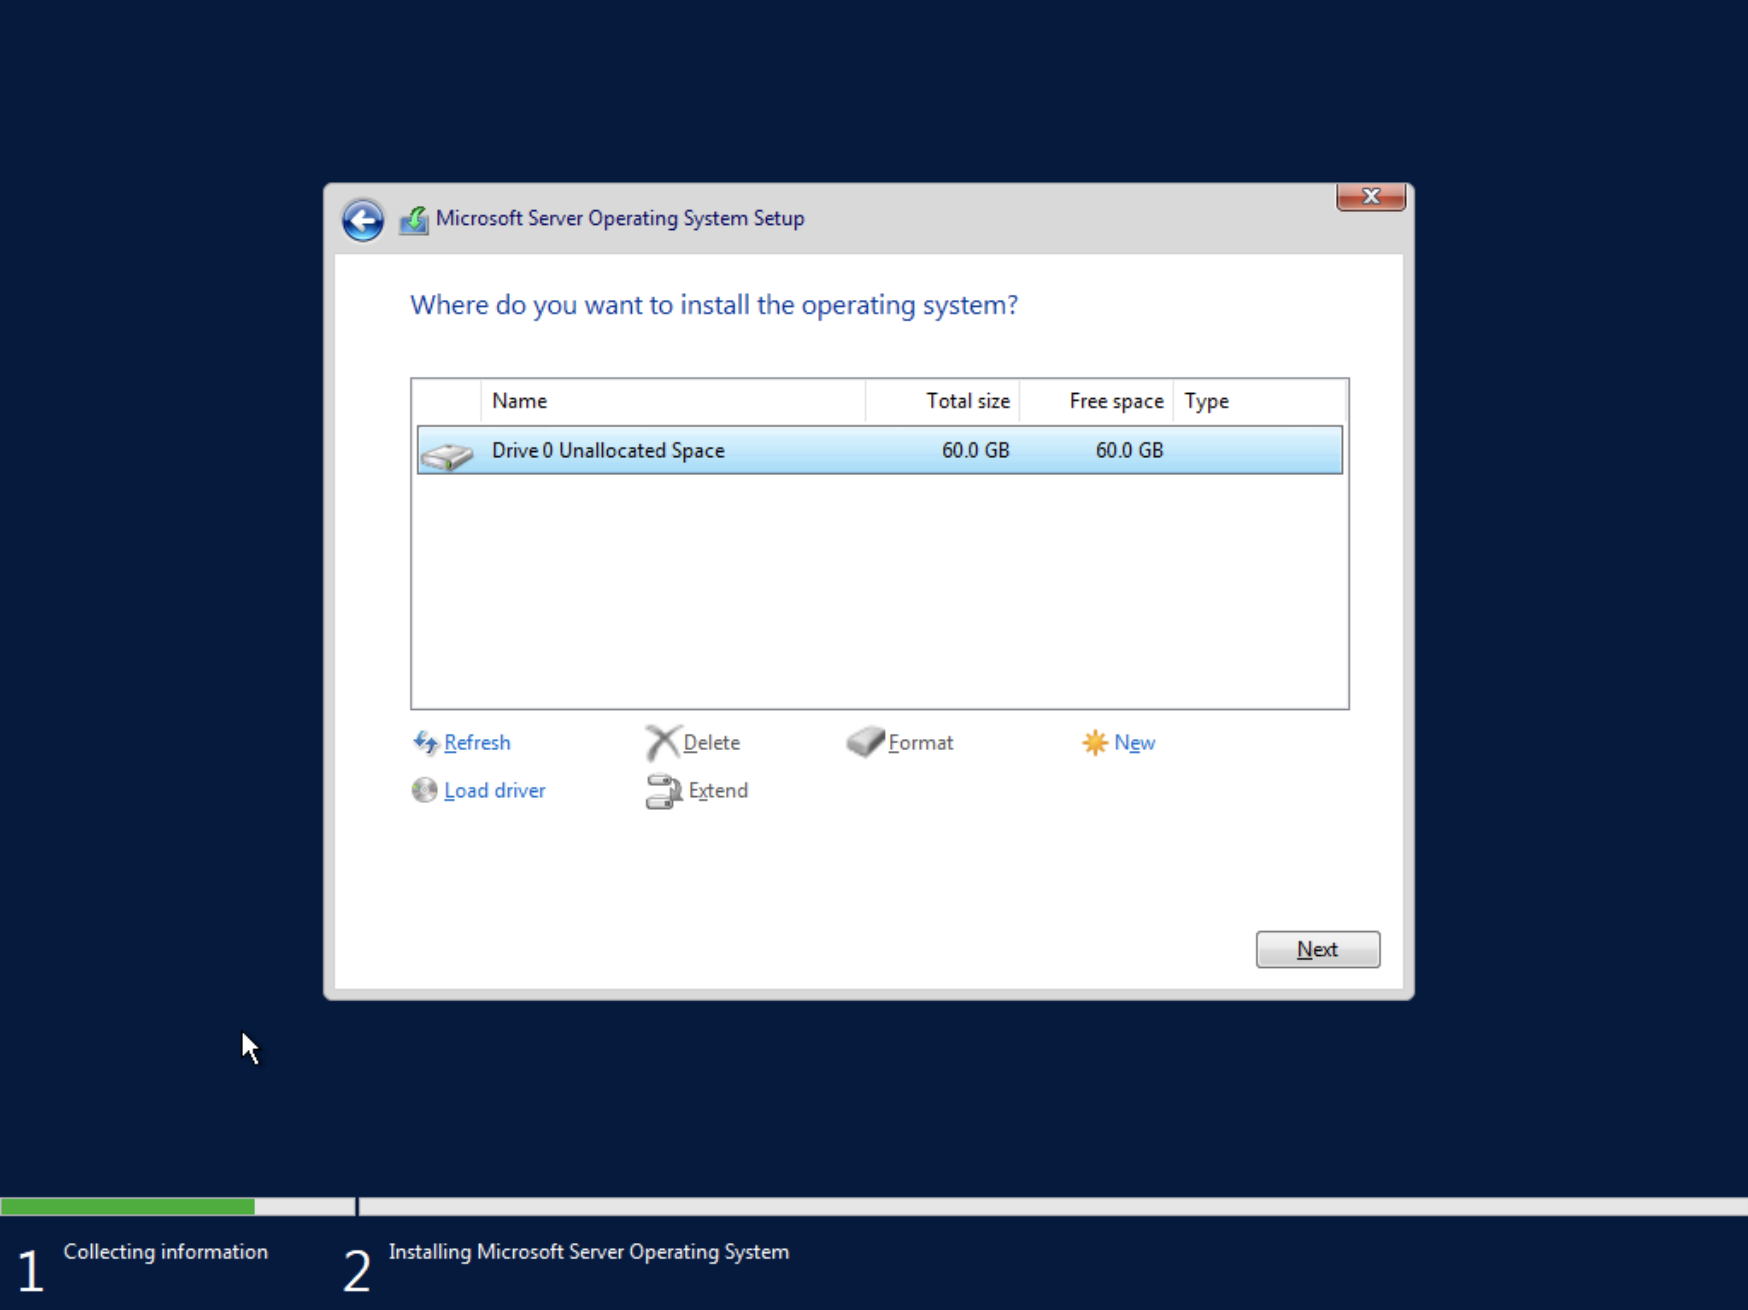
I’ll give it 60GB disk space. Minimum is 32 GB. We’ll give it 4 CPU cores with 4GB RAM.

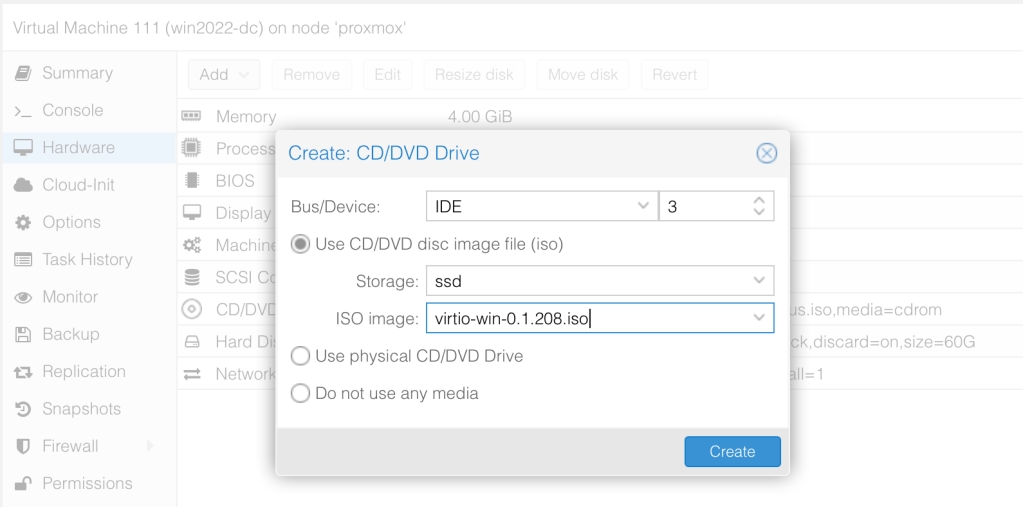
Before booting the VM, let’s create a new CDROM drive with Bus “IDE” and number 3 then load the Virtio Drivers ISO.
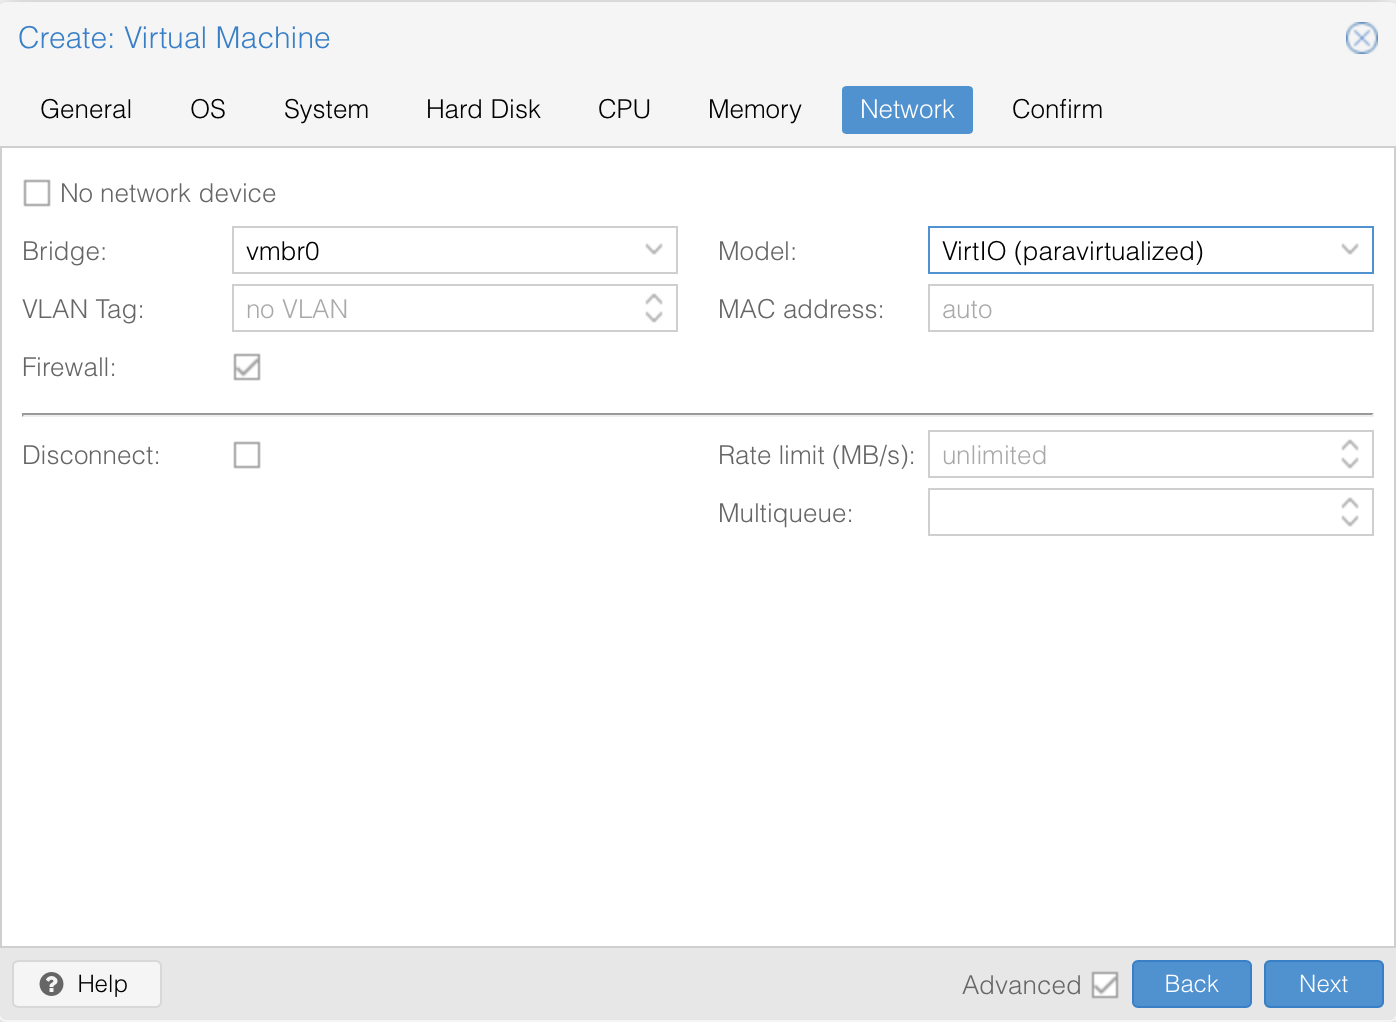
Since we need a windows client machine too, let’s create a template of this machine before installing Windows 2022. Once this is done, we can boot it up to start installing Windows.
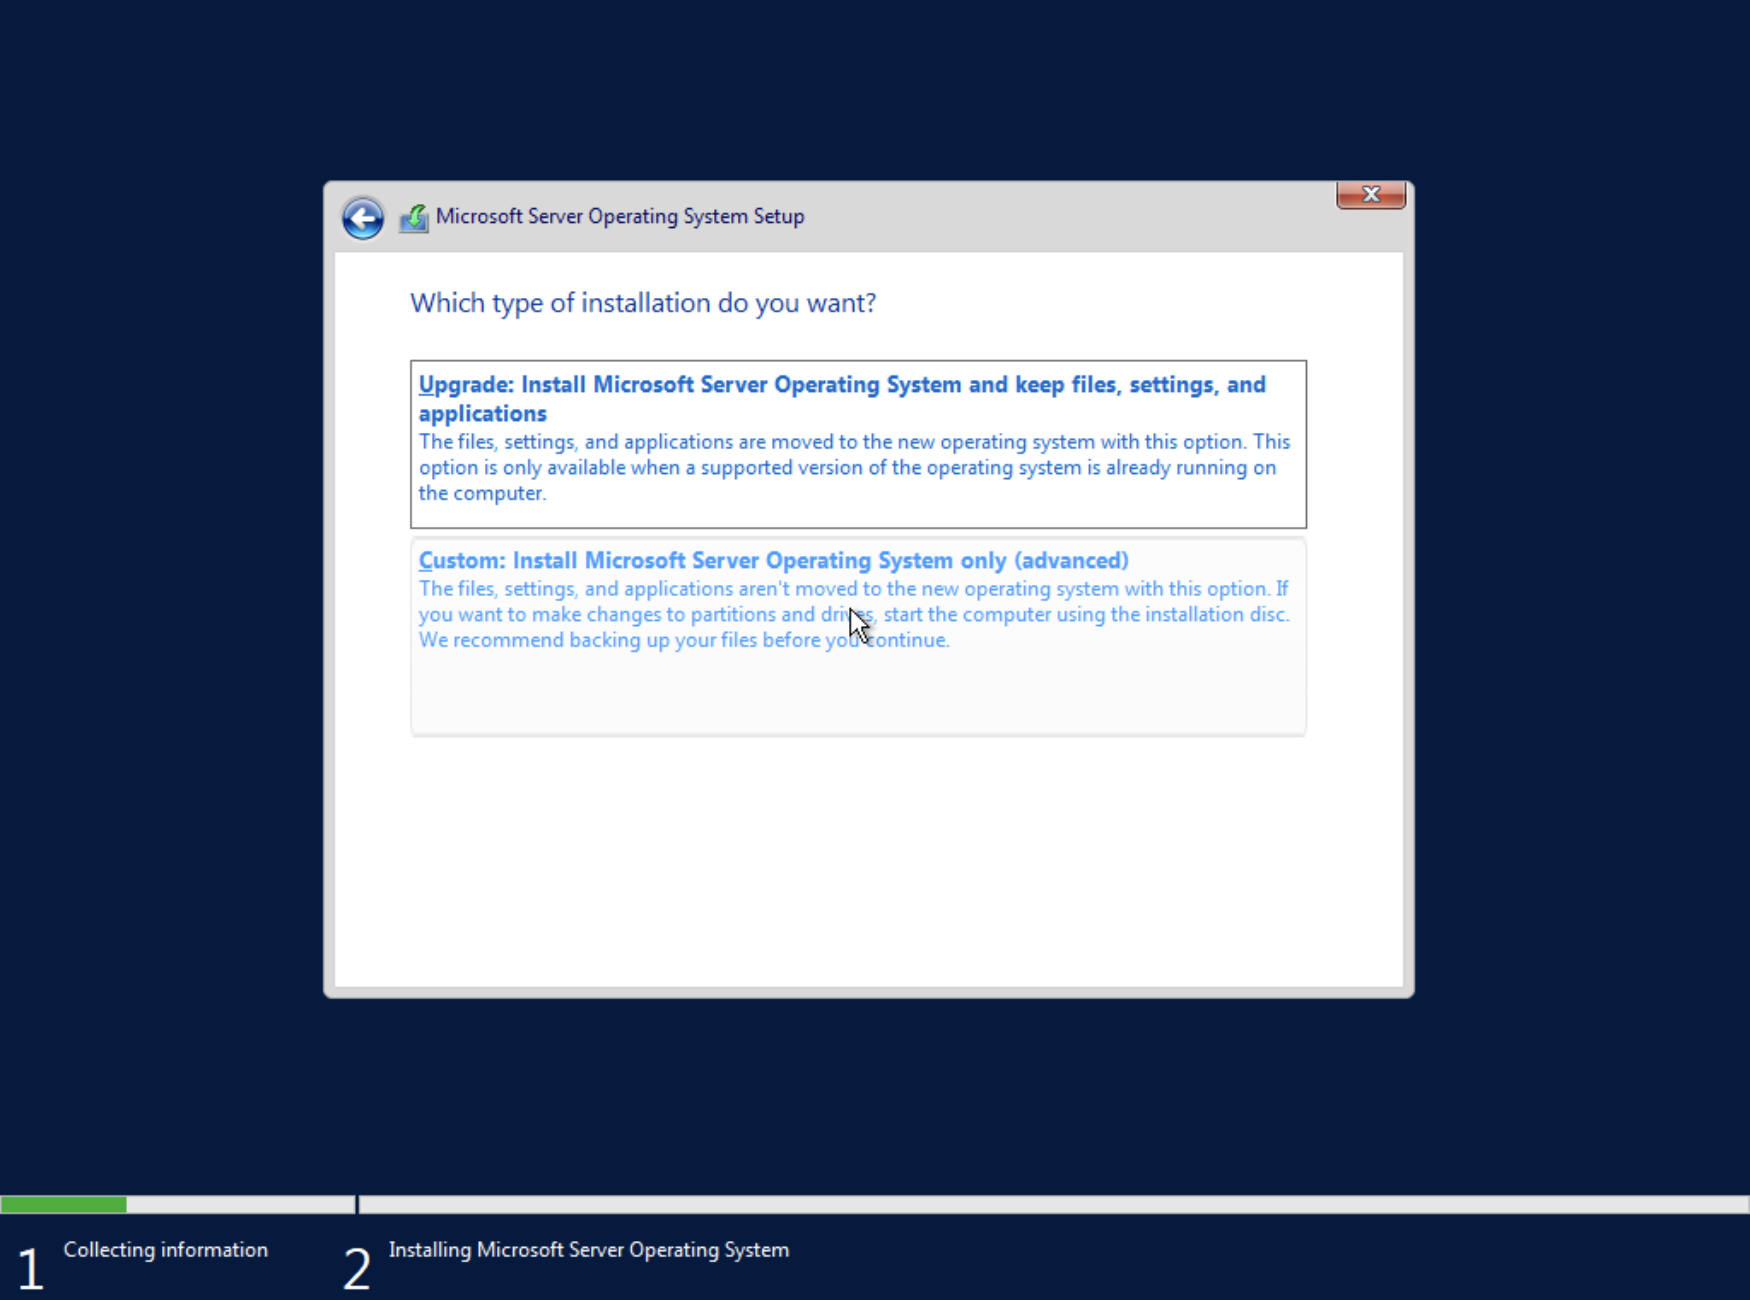
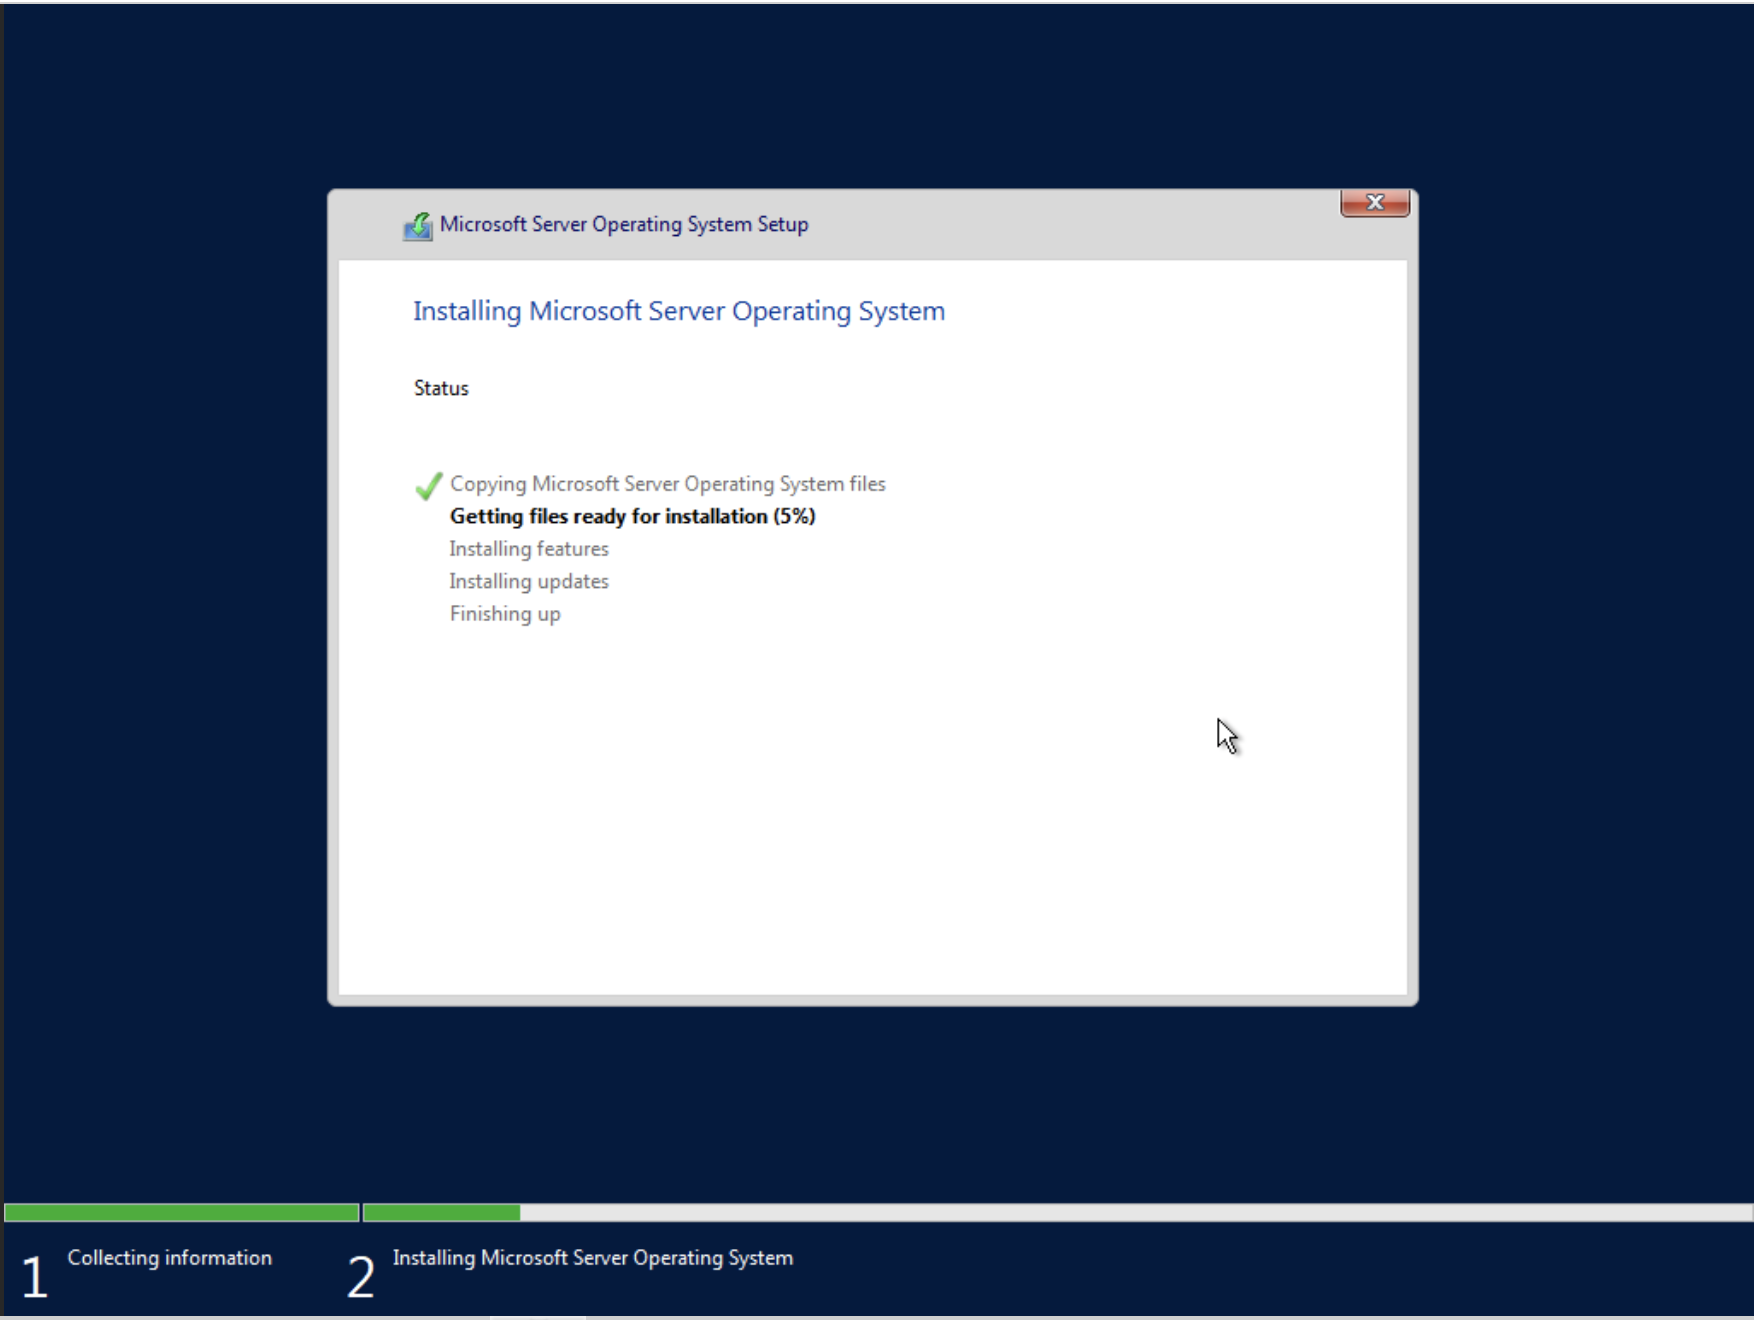
Windows 2022 Server Installation
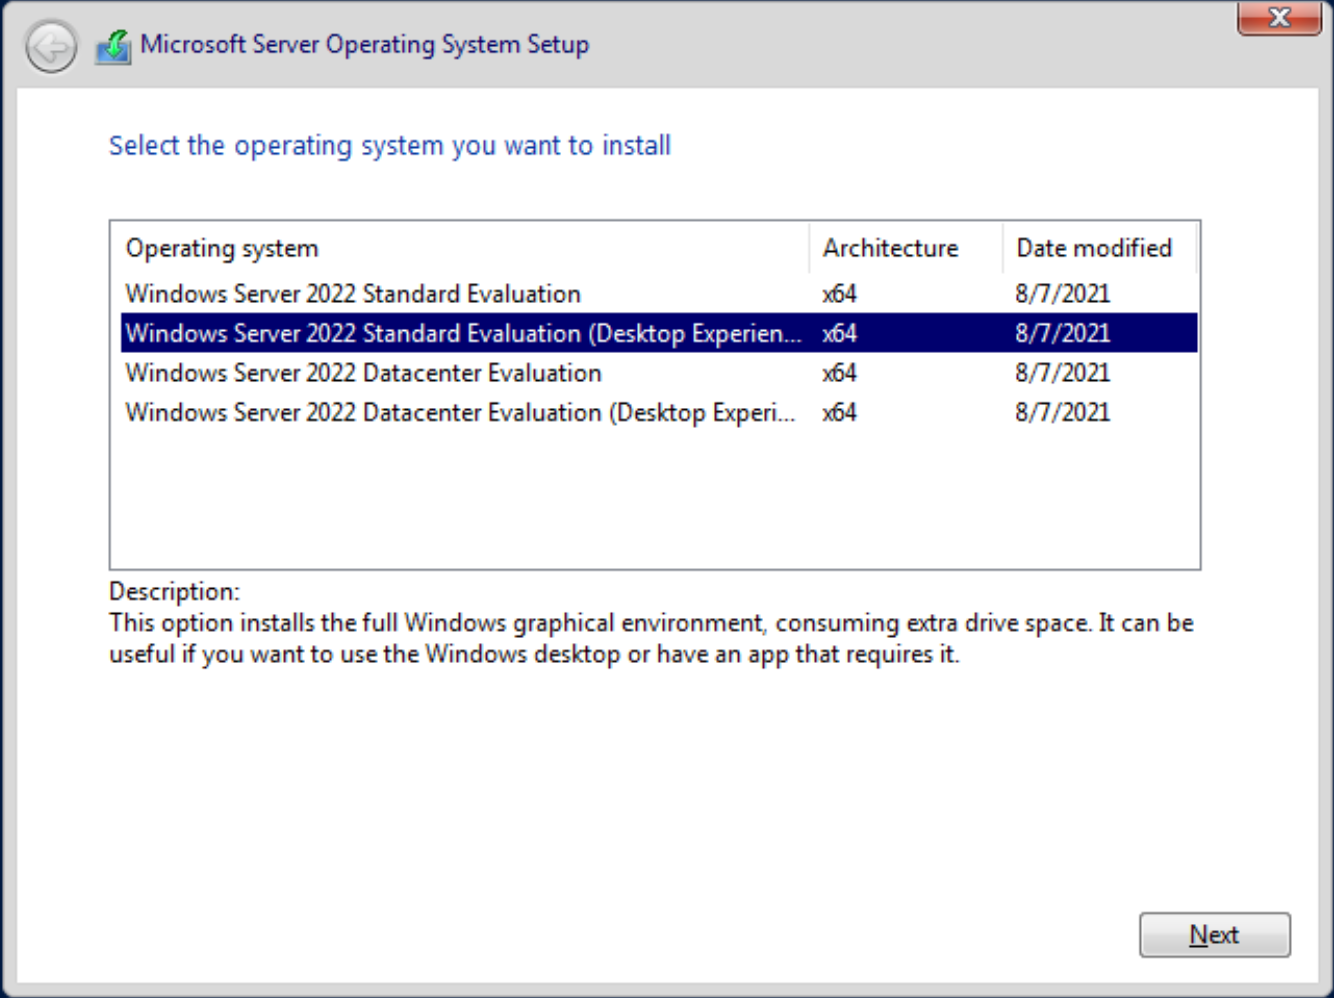
We will use the Standard Desktop Version here.
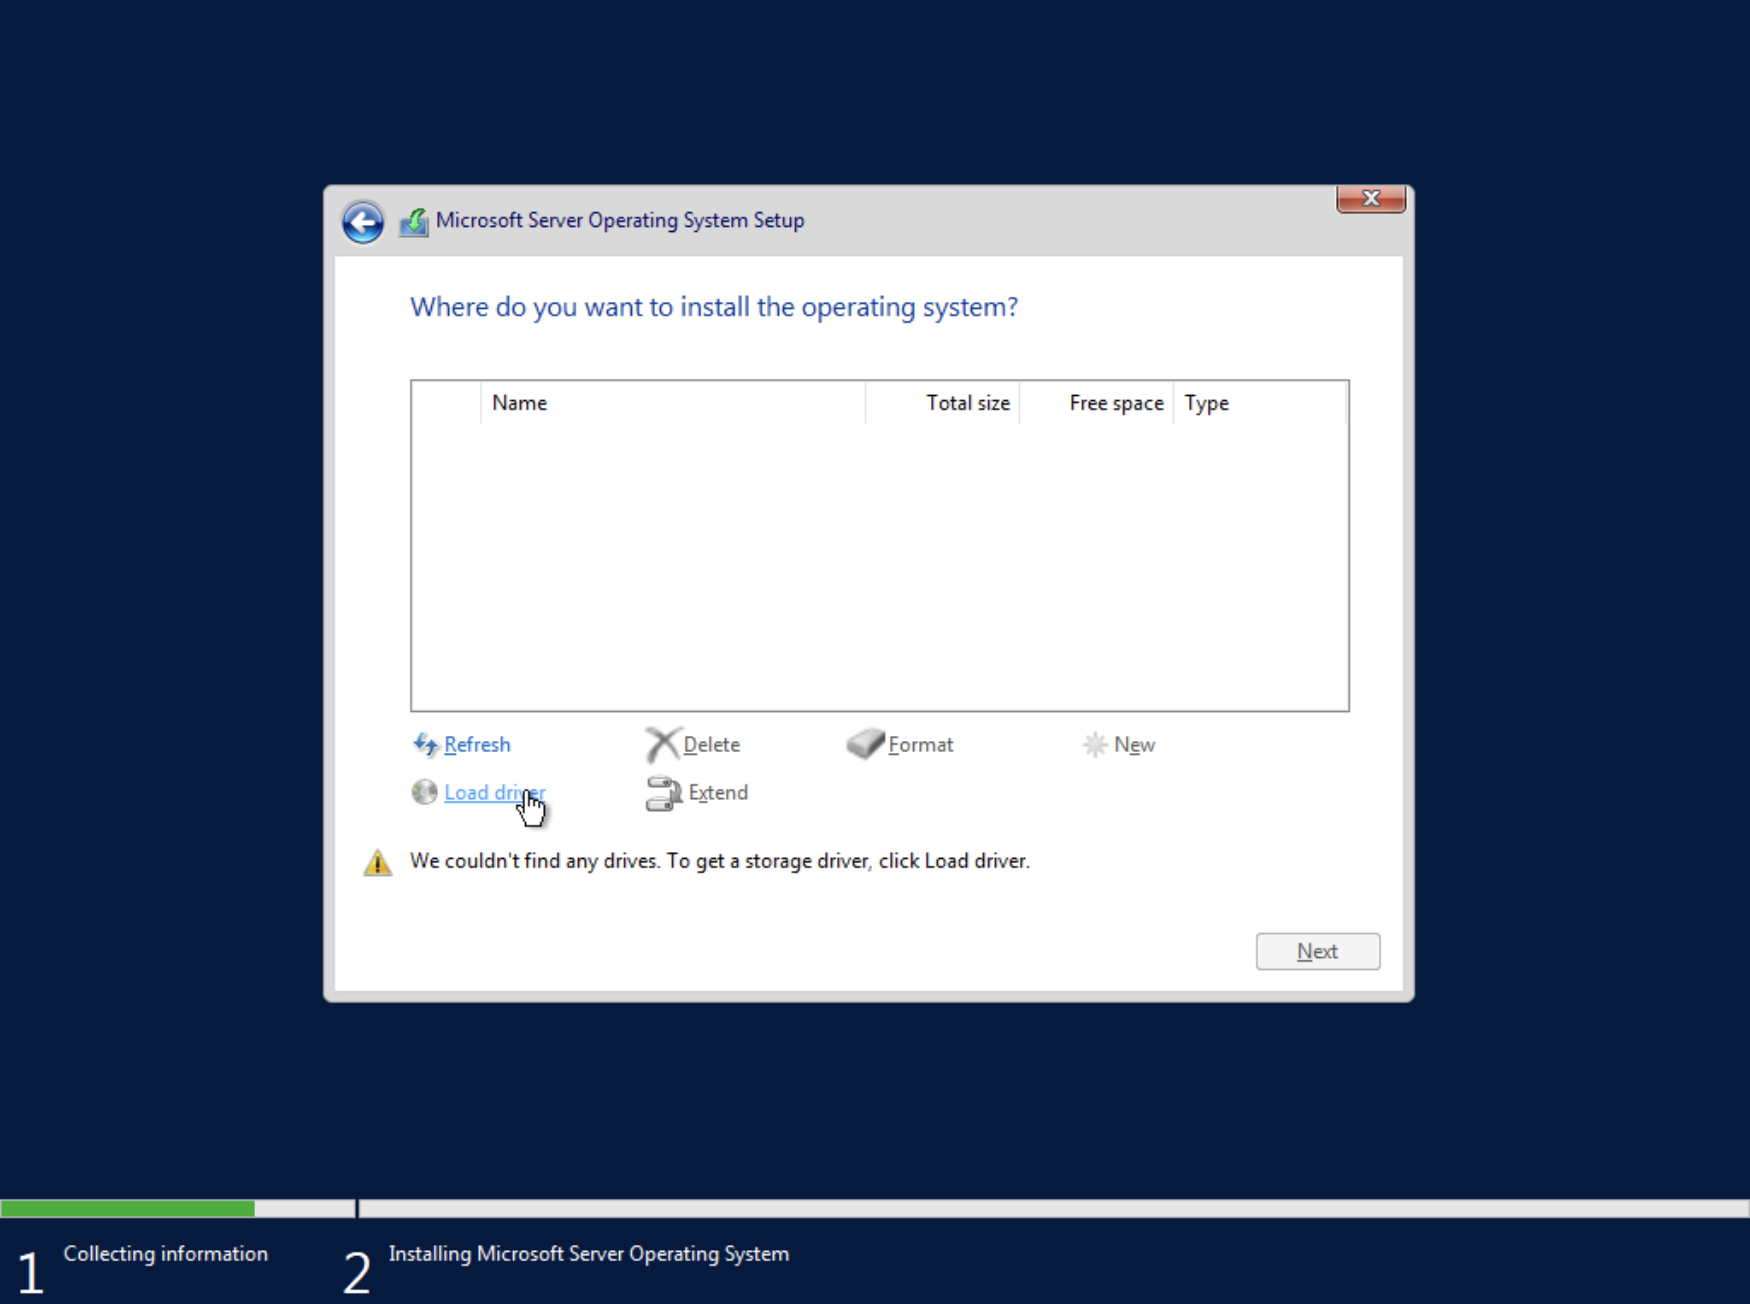
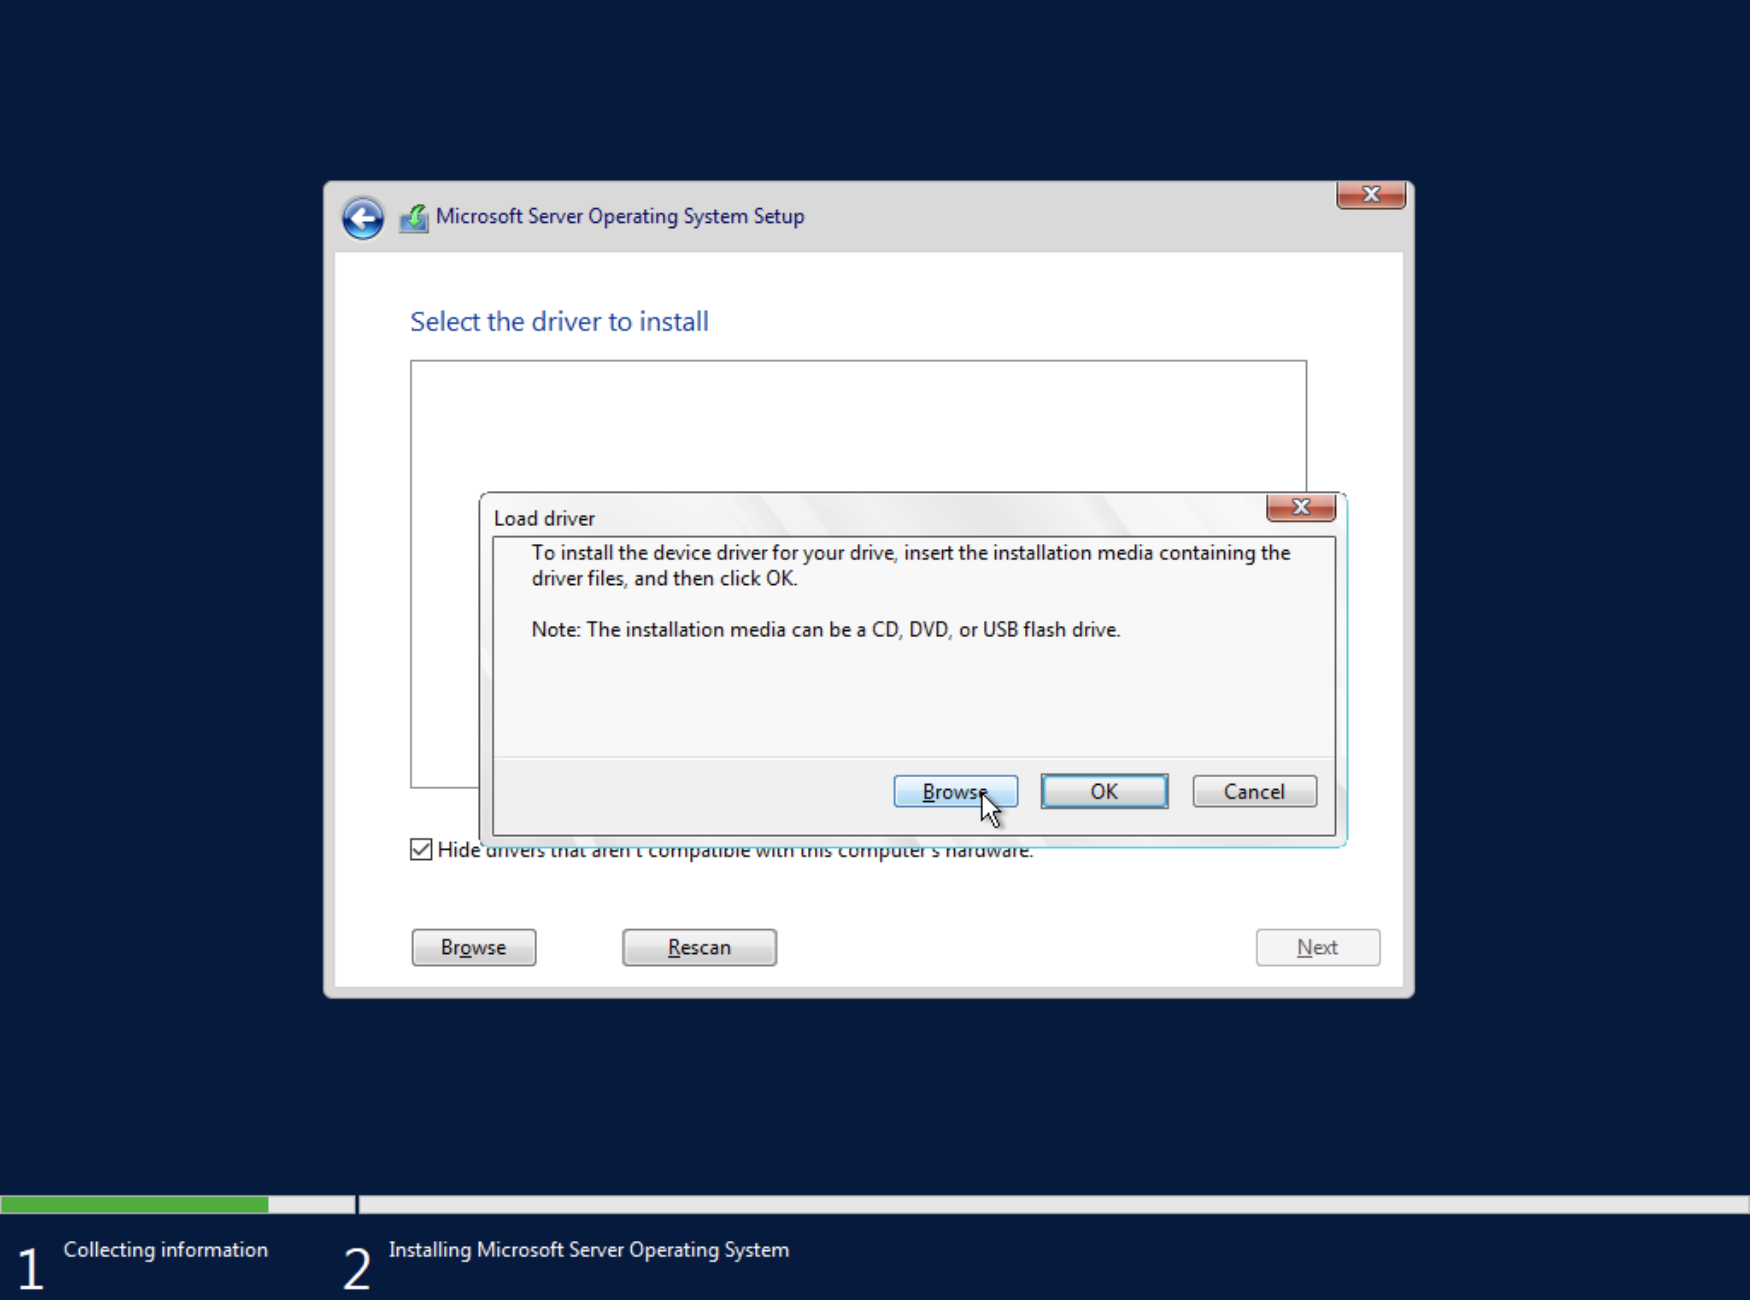
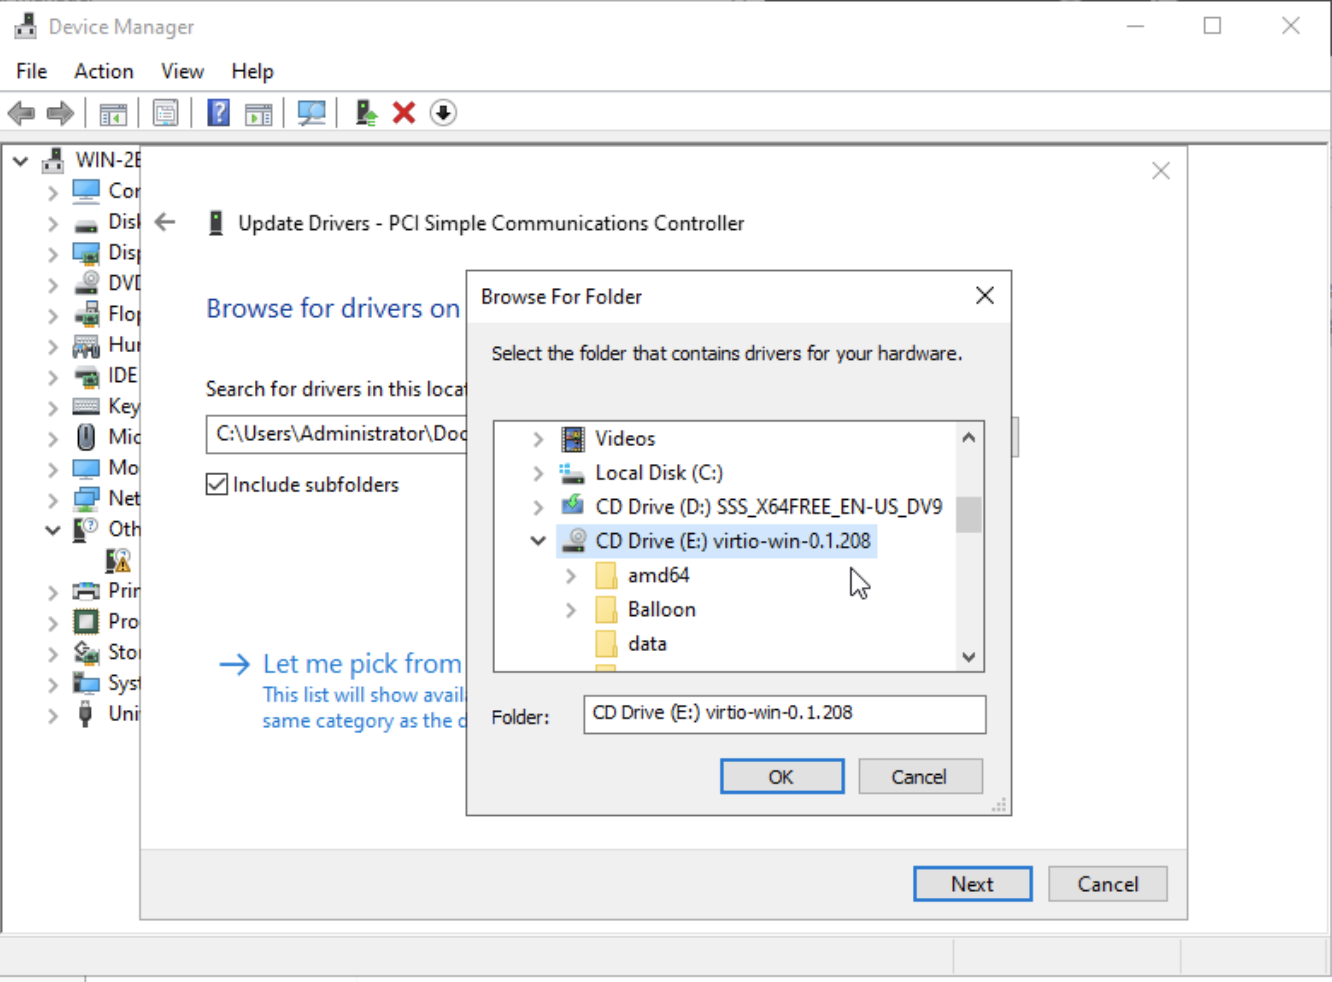
We cannot see the disk in the list. To see it, we need to first install the drivers. Select Load driver.

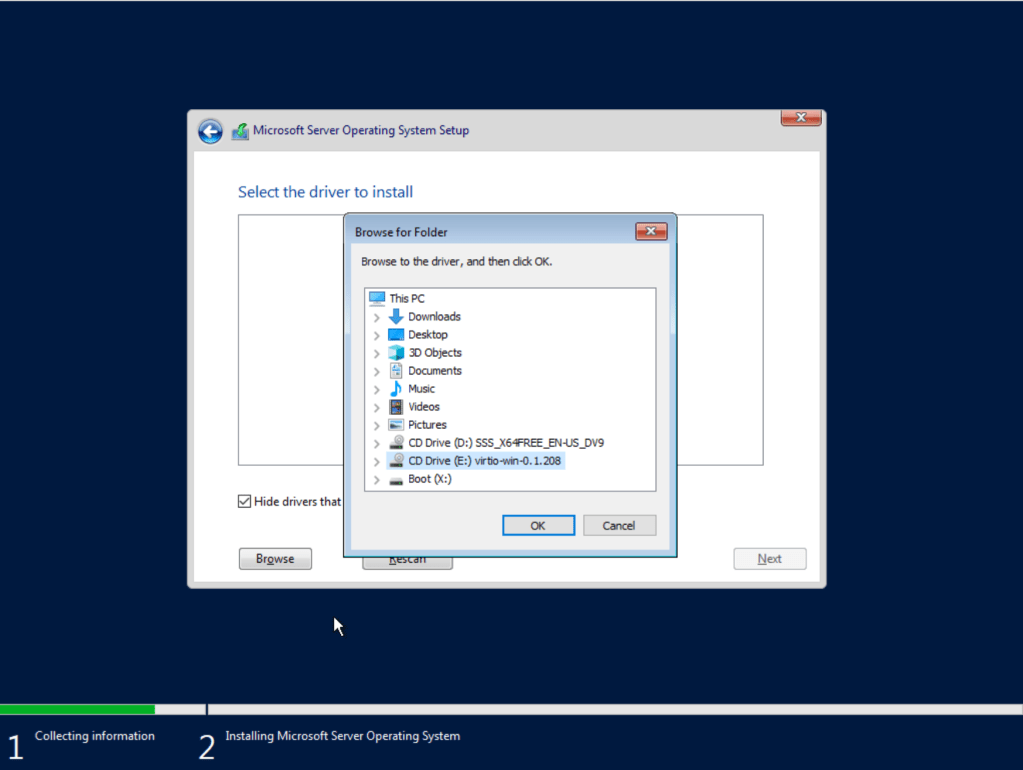
Navigate to the CD with the virt-io drivers.
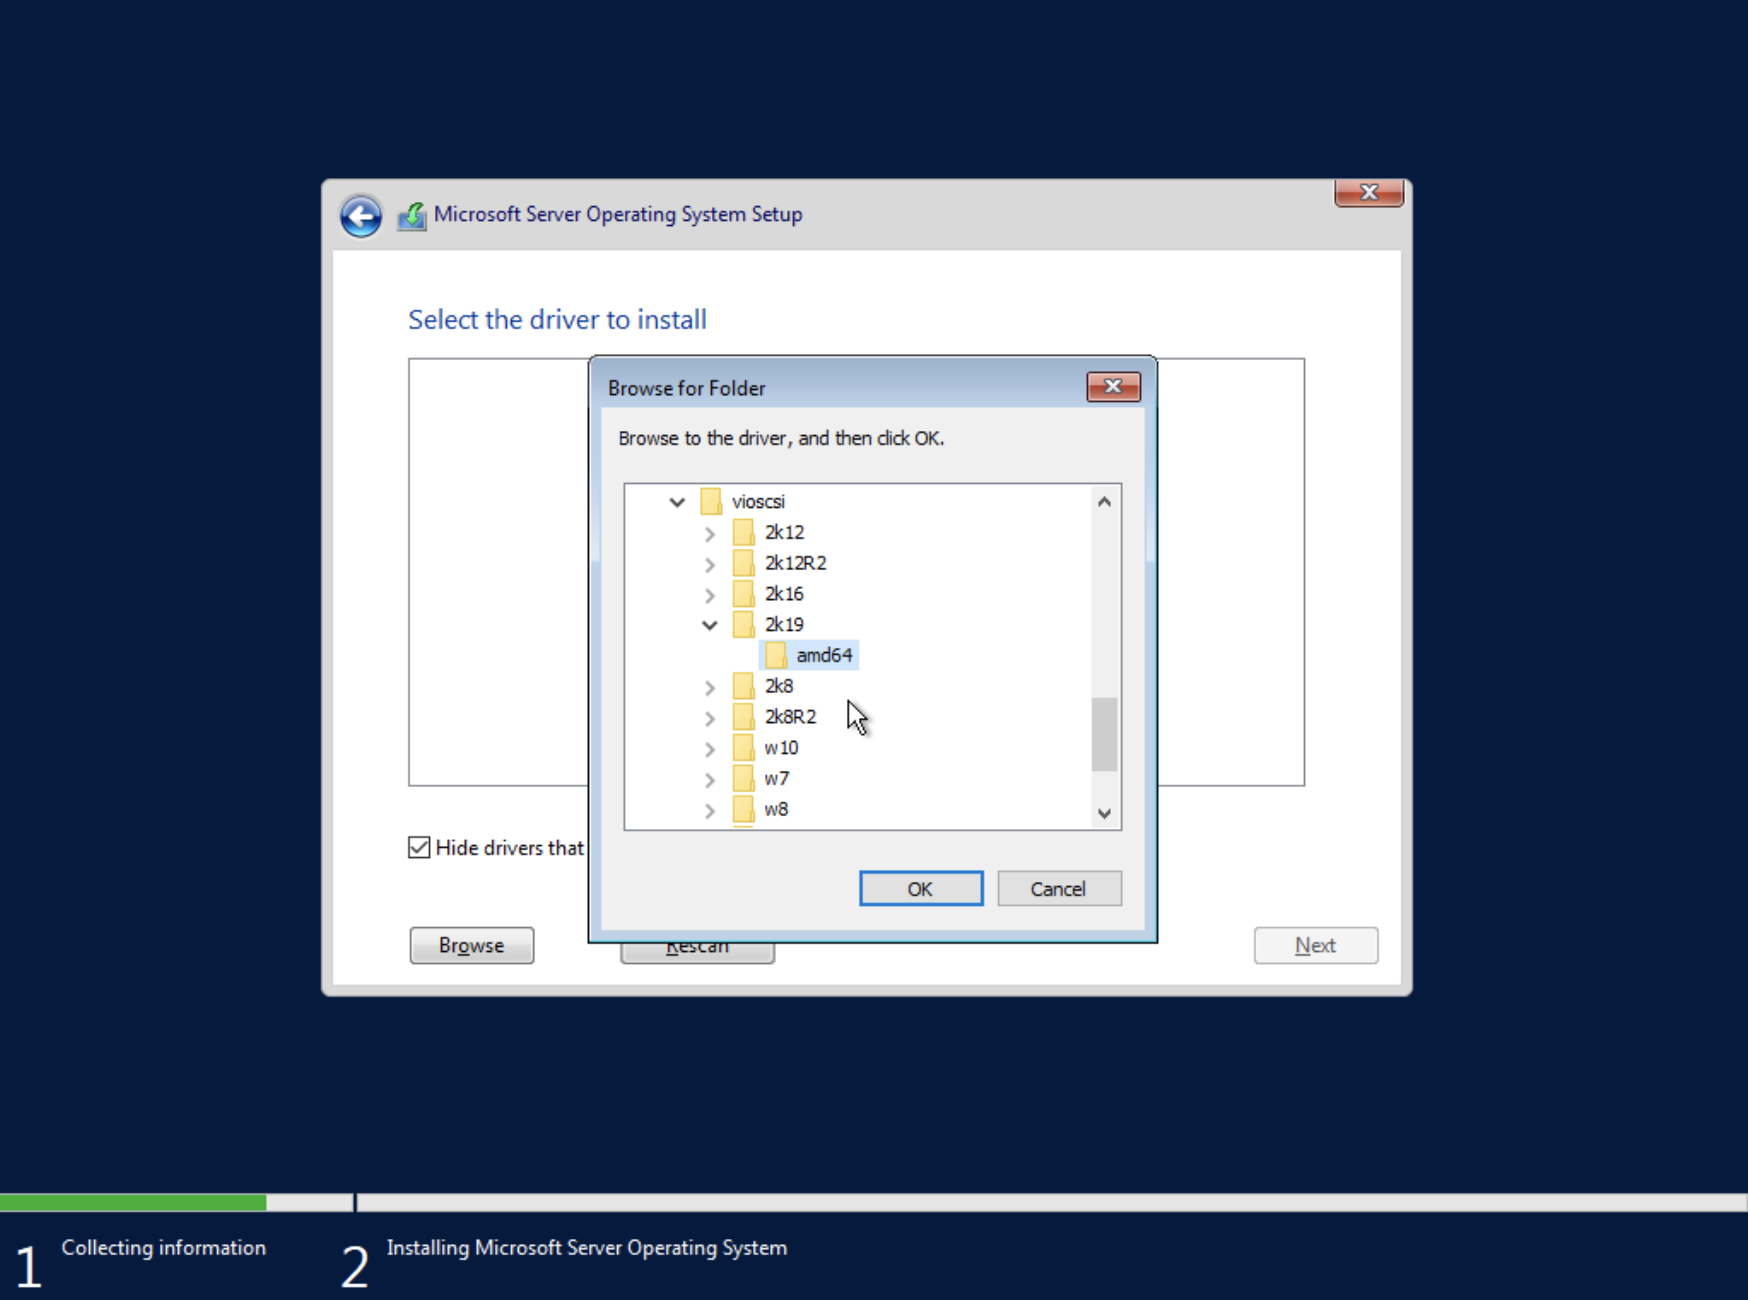
Let’s install the Hard disk drivers first. They are located here vioscsi\2k19\amd64. I’m using the 2019 ones as the 2022 drivers are not yet available. Let’s hope this will work.
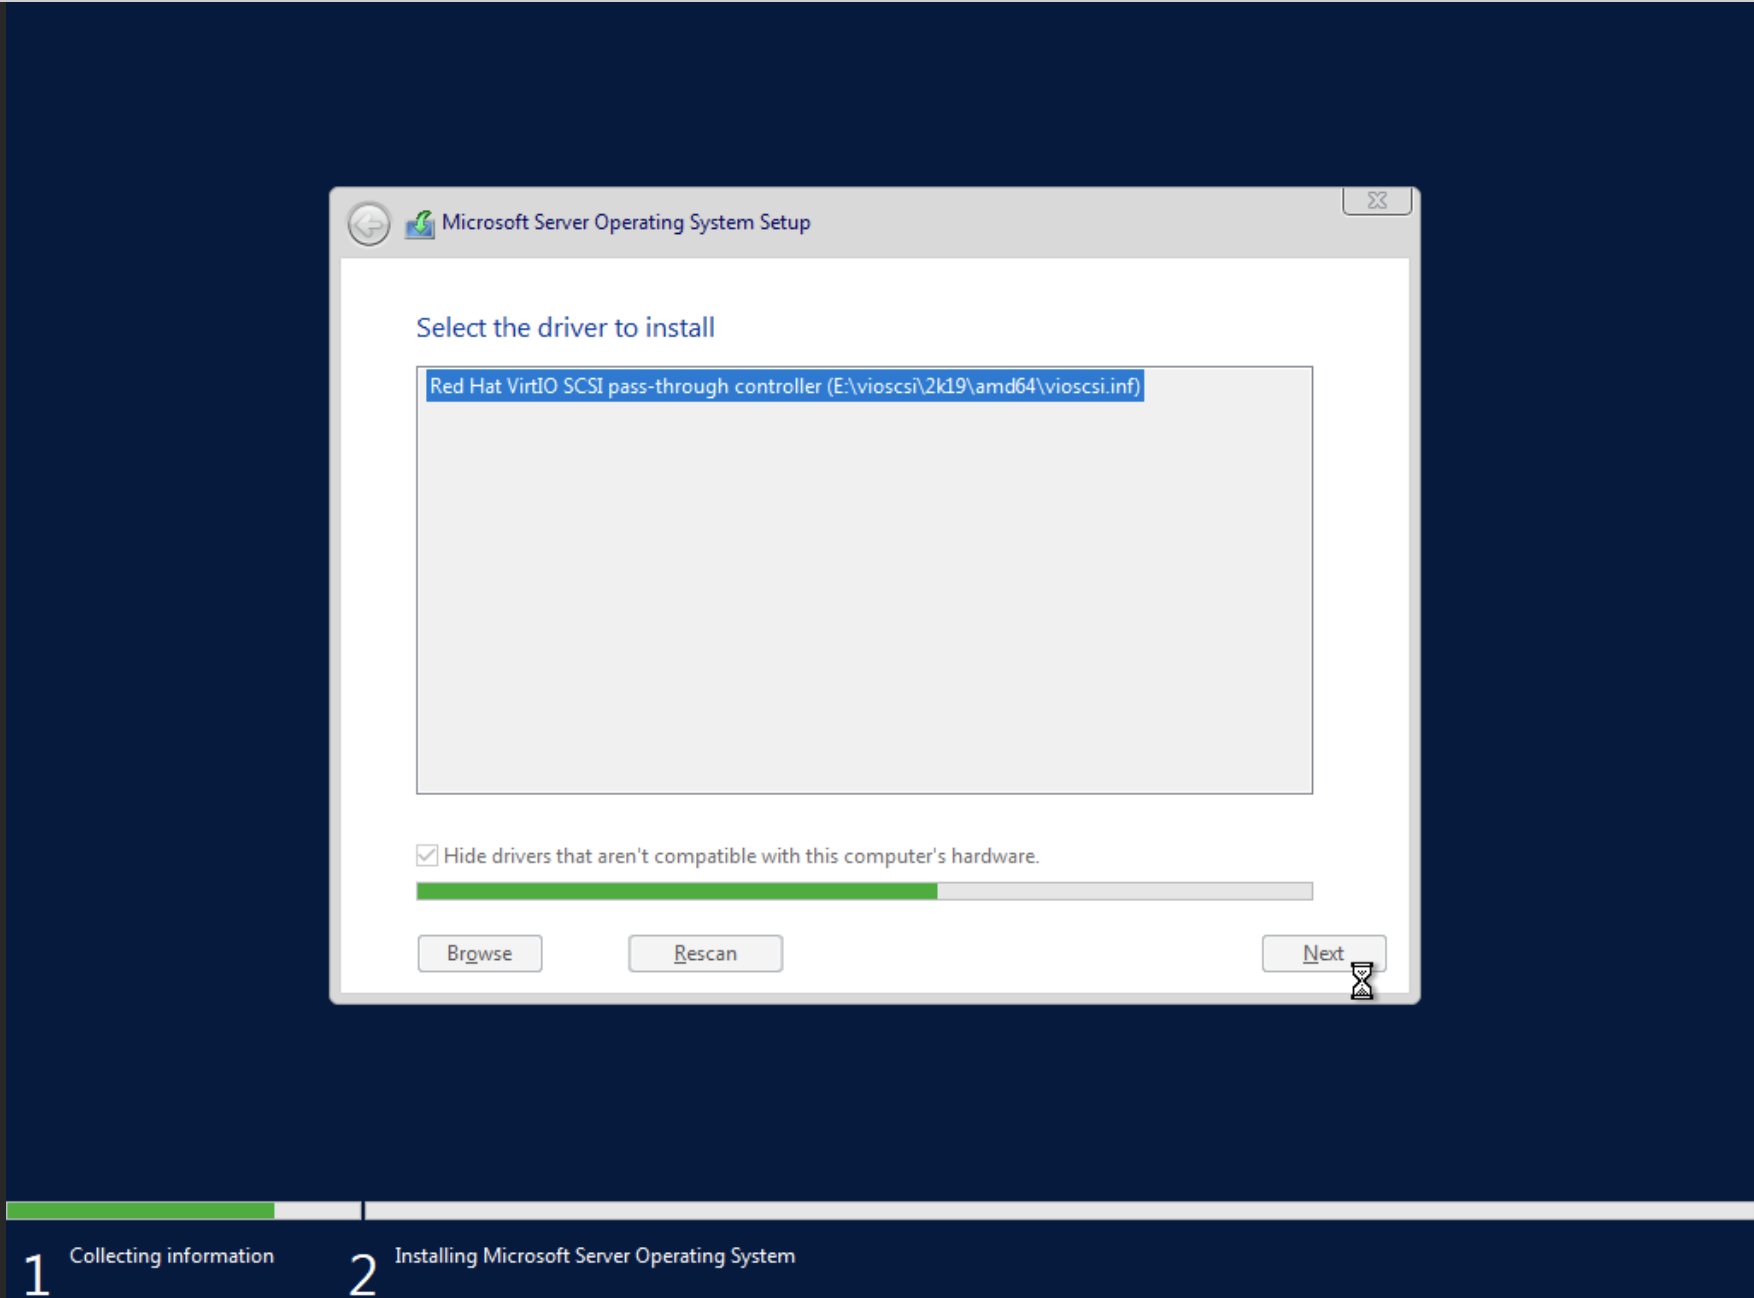
We can now see the drive.

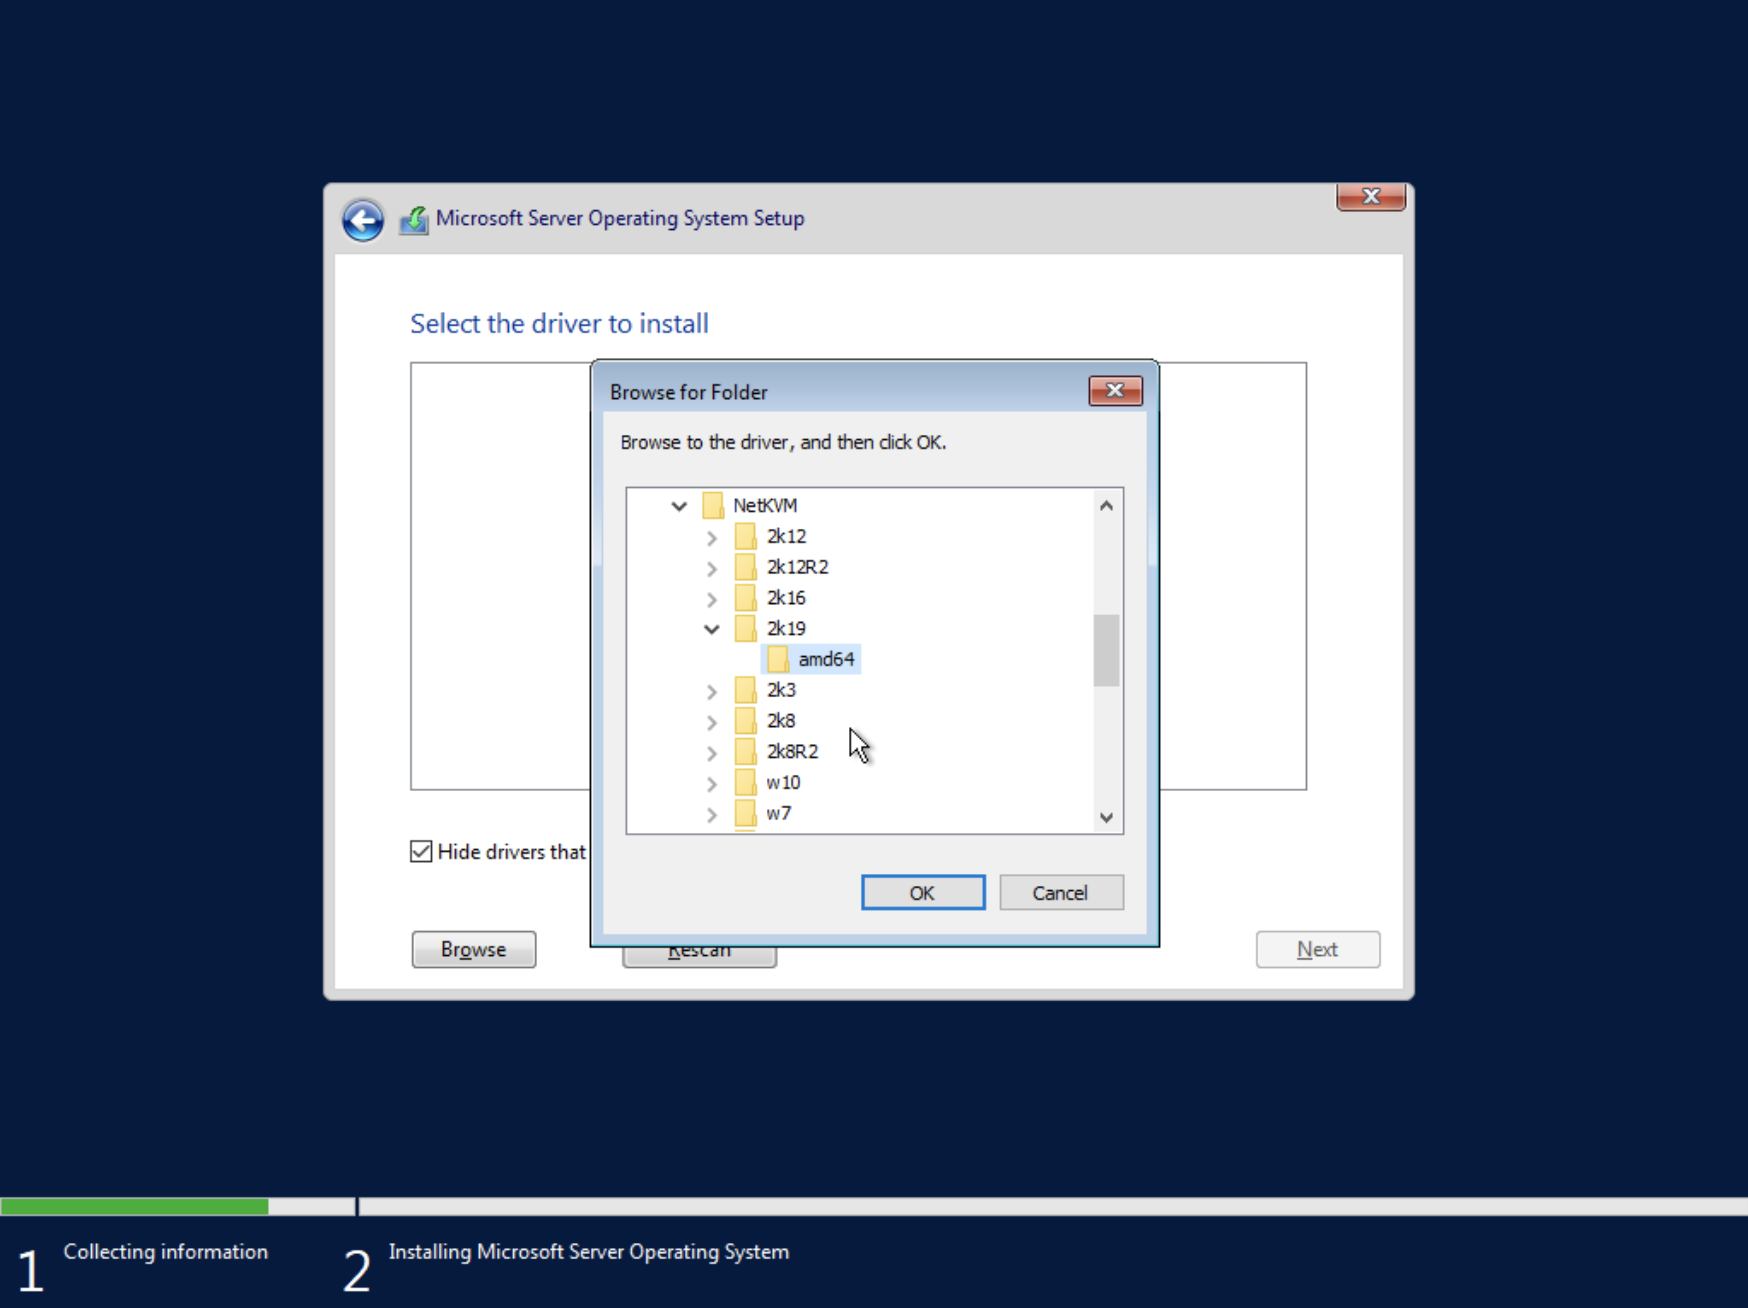
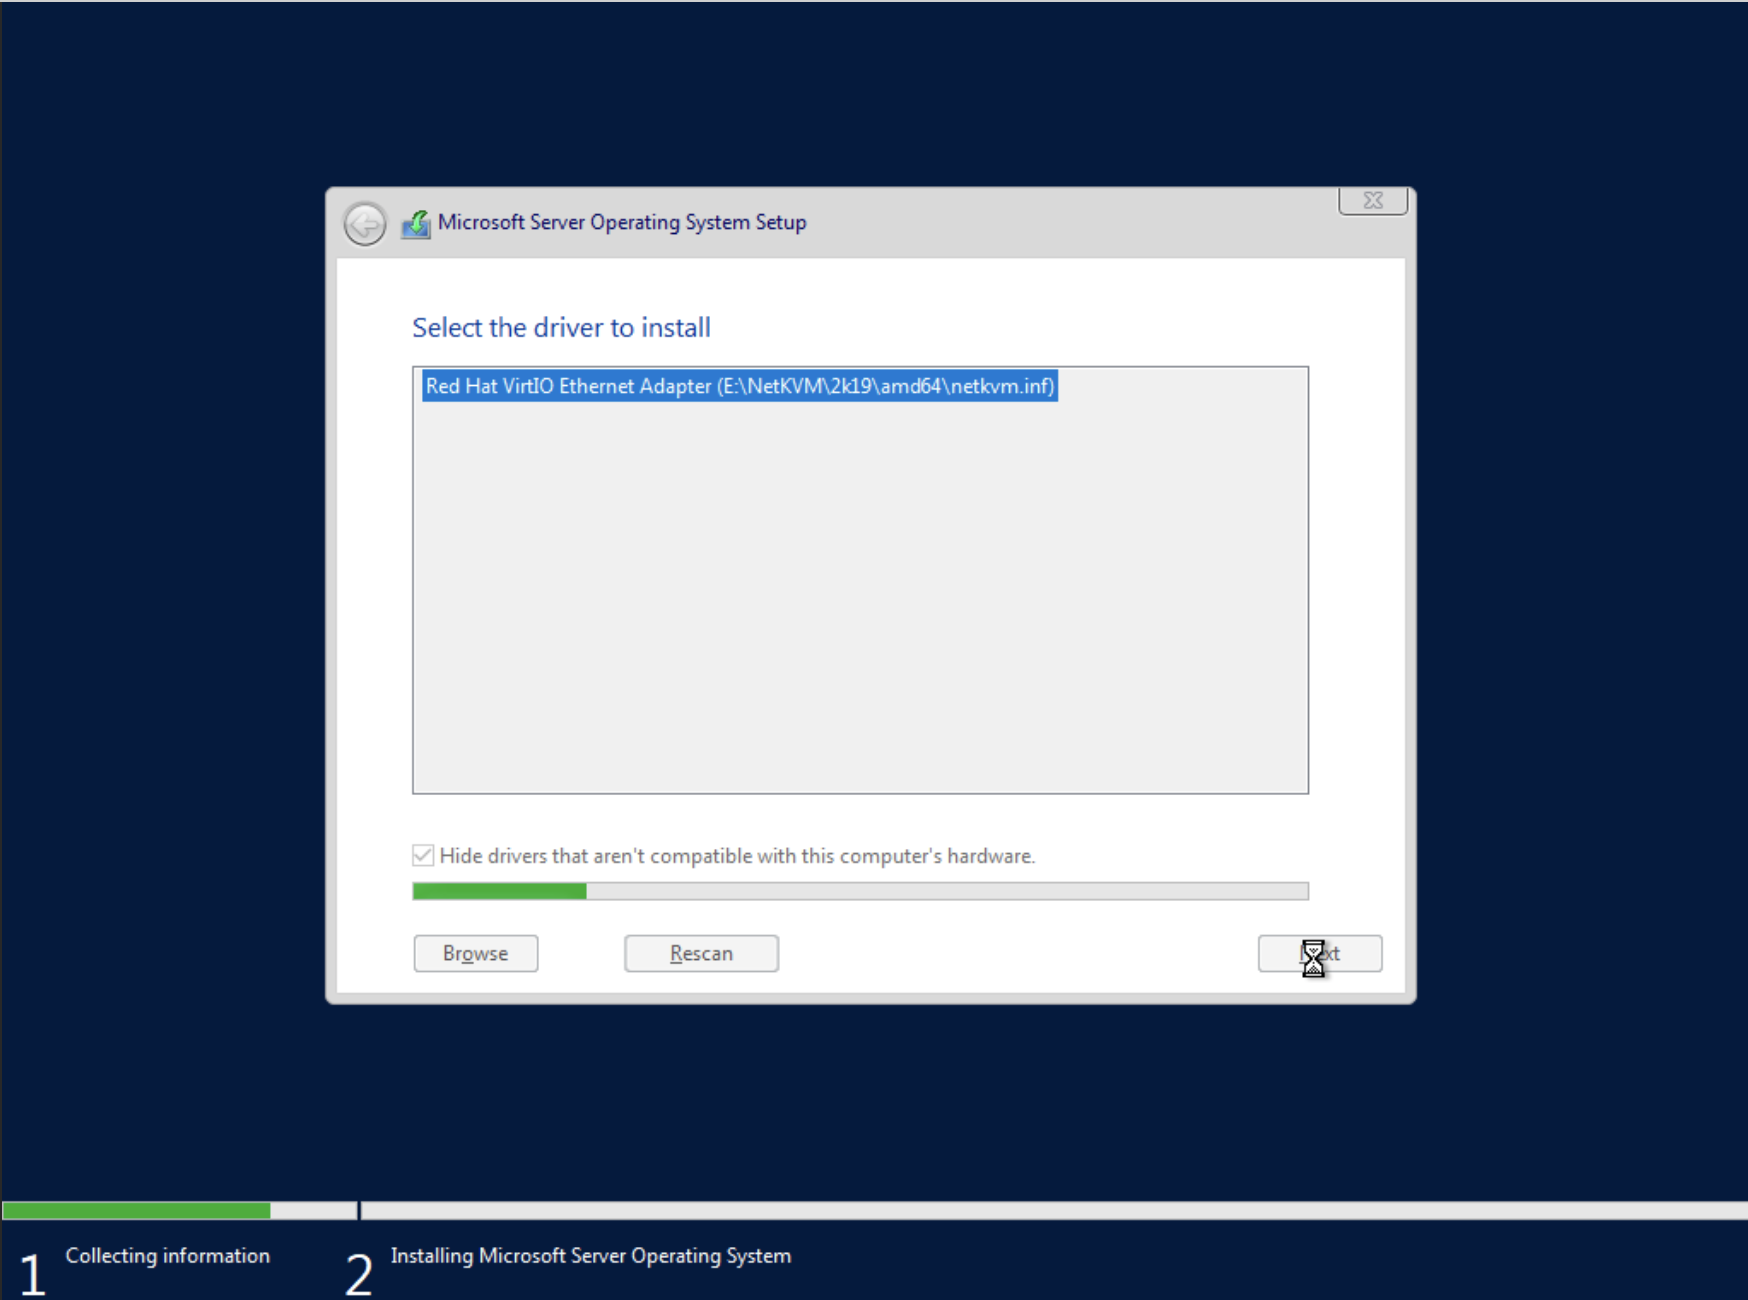
We also need to install the Network drivers same way as for the drivers. Let’s click load driver and navigate to NetKVM\2k19\amd64.
Lastly, we need to install the drivers for memory ballooning. Let’s load drivers and navigate to Balloon\2k19\amd64.


We are now set to proceed. Choose the drive and continue installing windows.

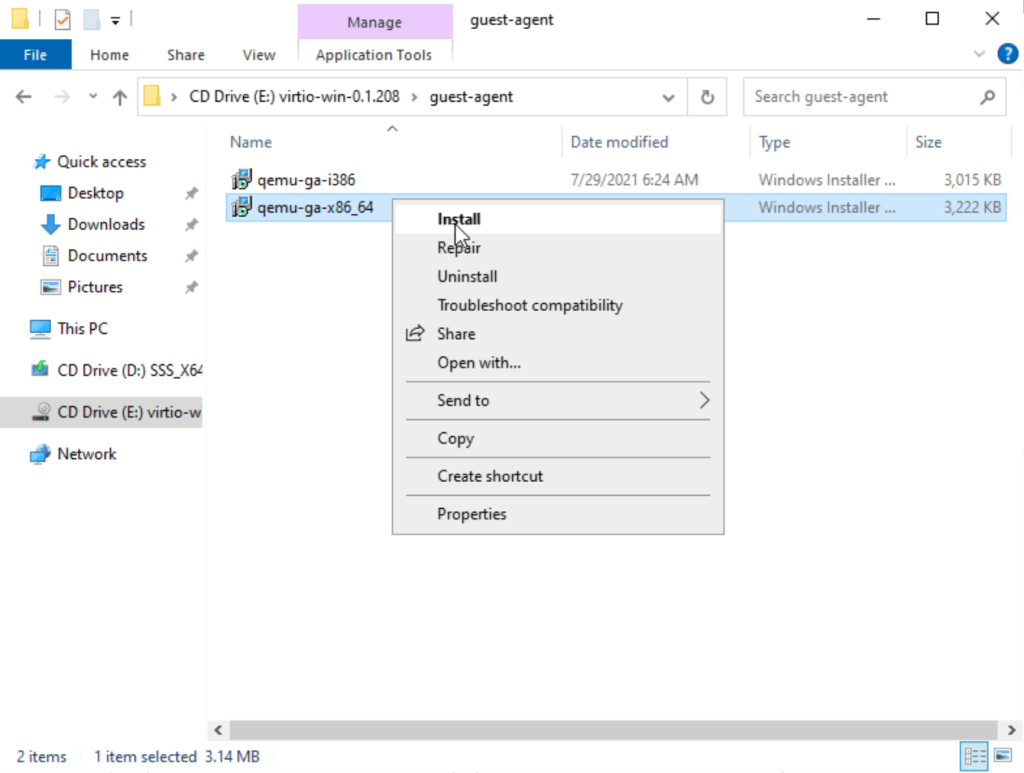
Once we successfully log in to the VM, let’s install the guest agent to fix the inaccurate mouse pointer.
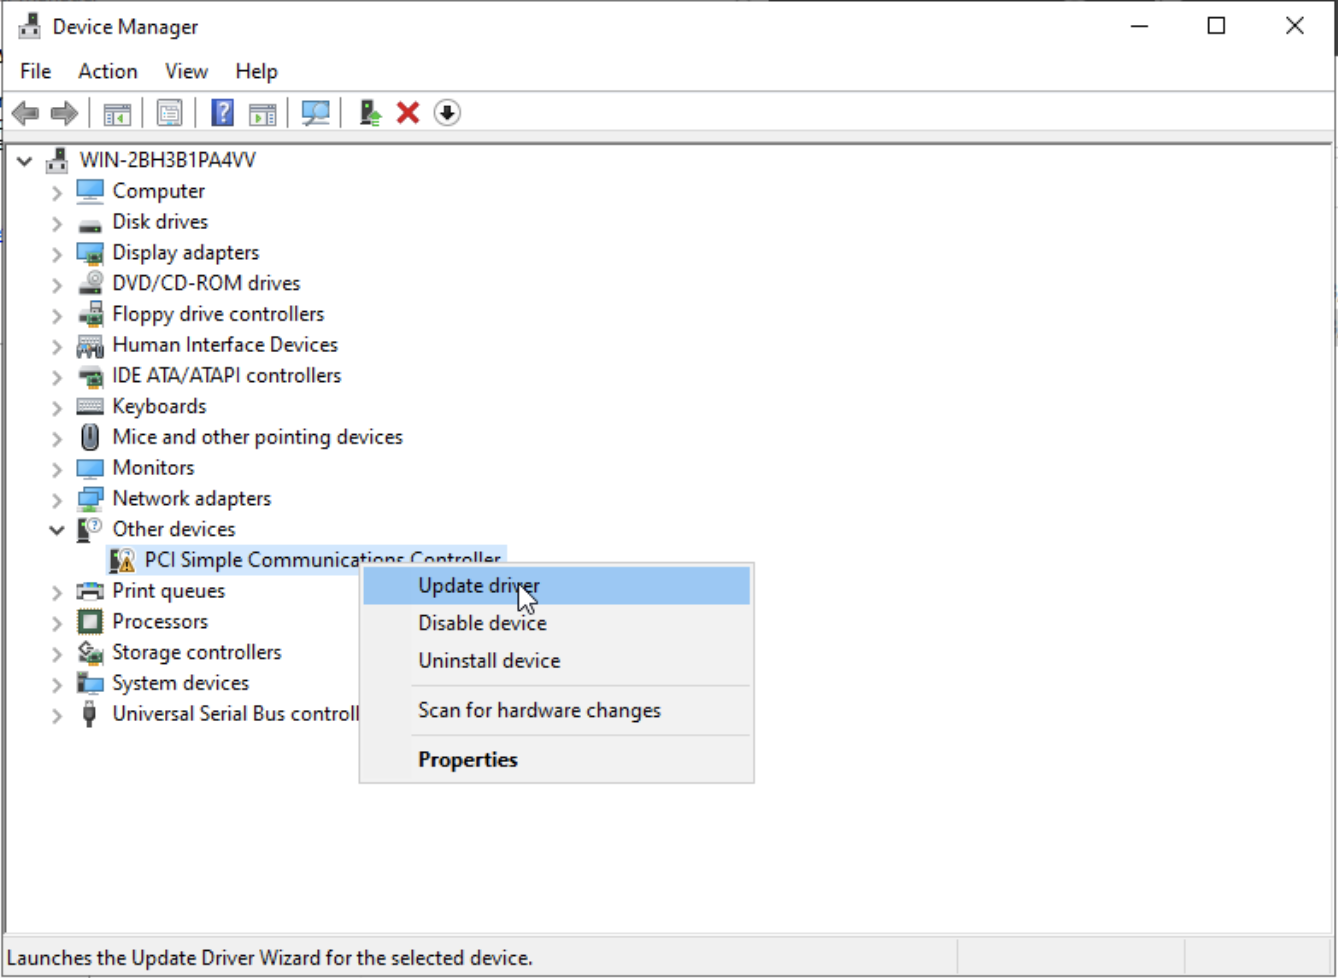
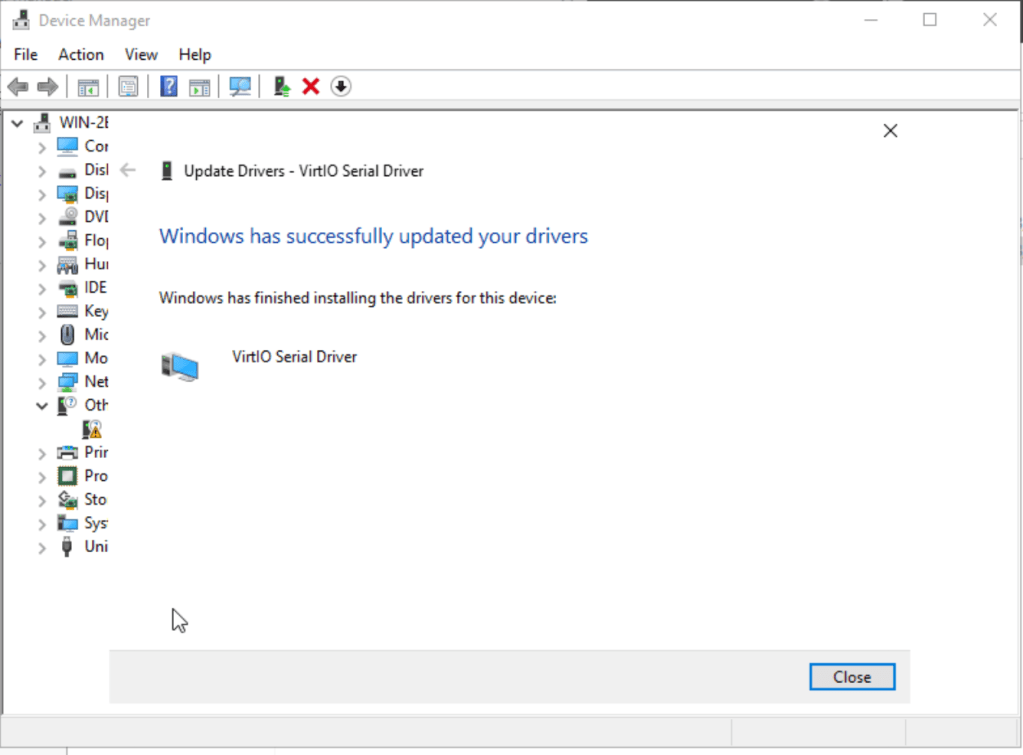
Next, let’s check and see if there are any missing drivers in Device Manager. To fix any issues, simply click on update driver and navigate to the virt-io driver location.
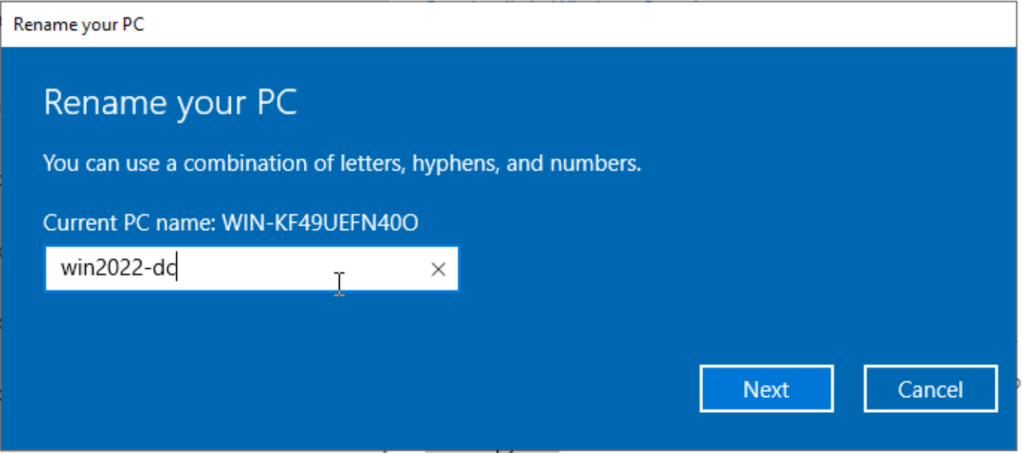
Next, let’s give the computer a proper name. This can be done via Start > Computer > This PC > Right Click: Properties > Rename PC. You will need to reboot the computer for the change to take effect.
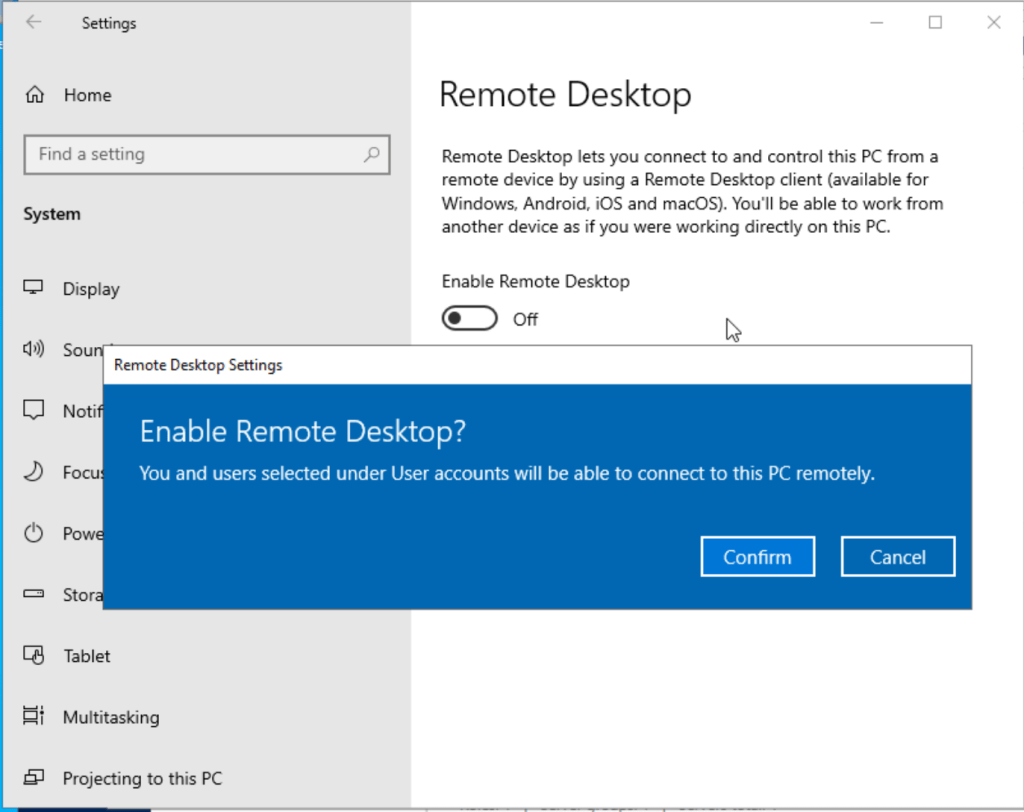
Let’s make sure we can connect to the VM via RDP. Search for Remote Desktop Settings. Click Enable Remote Desktop and confirm.
Once that is done, we can access the machine remotely via RDP.
Domain Controller Role Setup
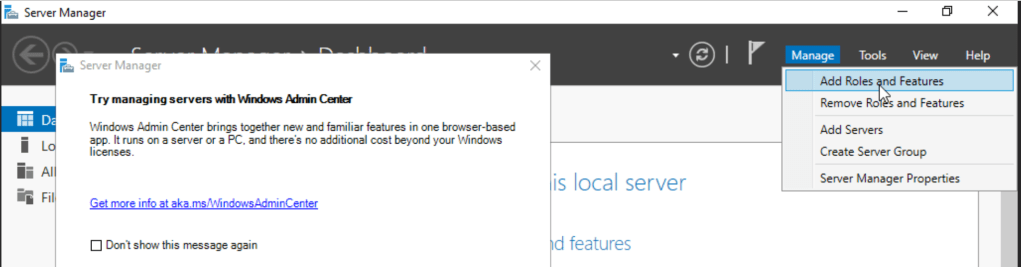
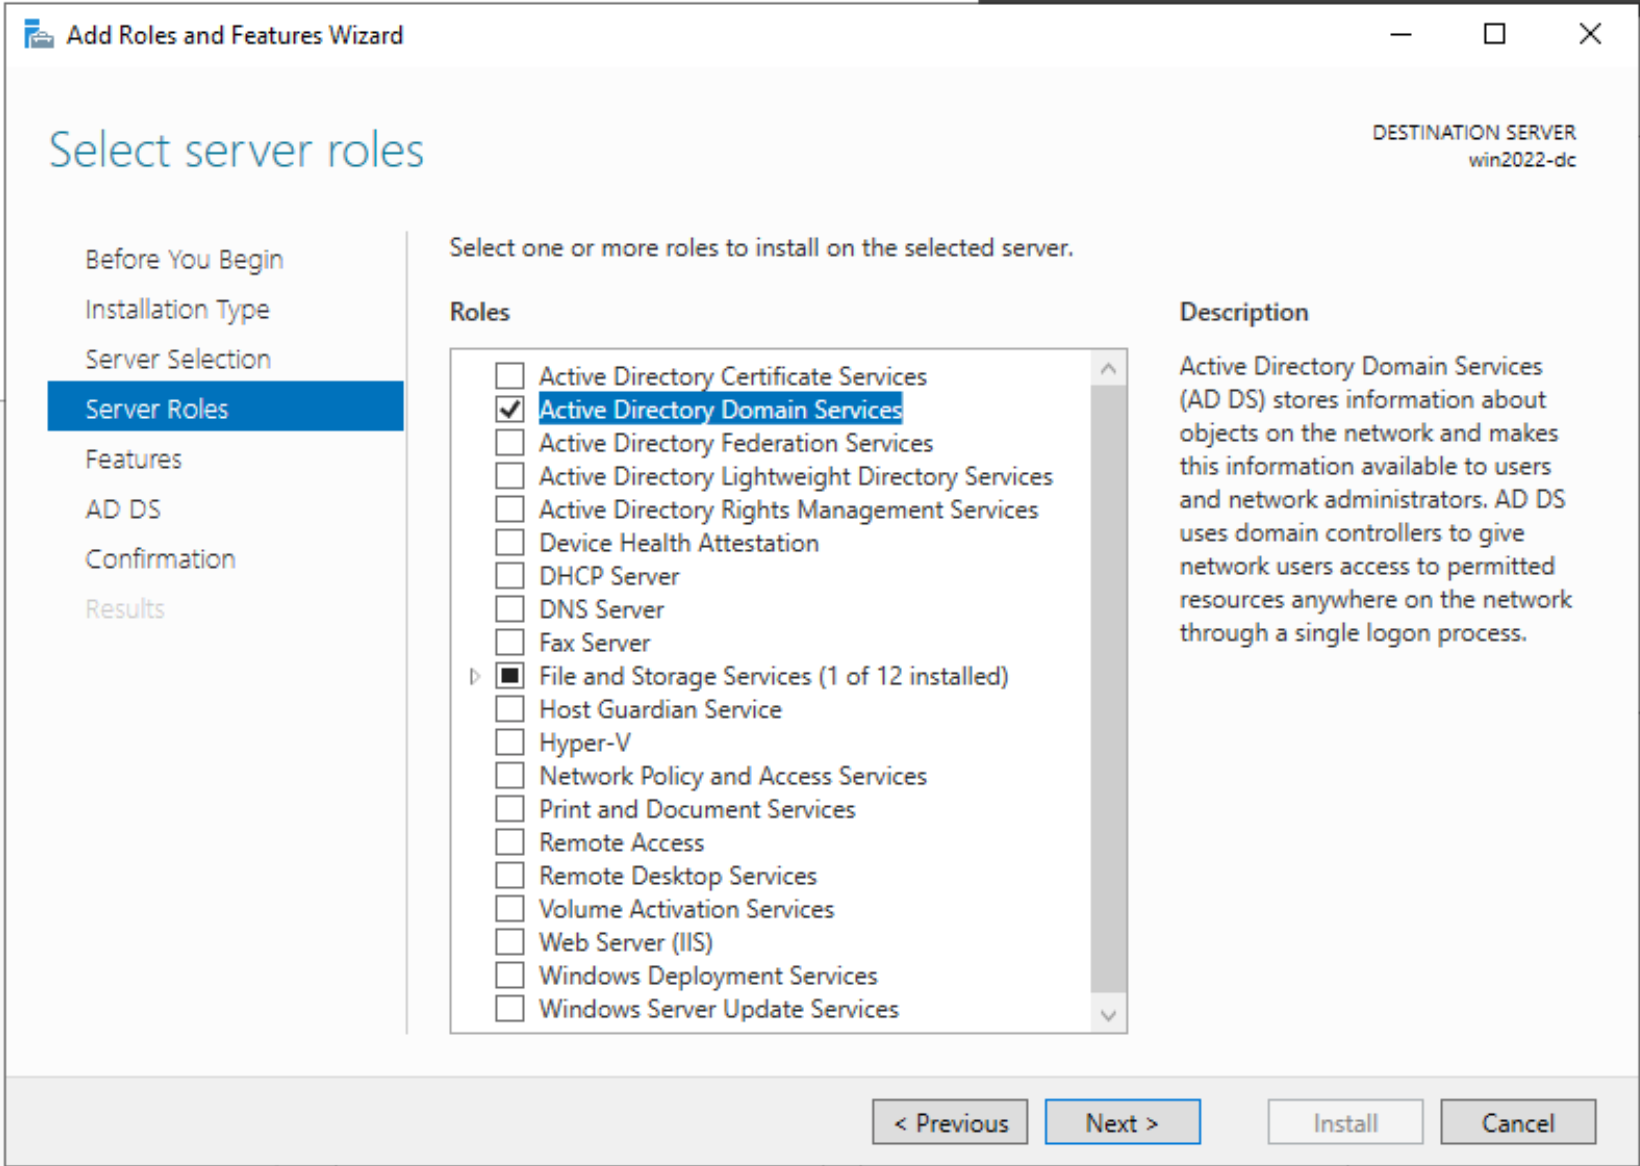
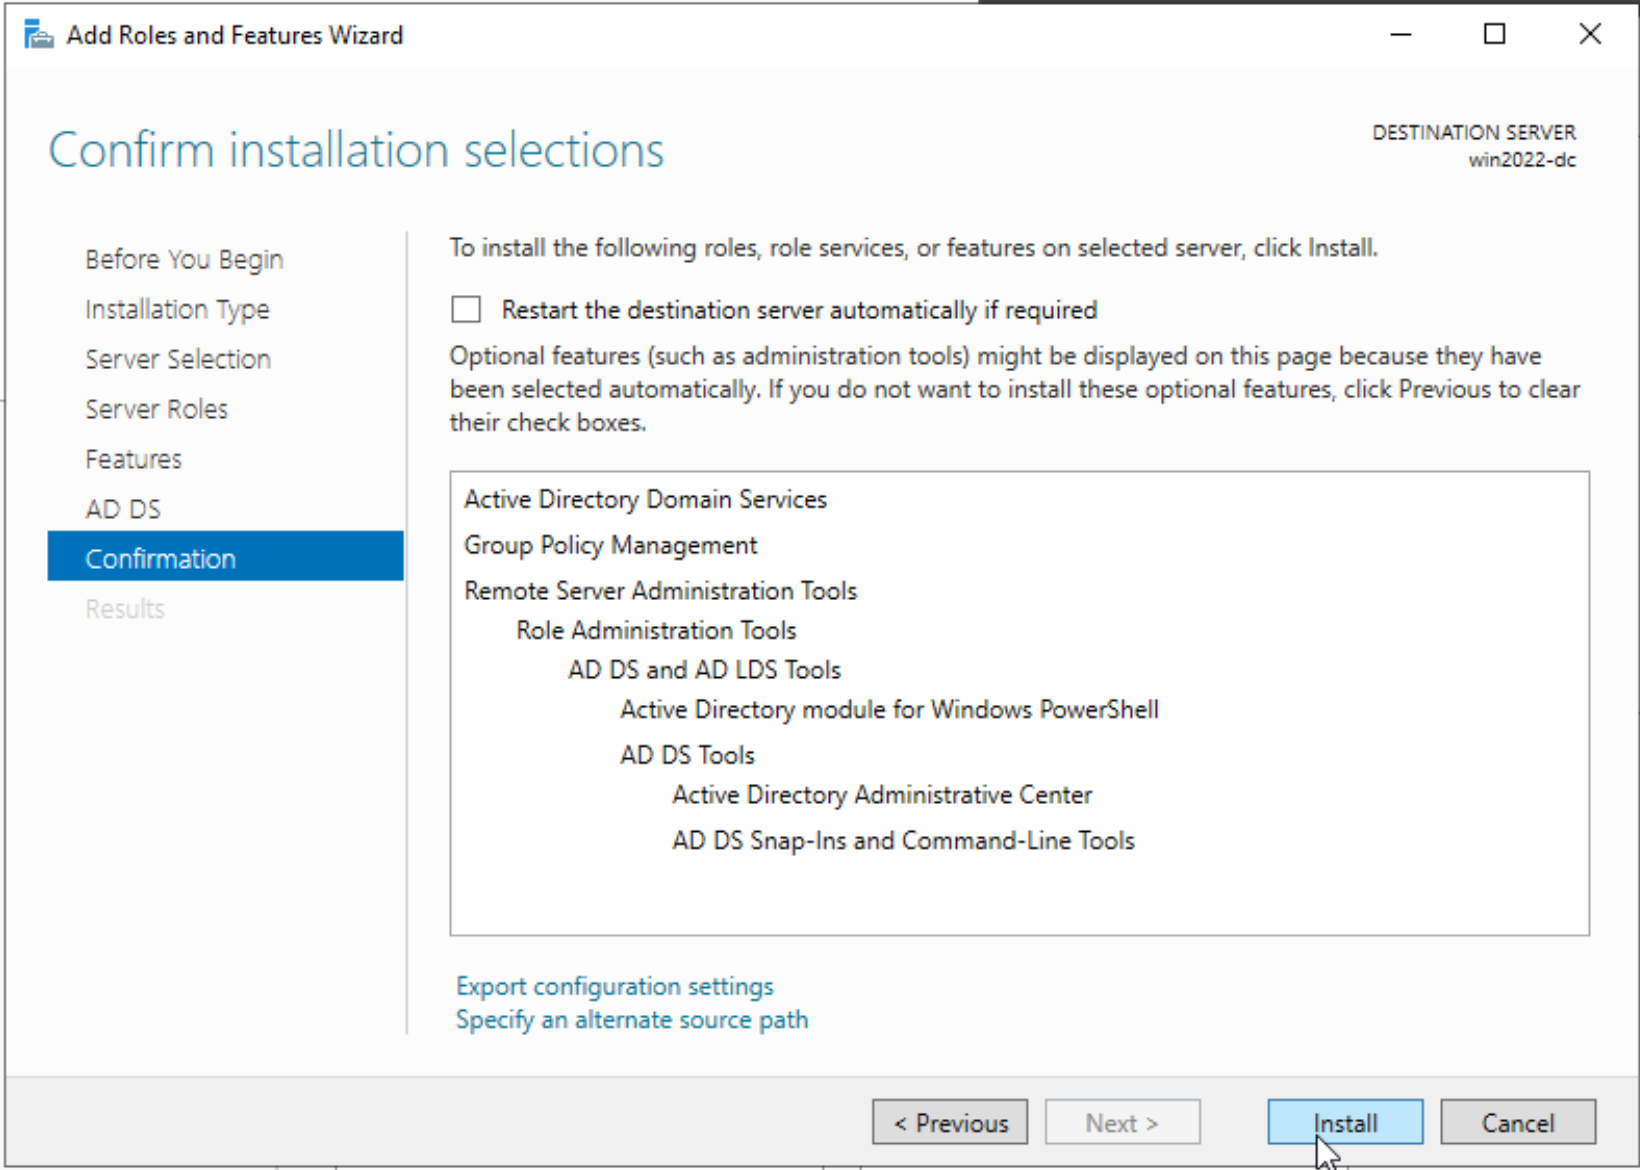
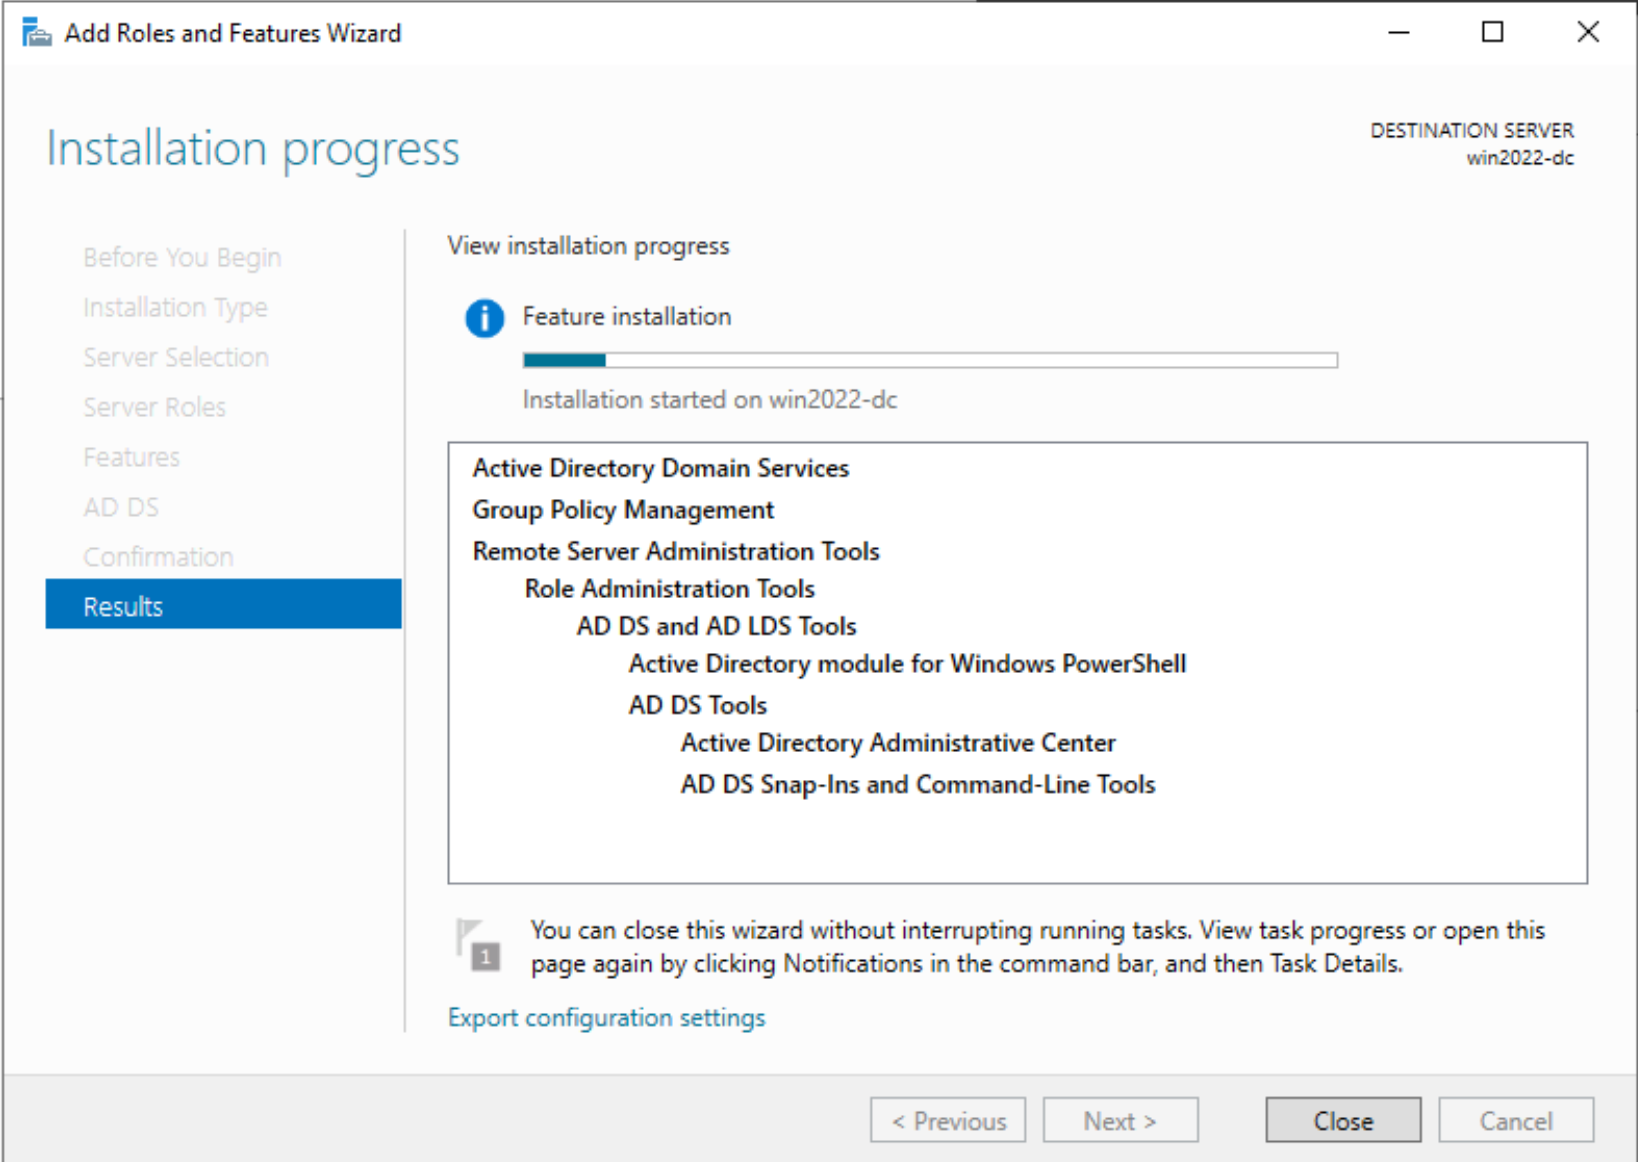
Next, we will install the Domain Controller. Let’s navigate to Server Manager > Manage > Add Roles and Features
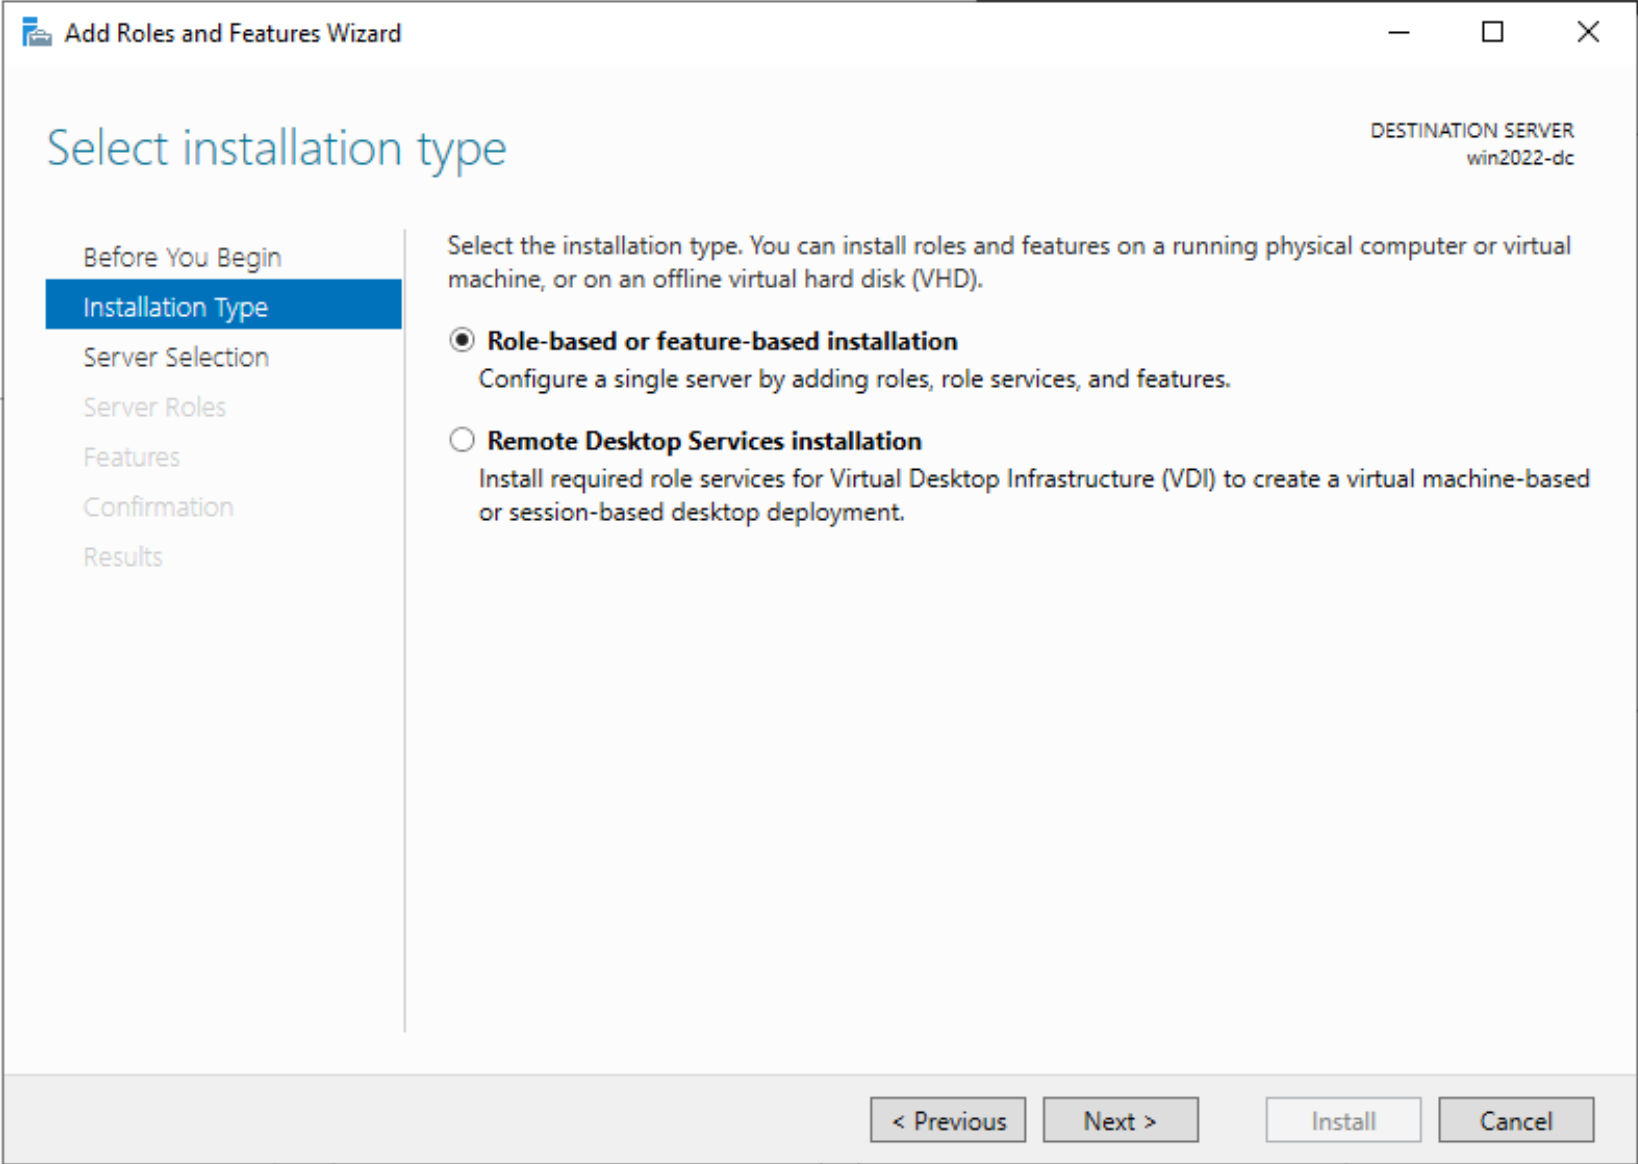
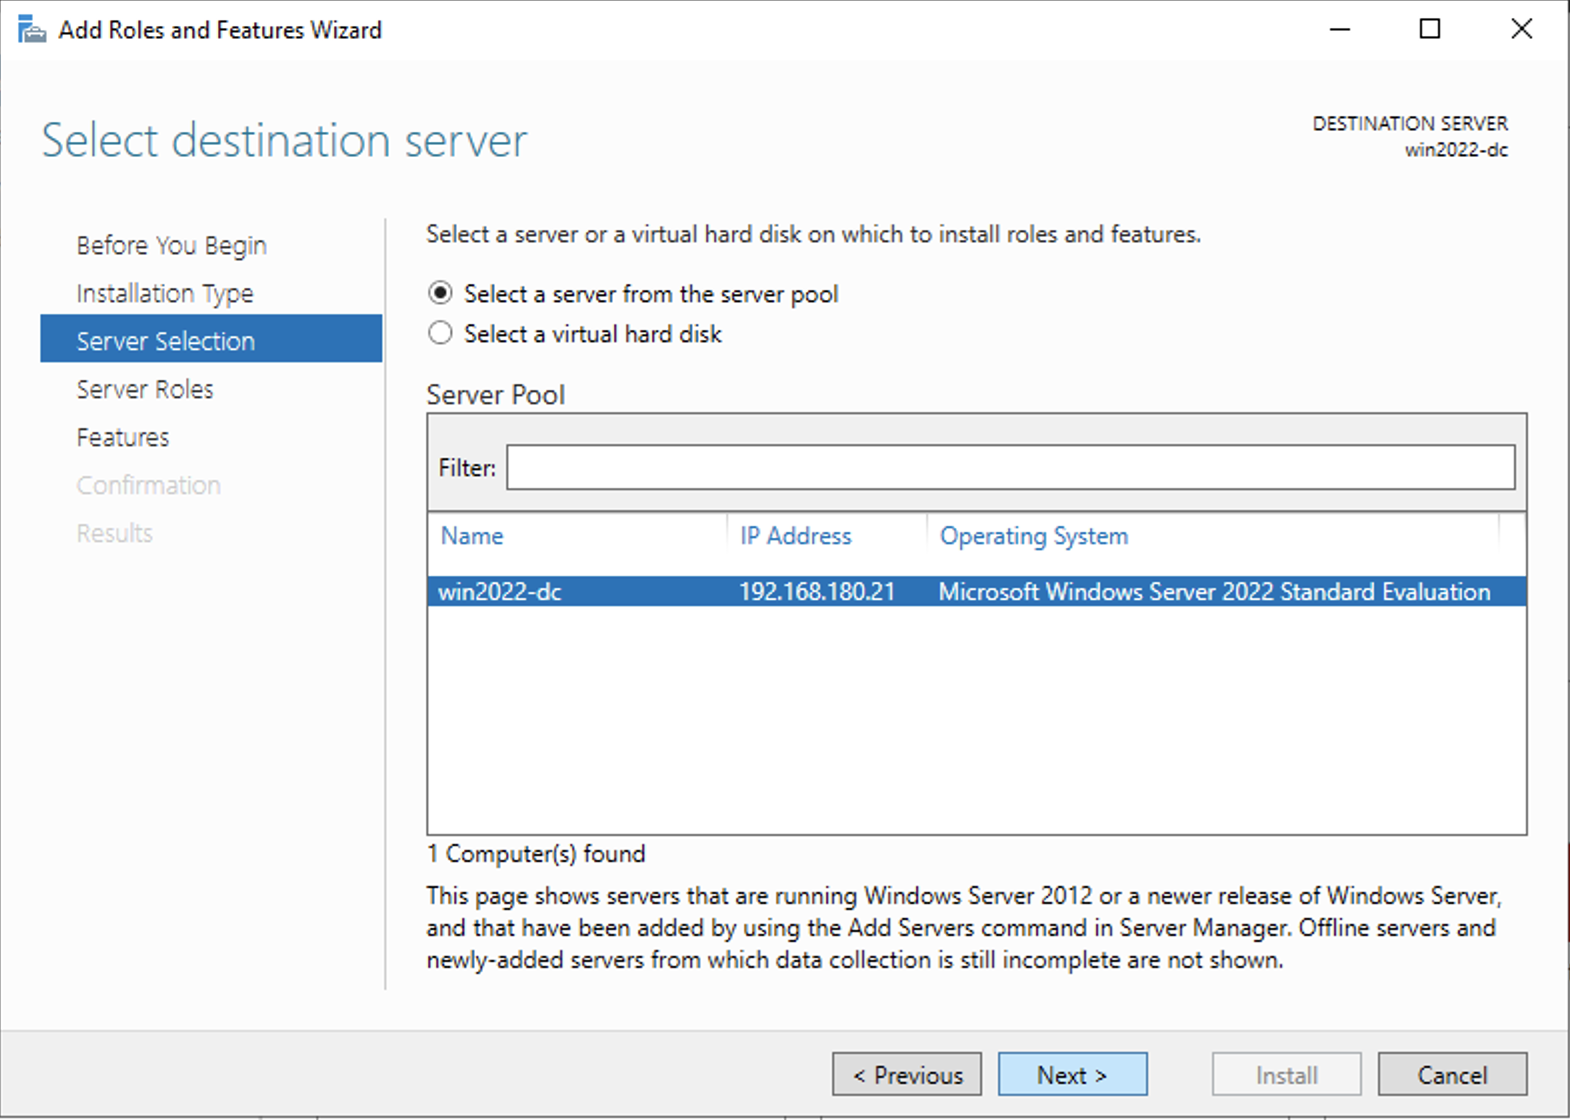
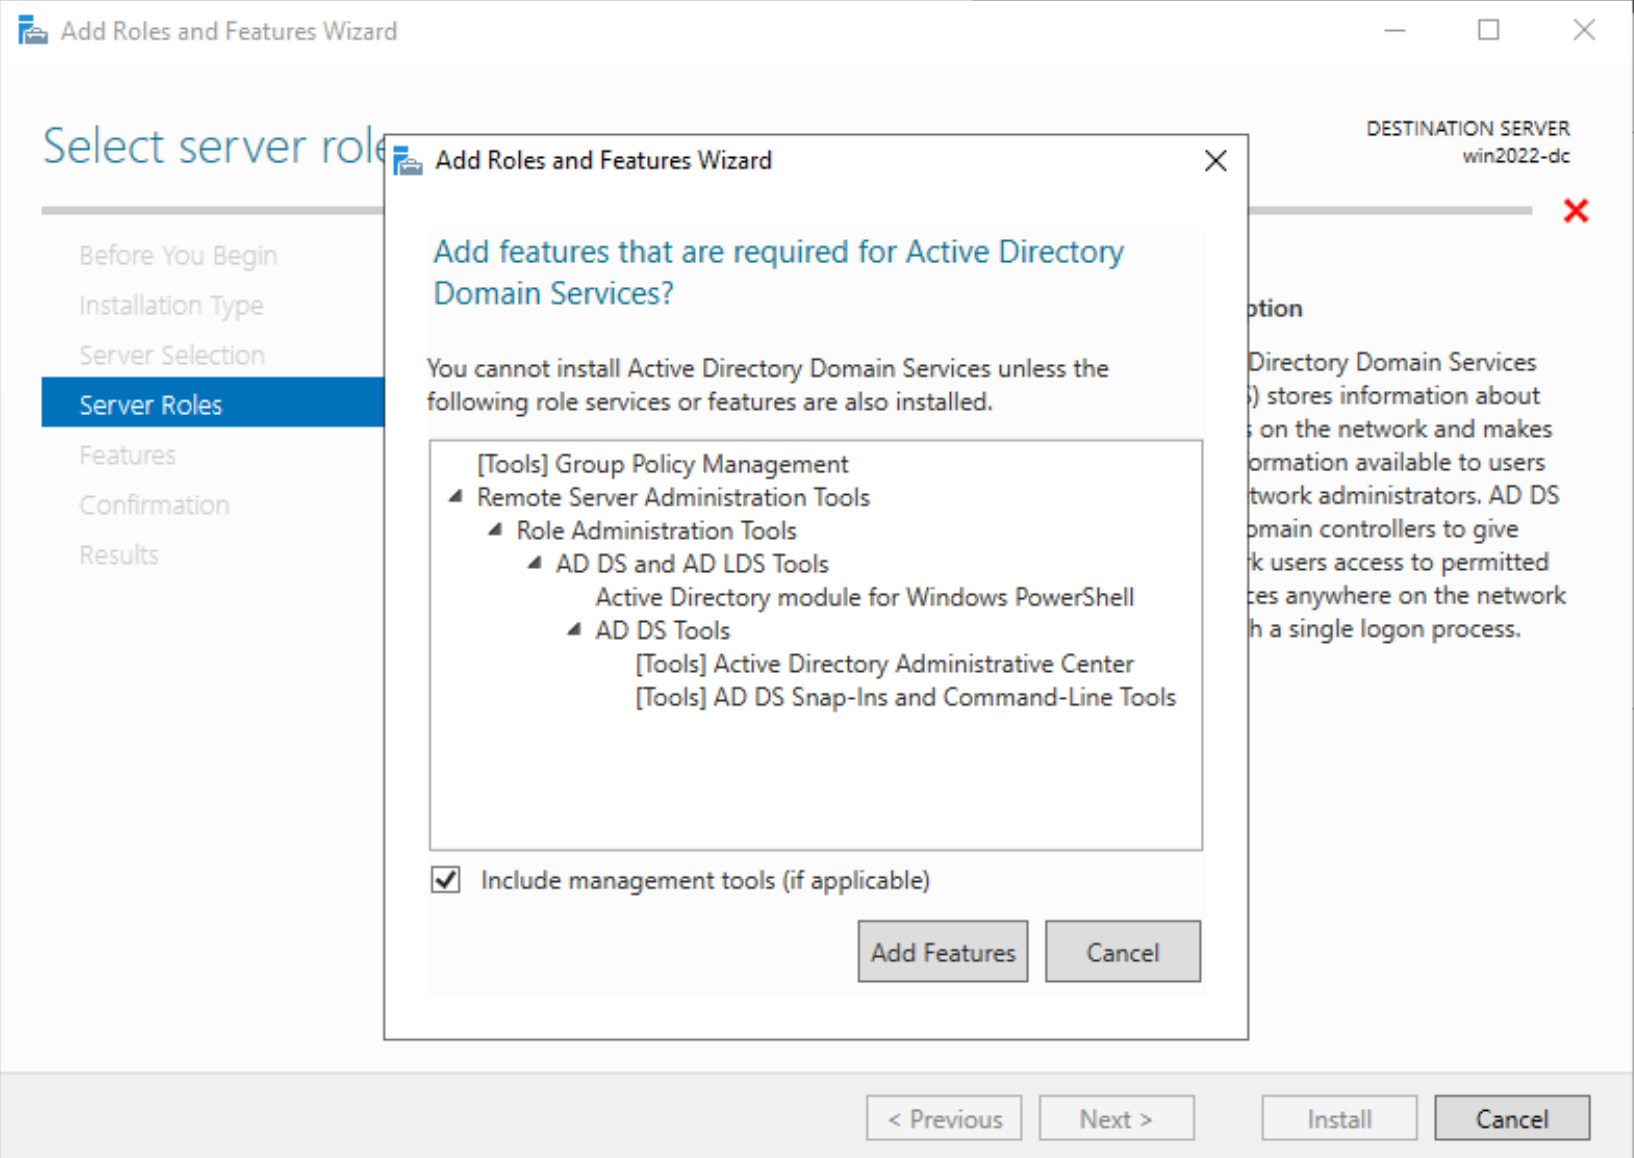
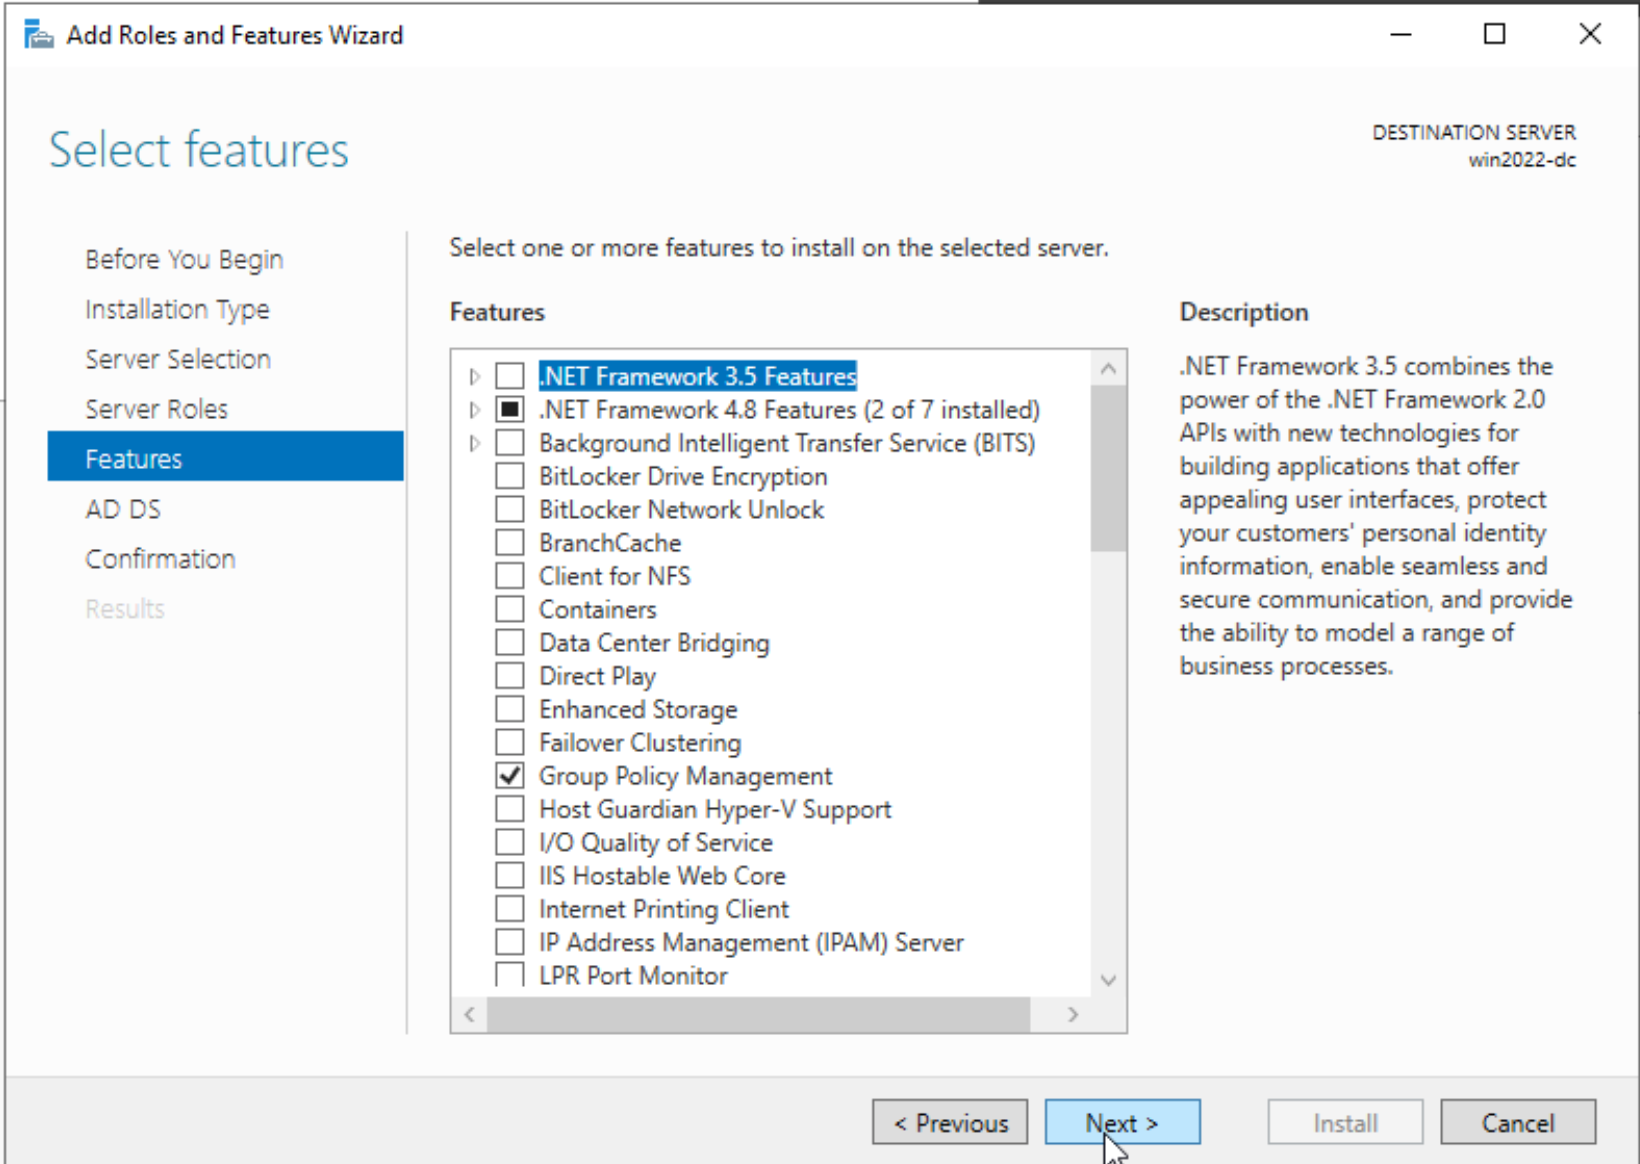
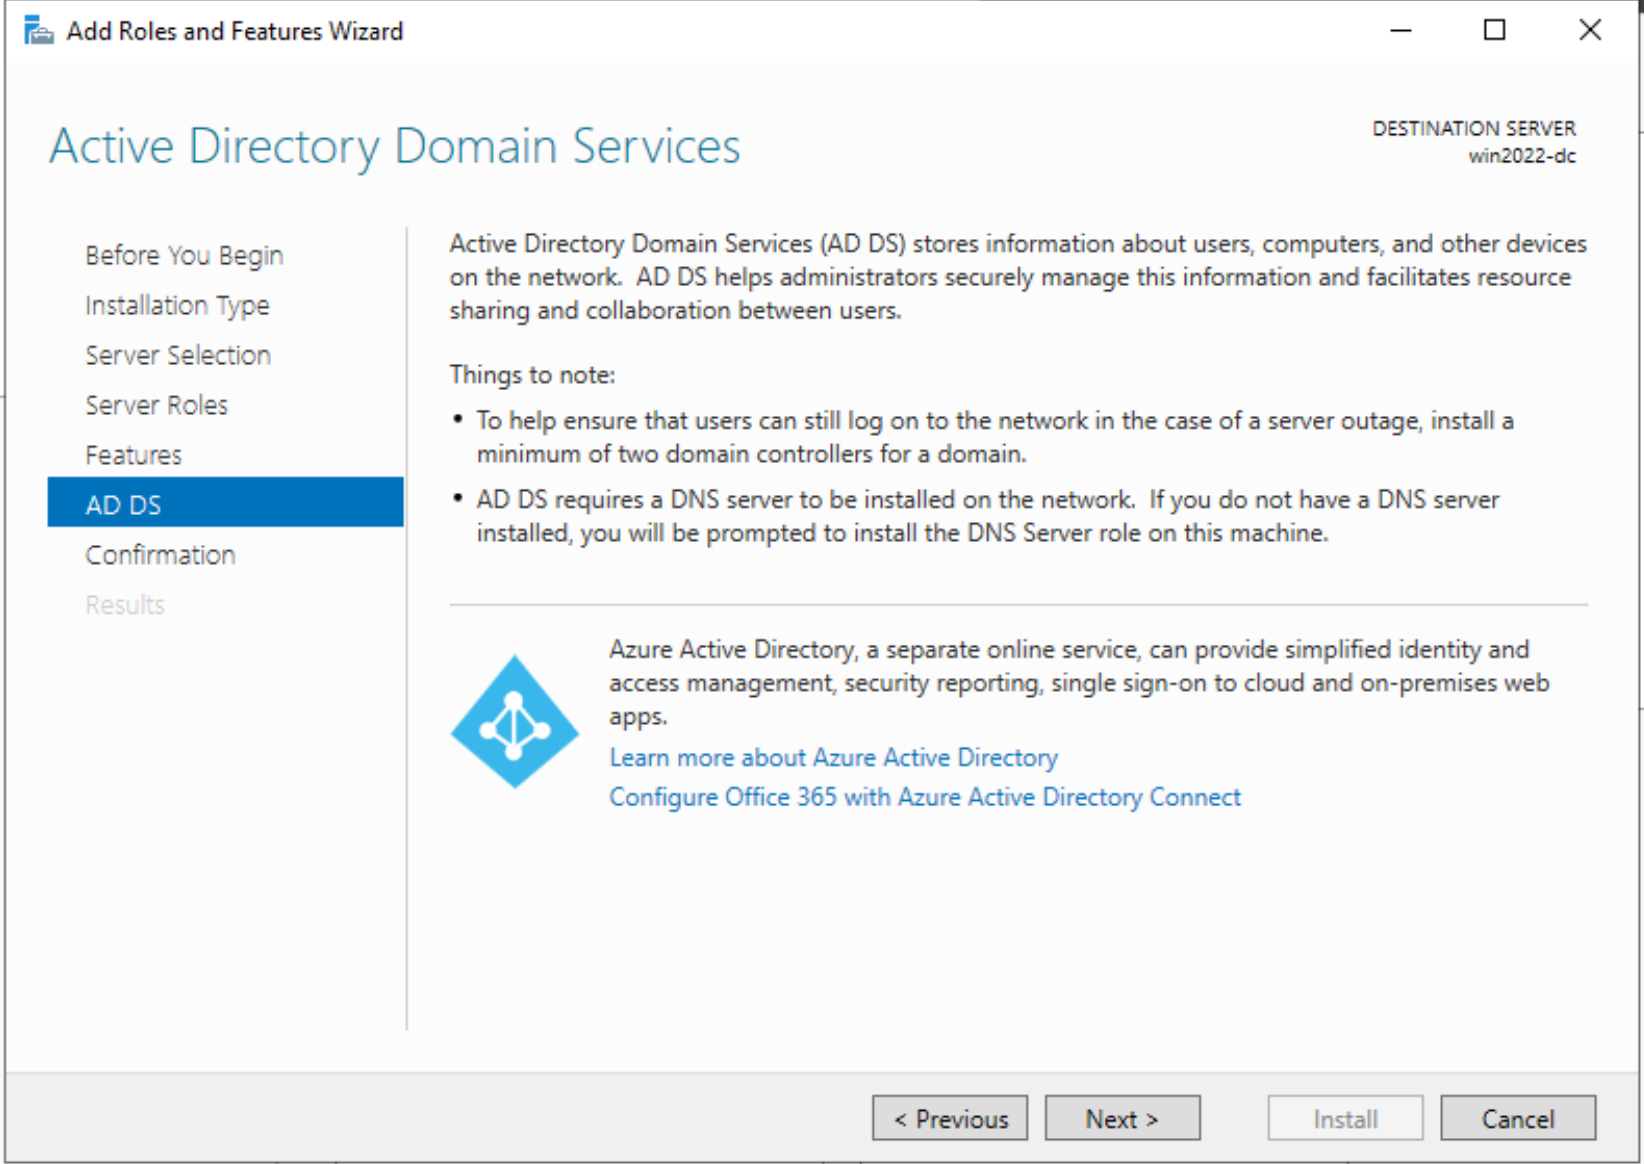
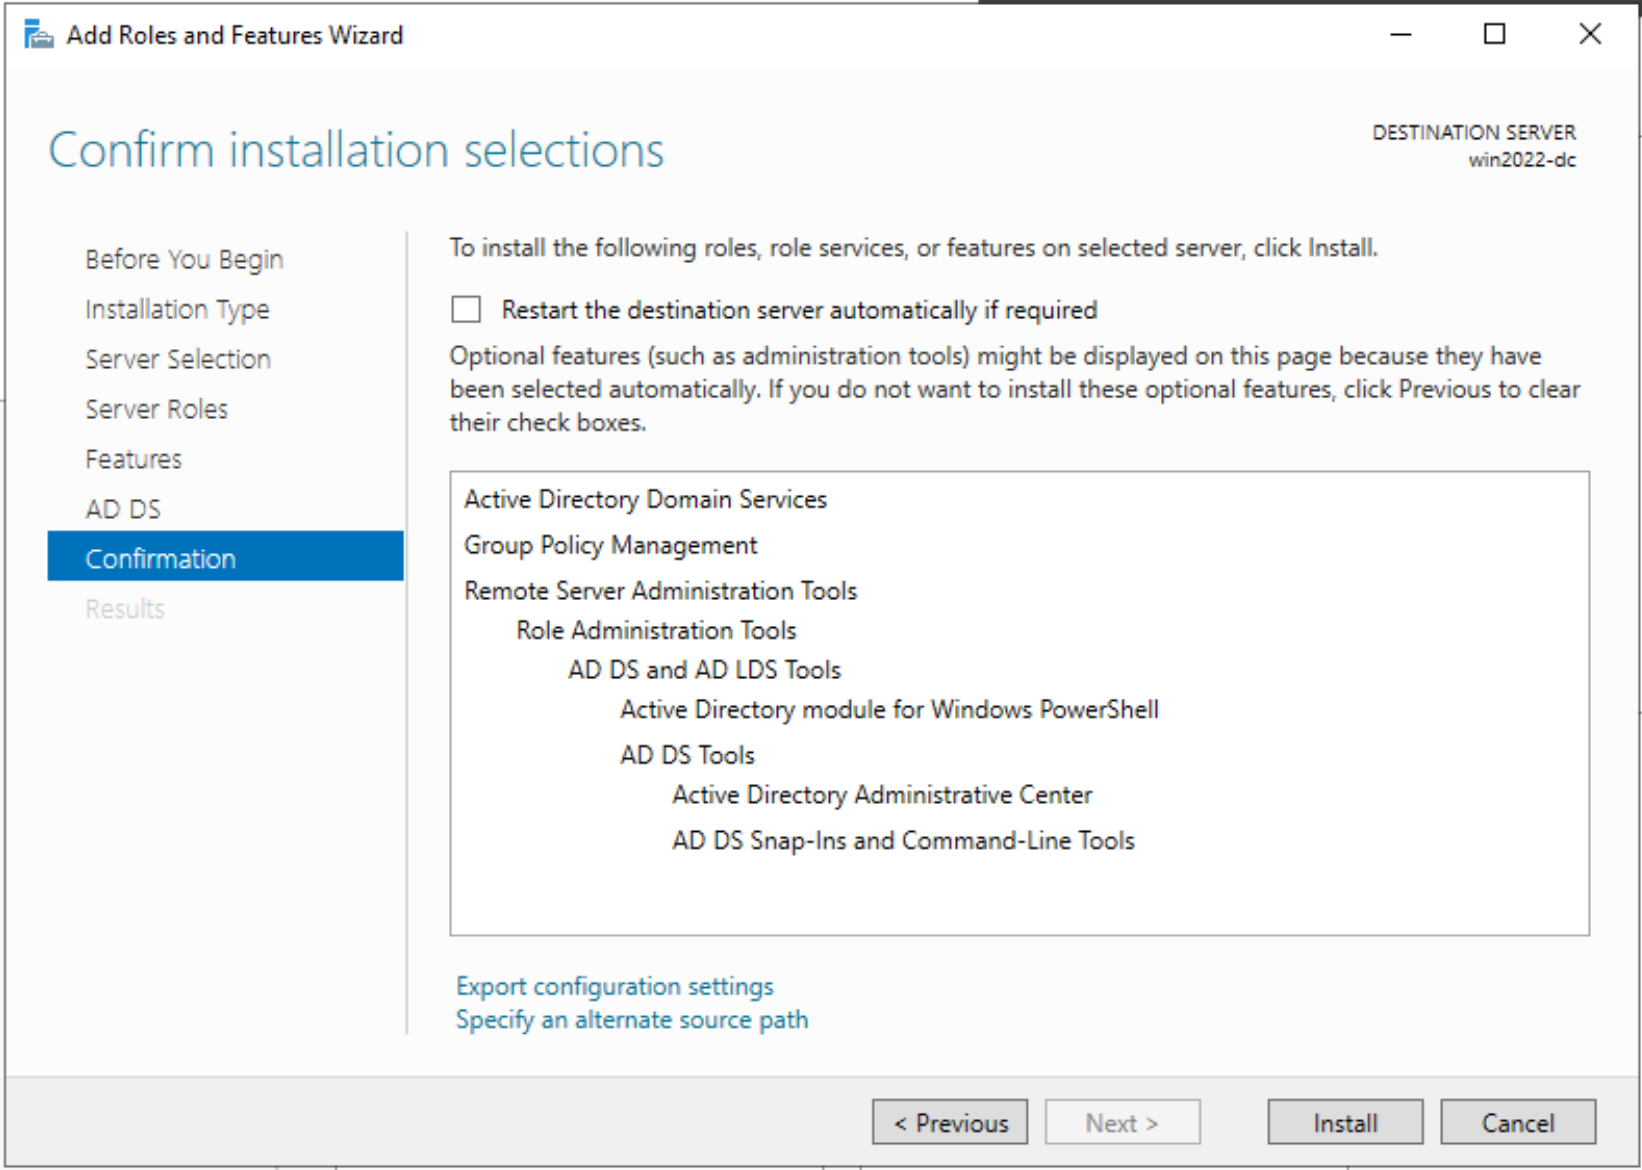
Follow the step by step wizard instructions to activate the domain controller role on this VM.


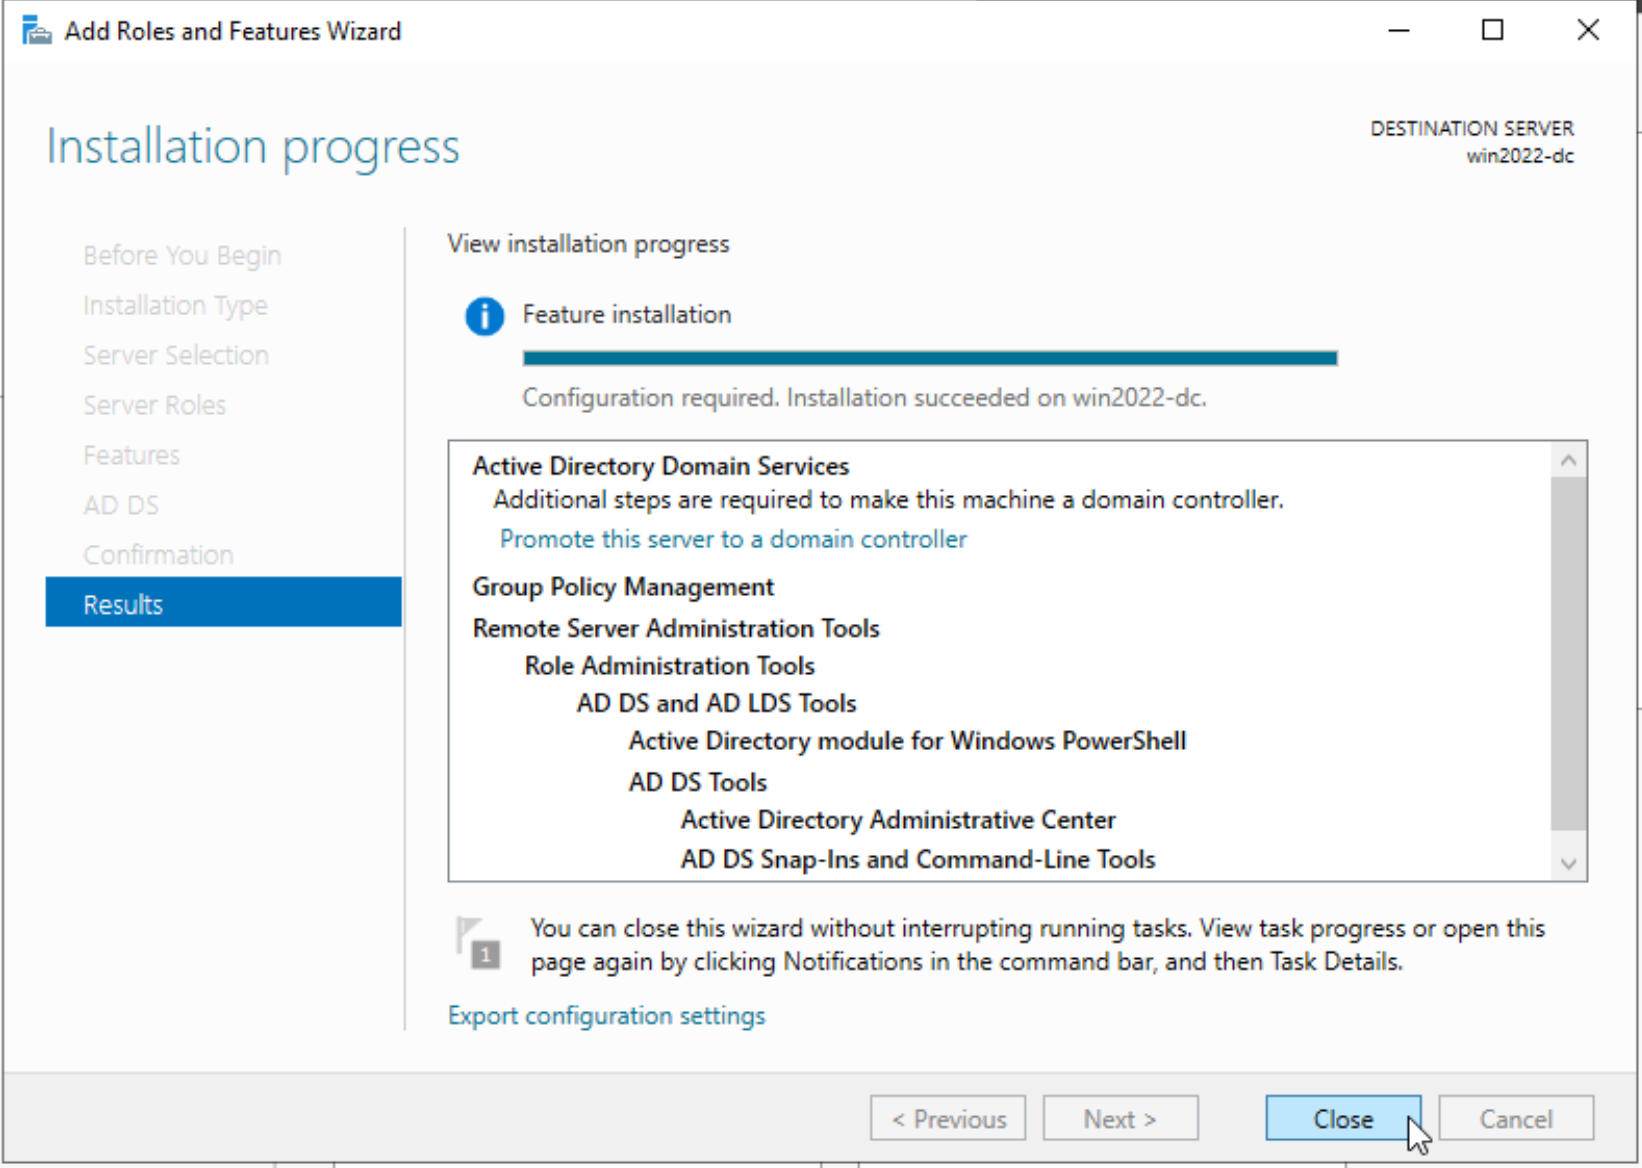
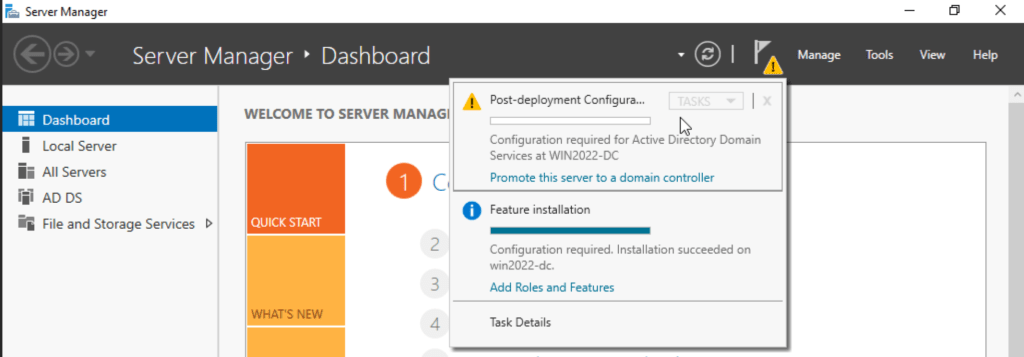
Next, we need to promote the server to a domain controller.
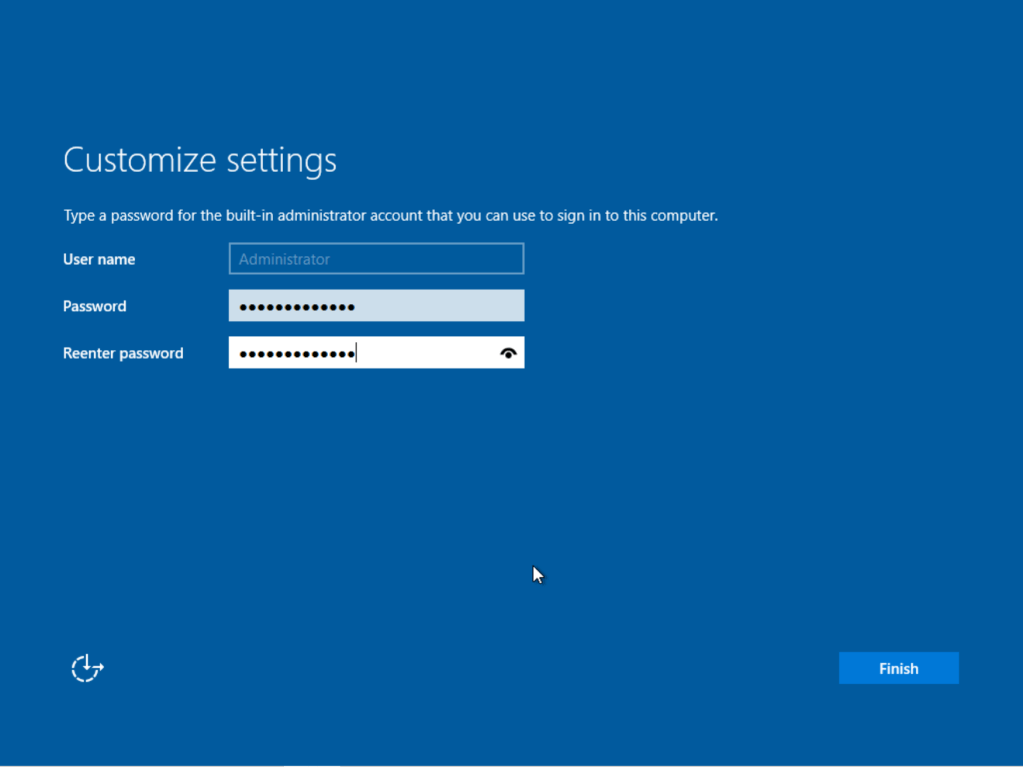
Specify the domain name to use and a password. The rest of the steps are all default.
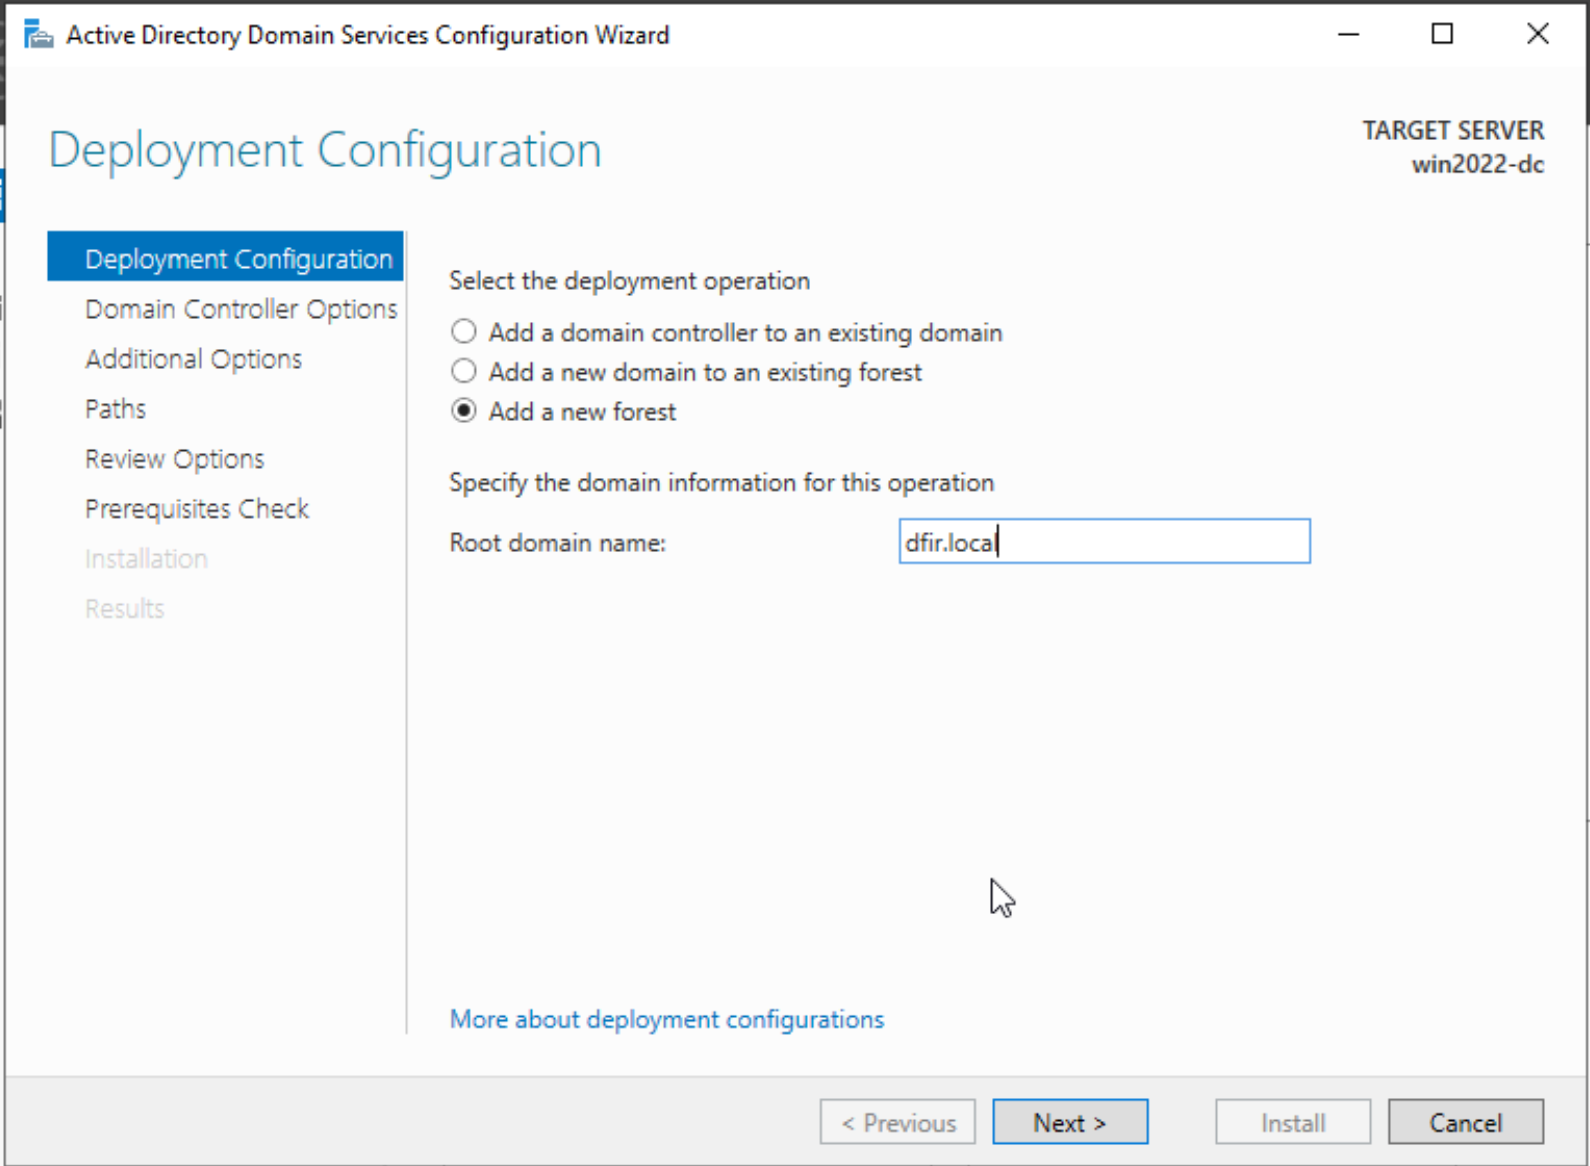
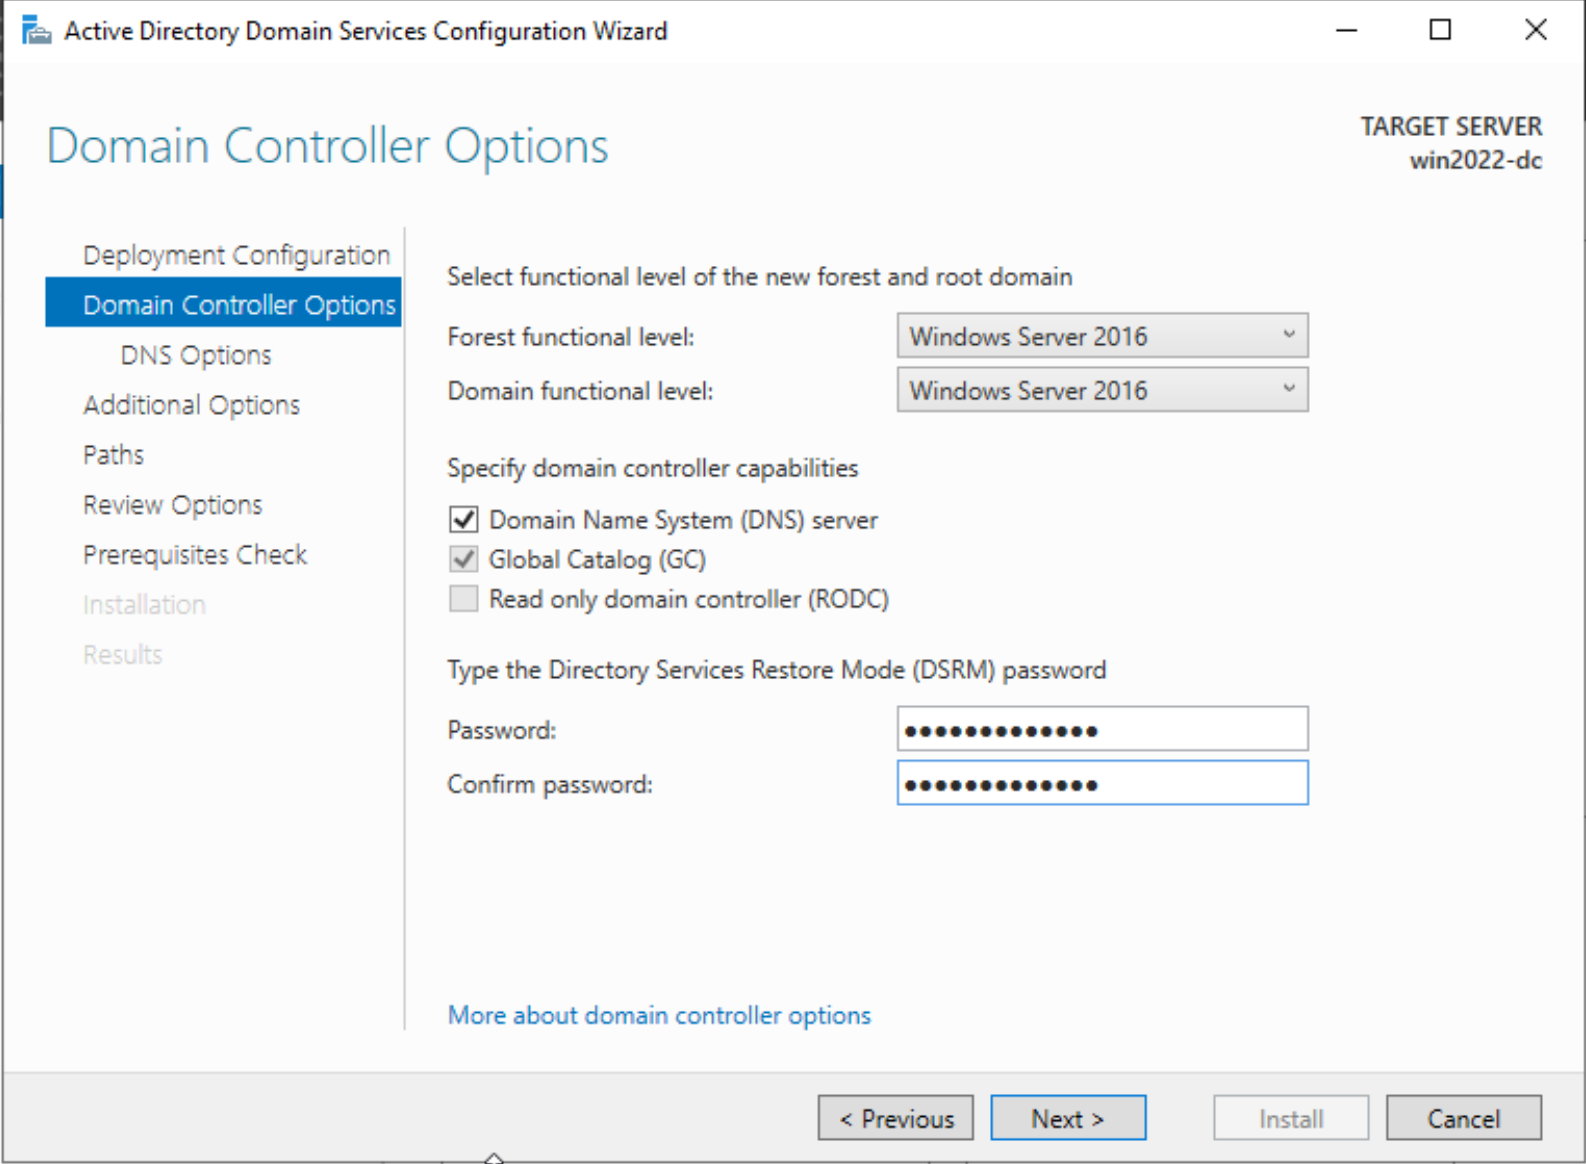
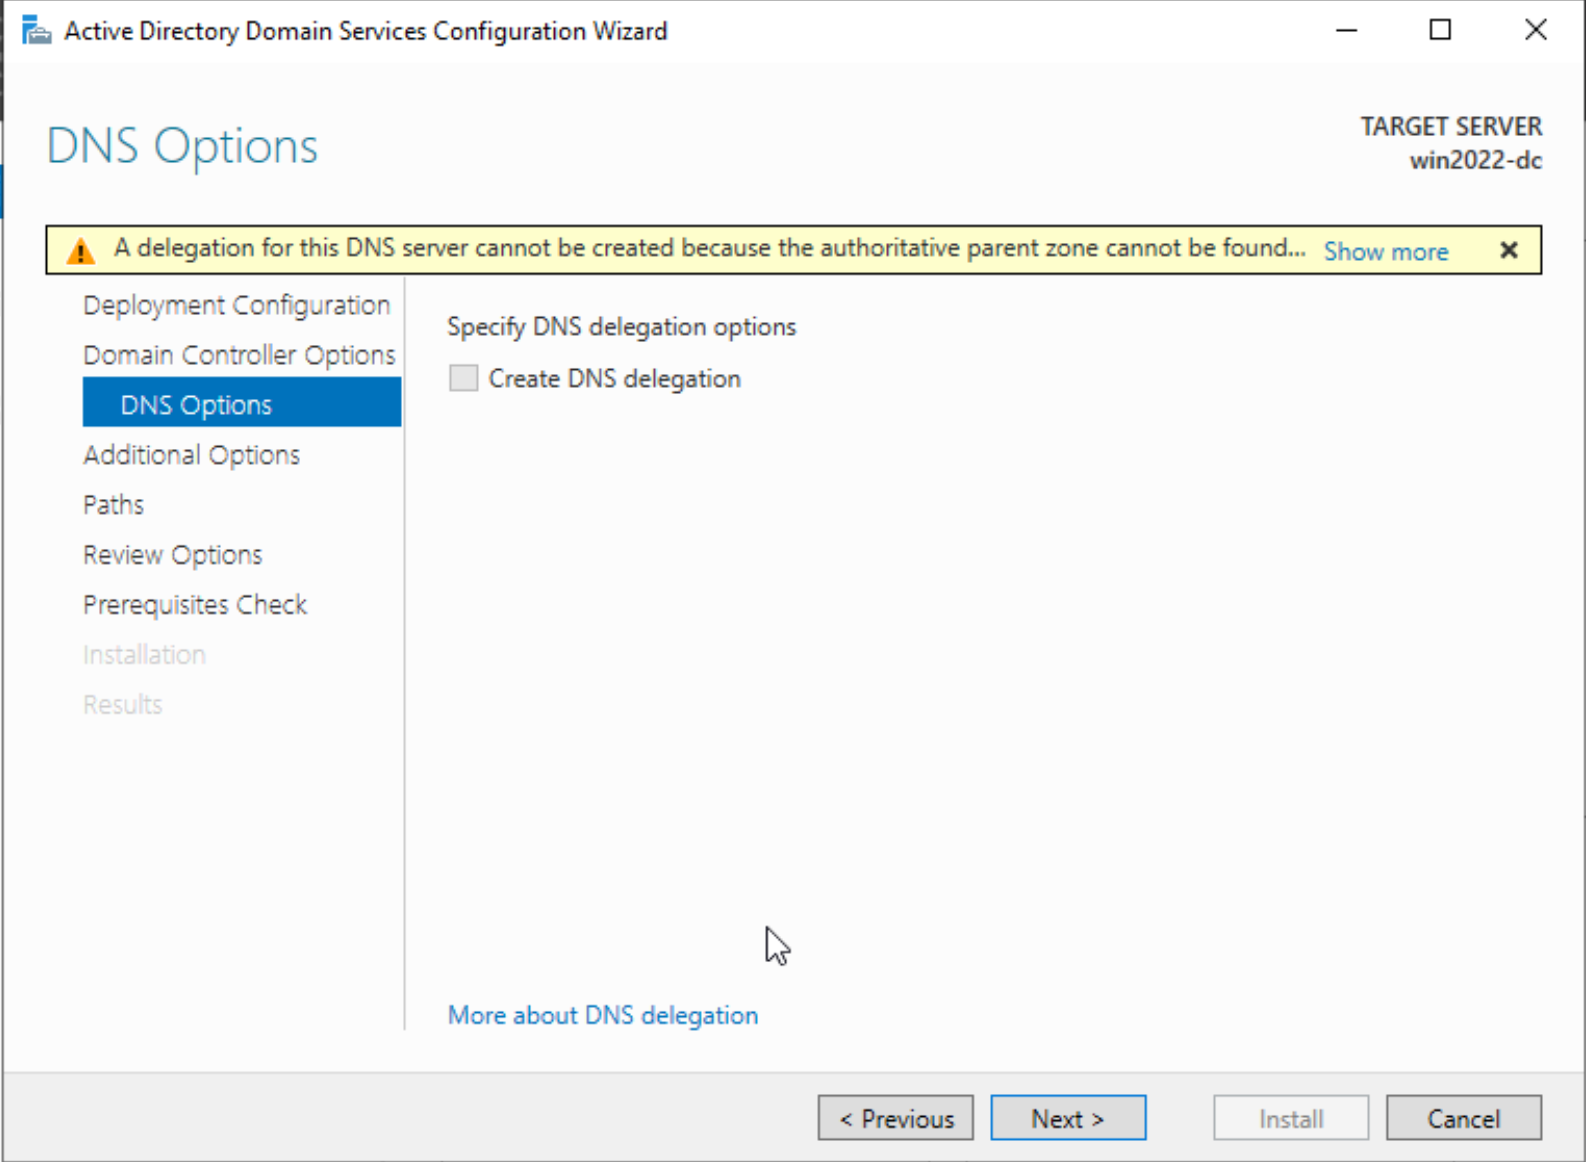

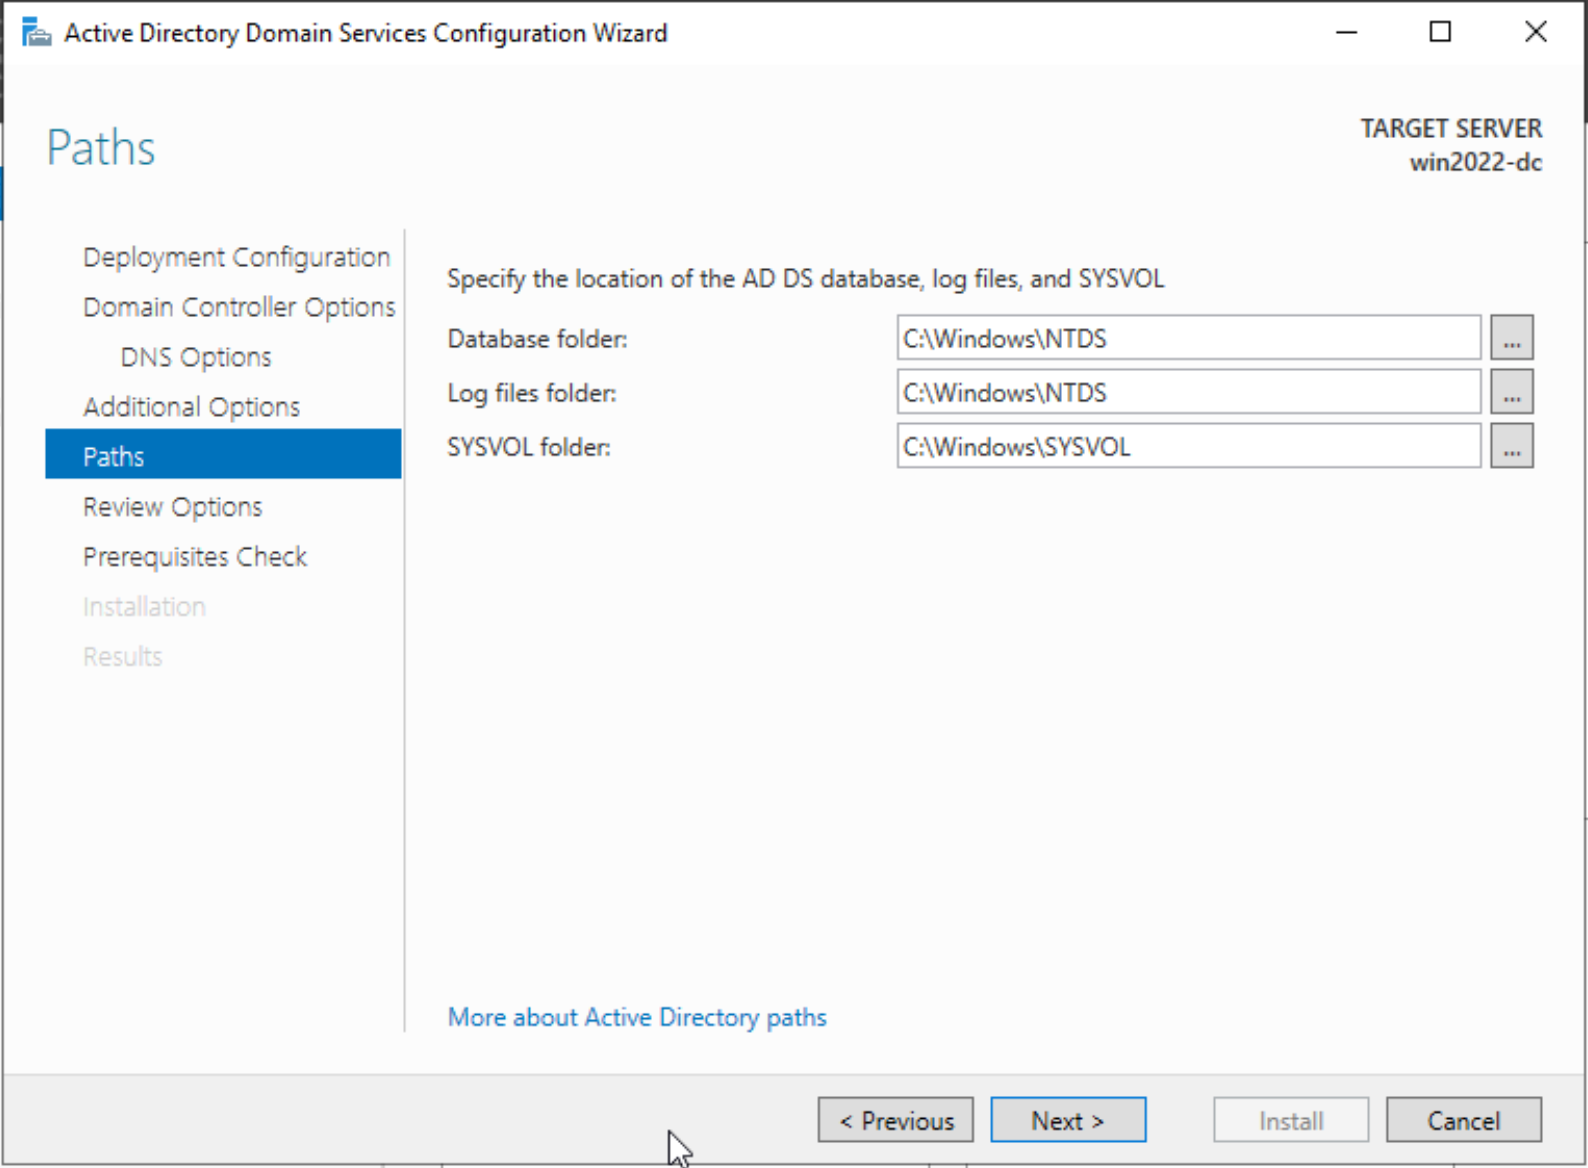
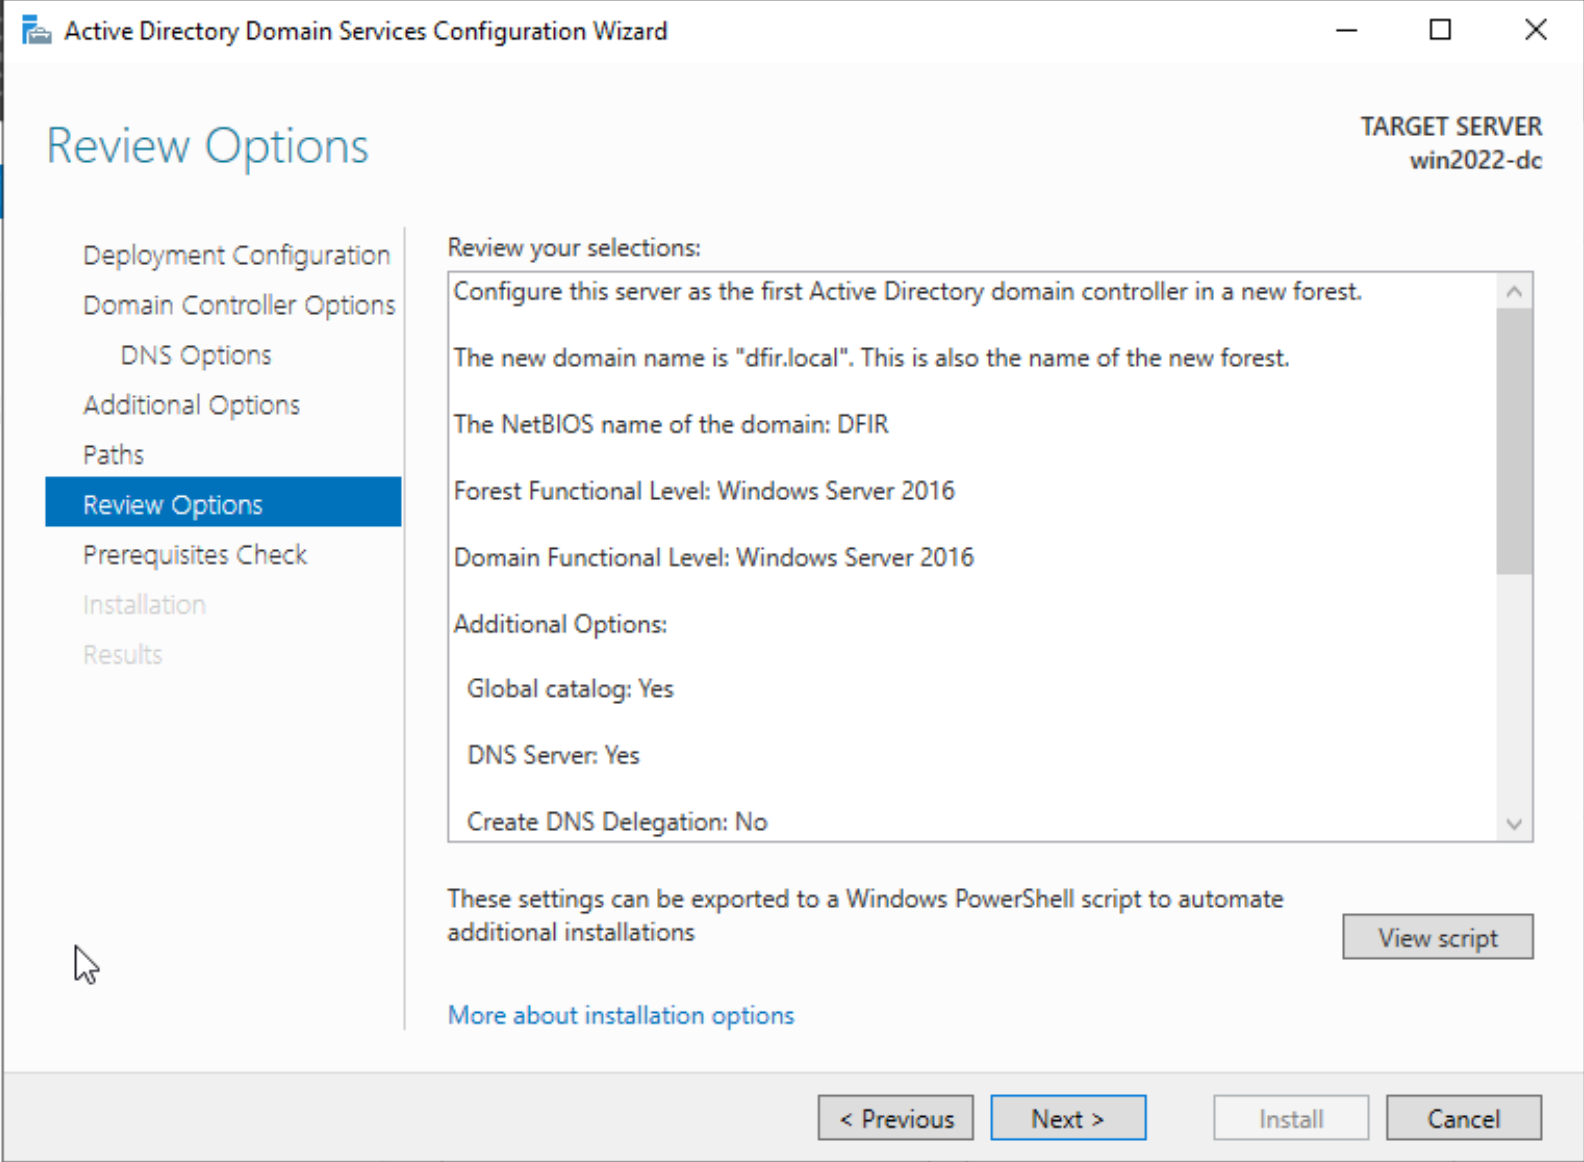
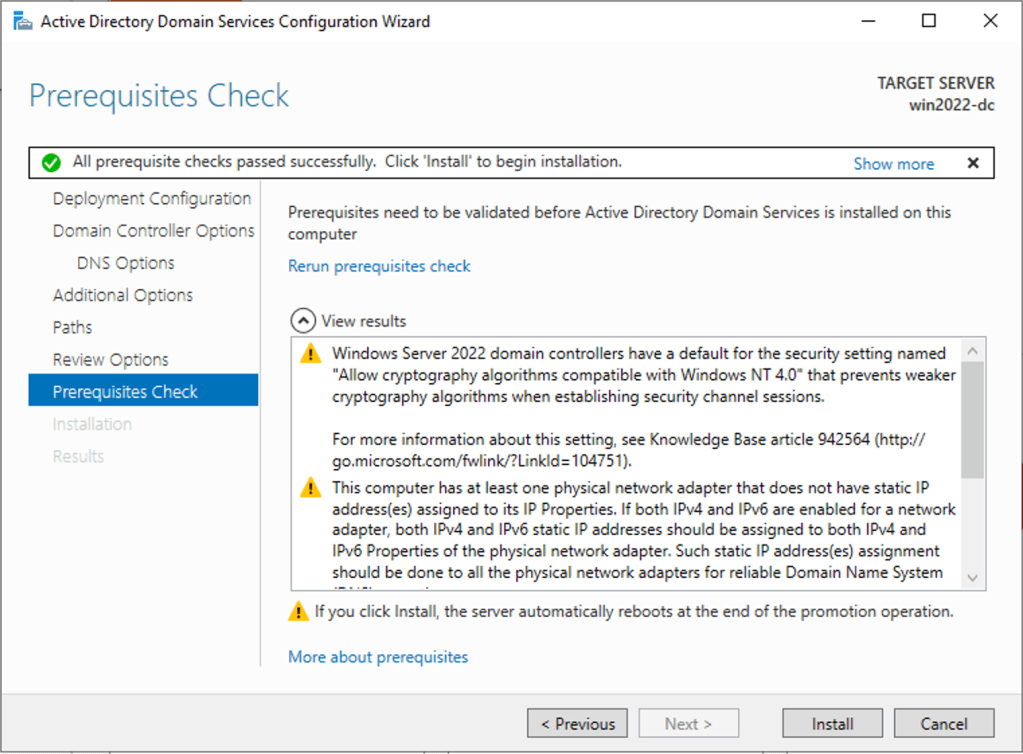
If everything checks out, you can click install to begin installing active directory domain controller services on the VM. A reboot will happen once the installation is successful.
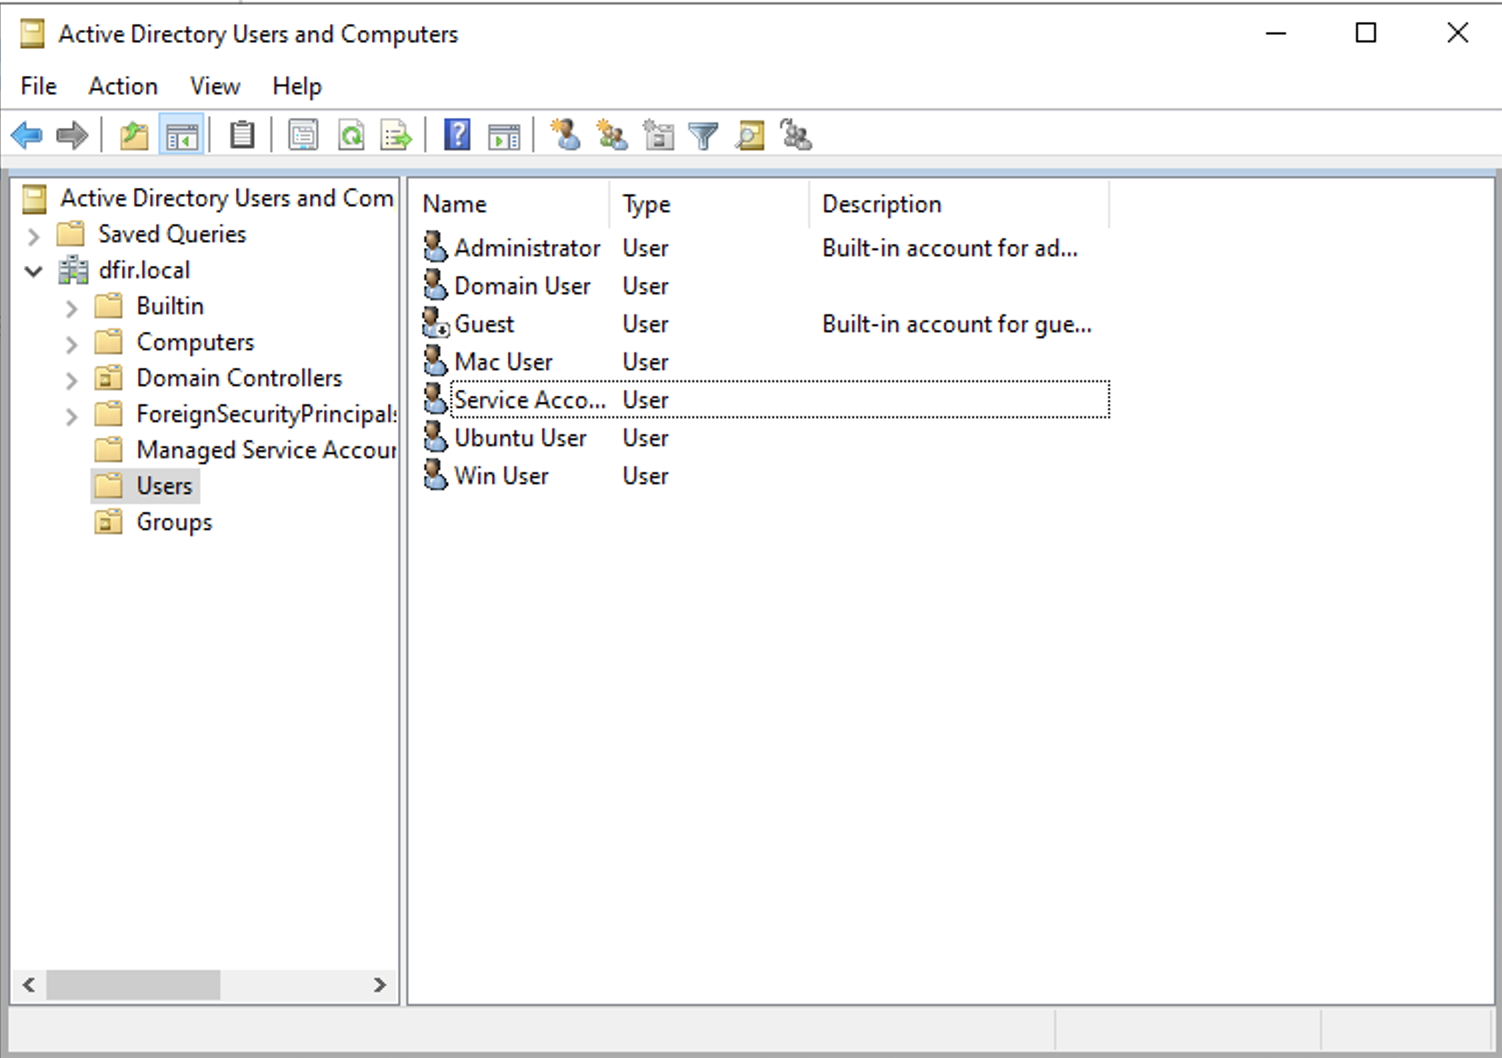
We now have a Domain controller but no users. We will create a couple of them to emulate an operational organisation.
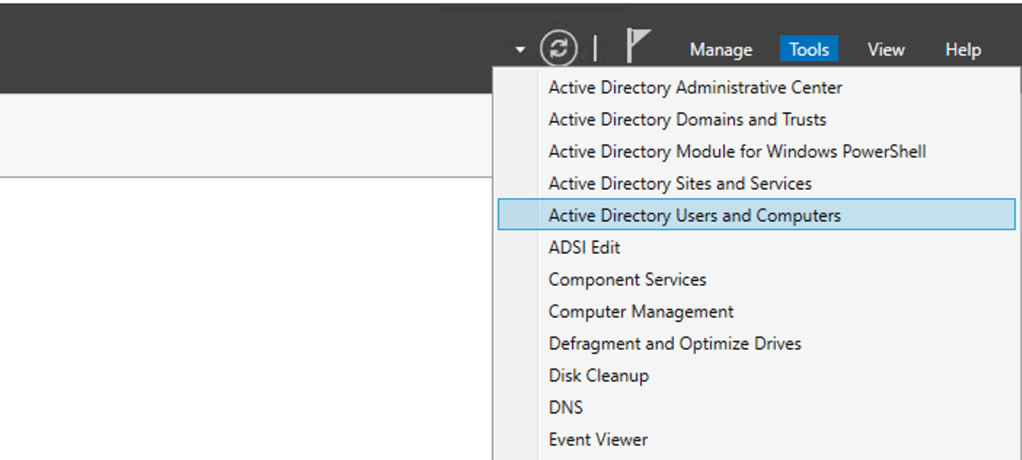
Let’s navigate to Tools > AD users and computers.
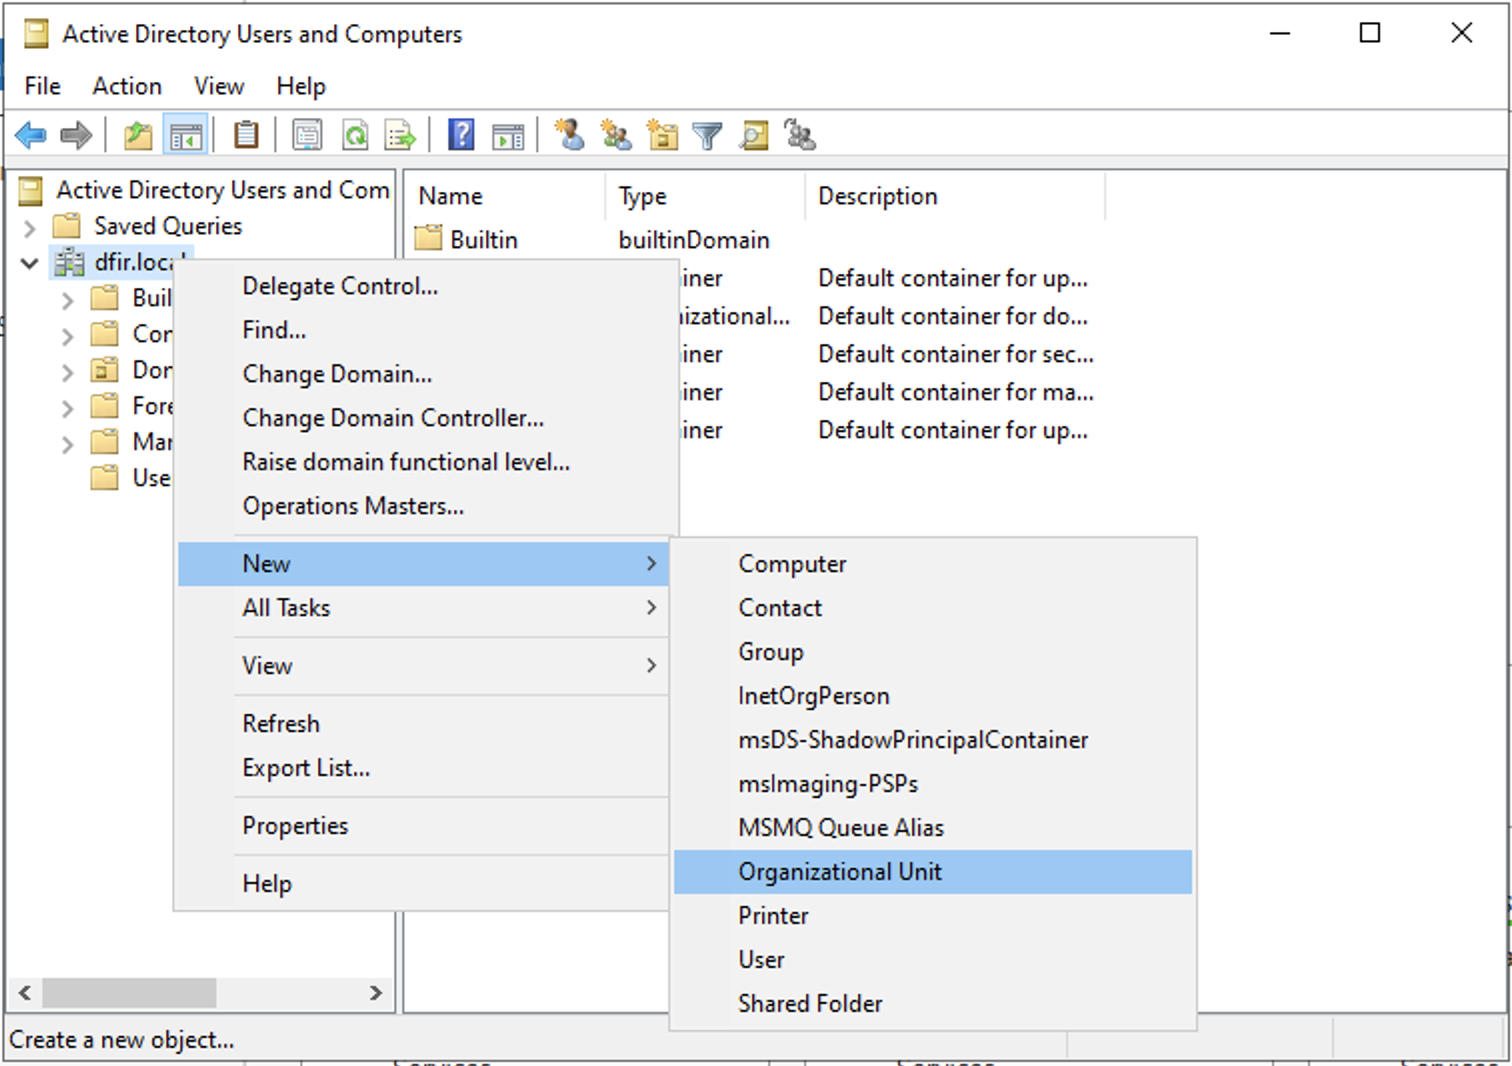
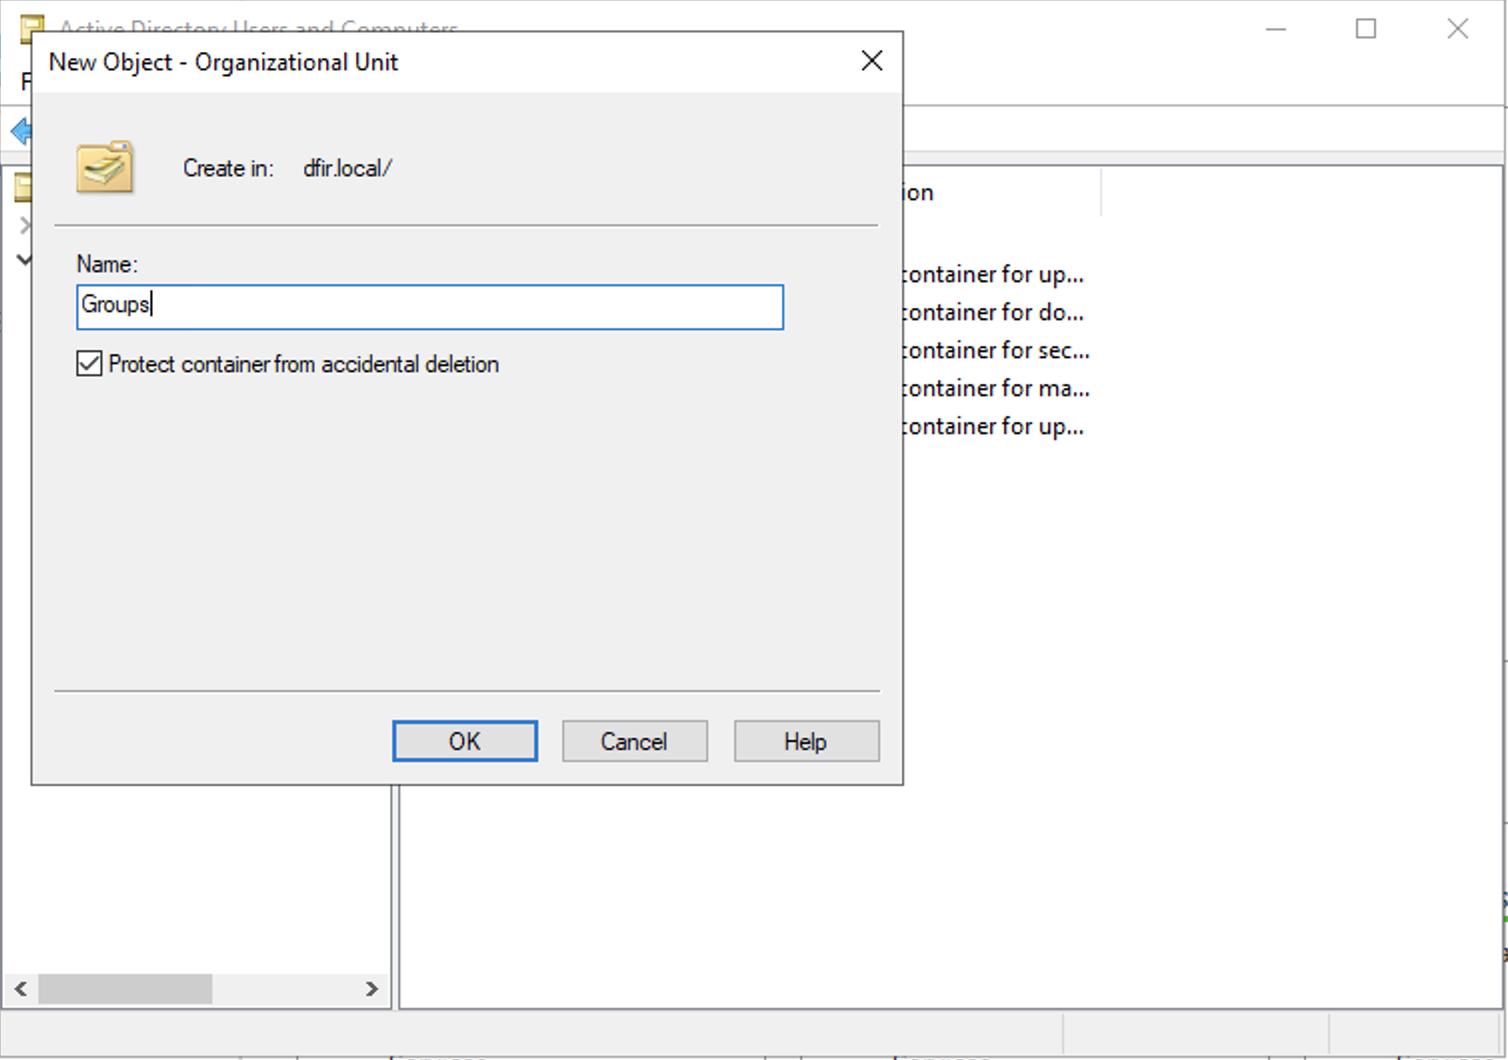
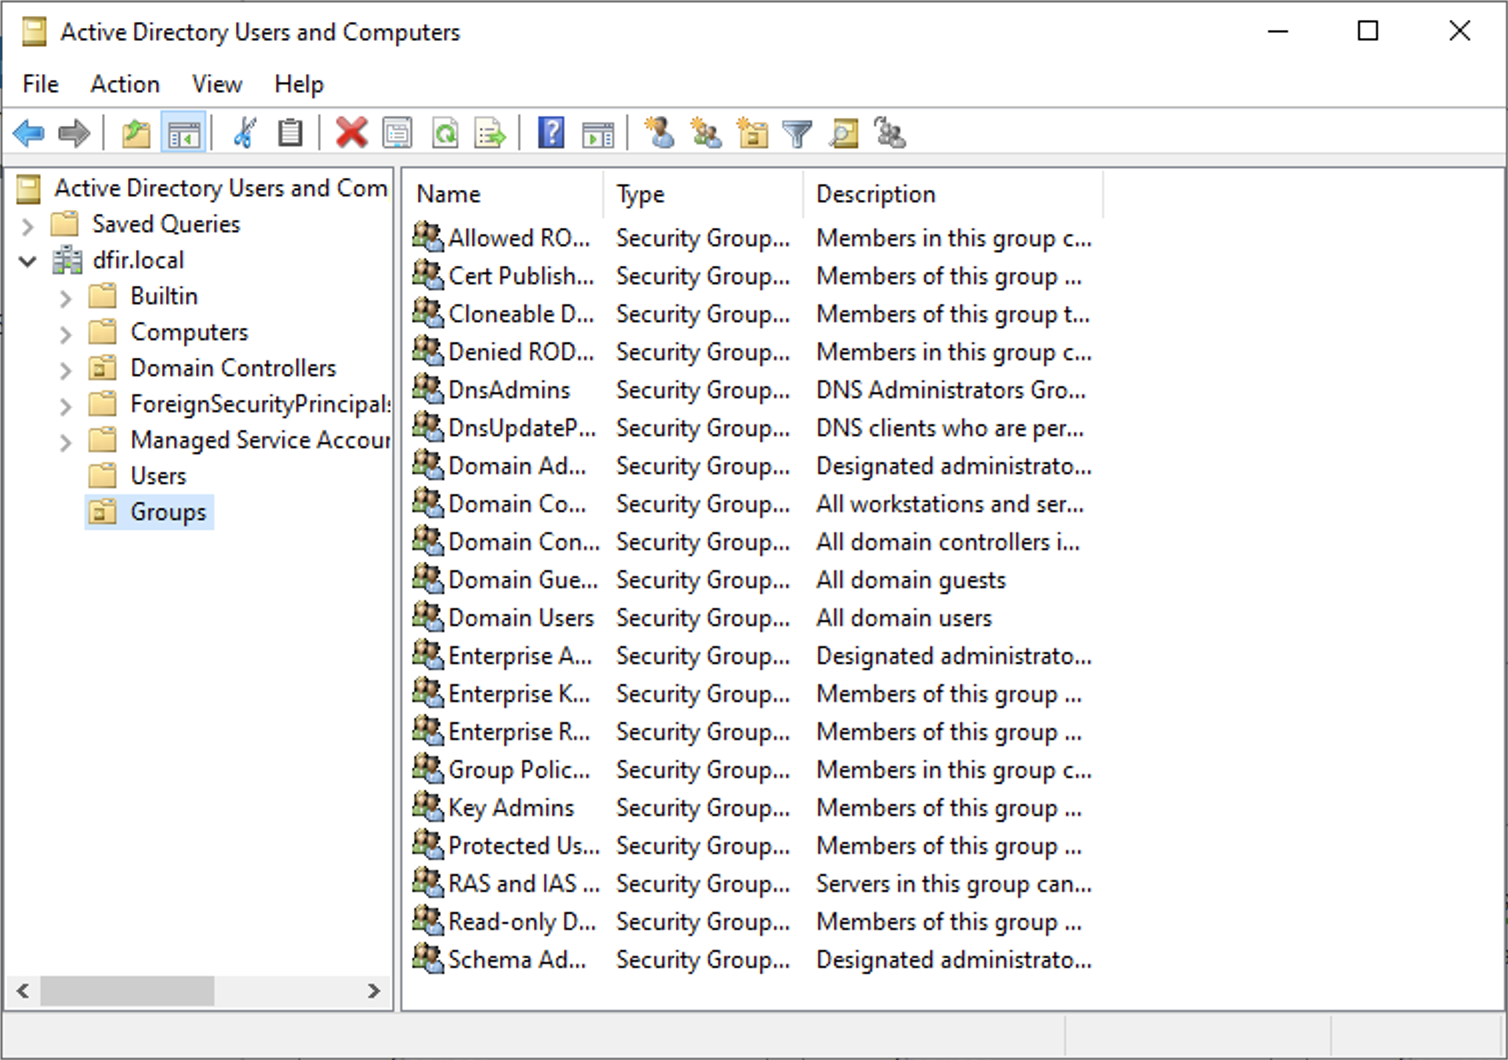
This step is optional and only for organizational purposes. We will separate the users from the groups for a cleaner view. Let’s create an Organisational Unit then drag all the groups from Users to Groups.

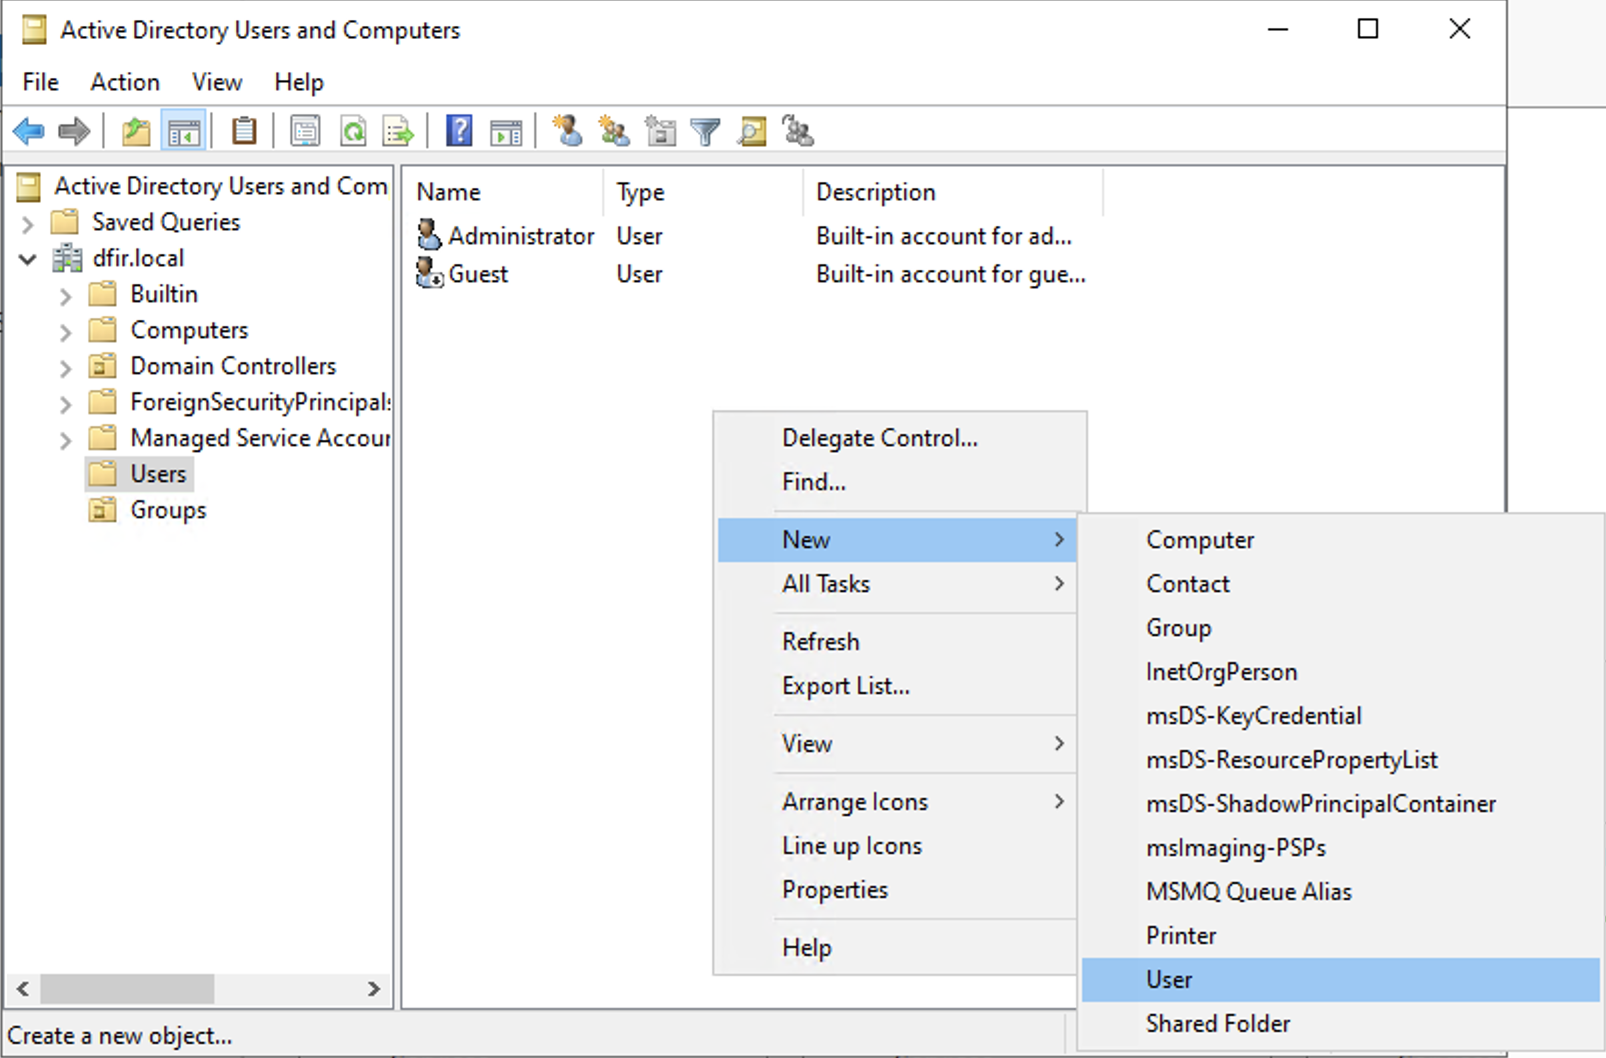
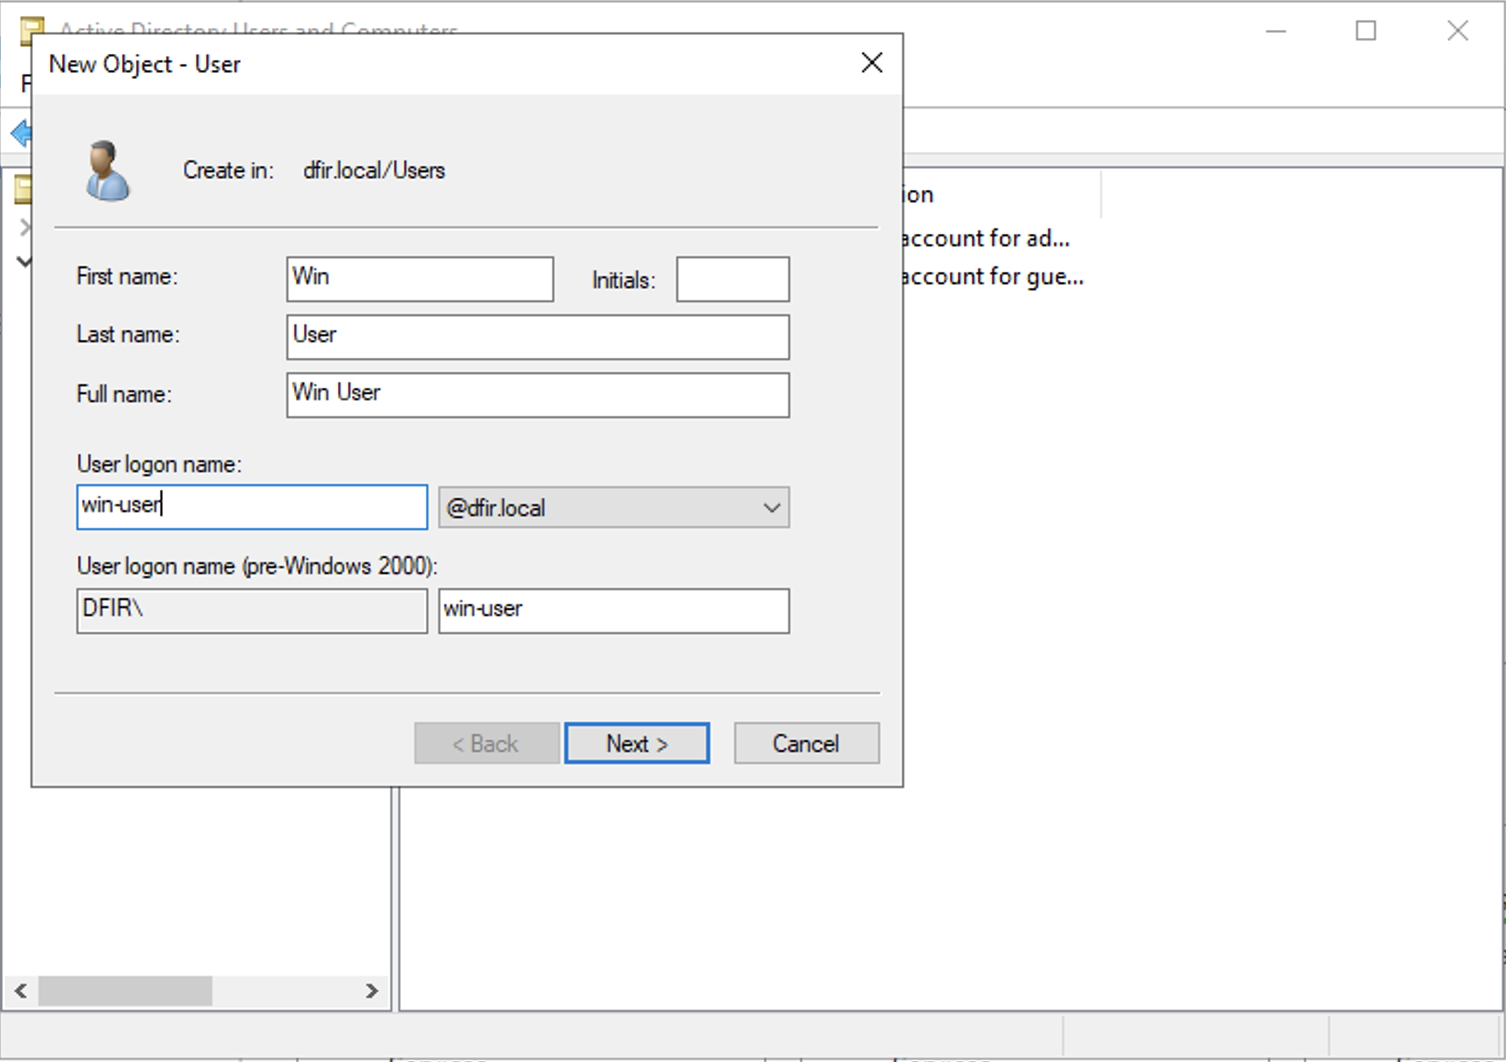
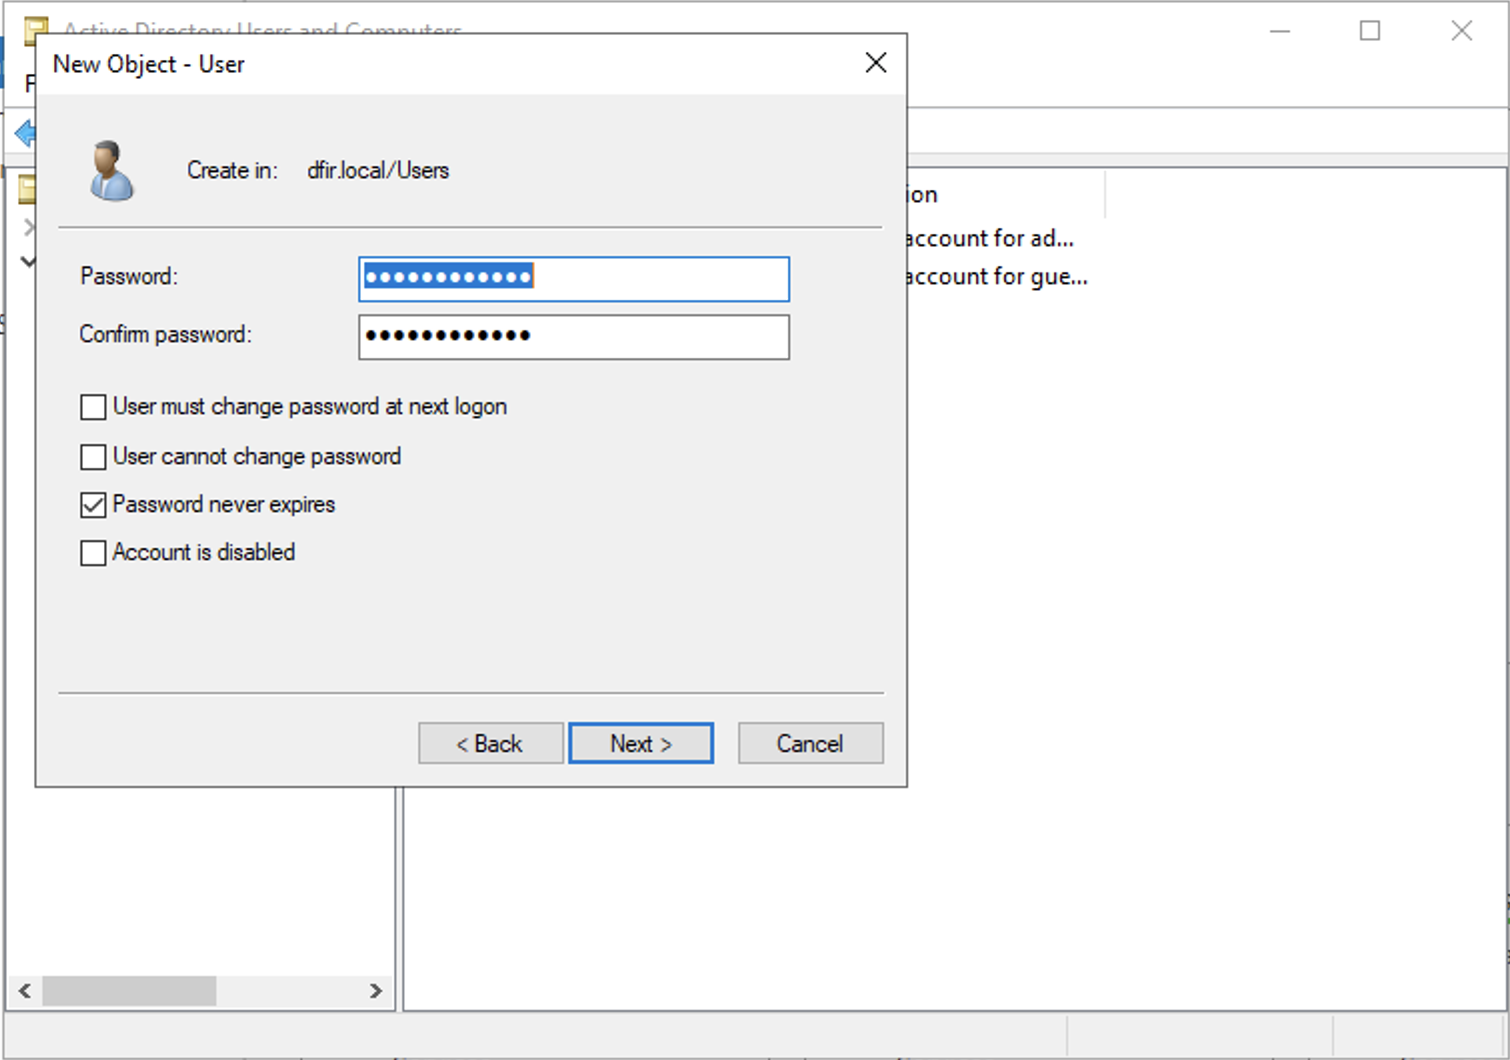
We can then create a couple of users, including an administrator domain account and a service account.
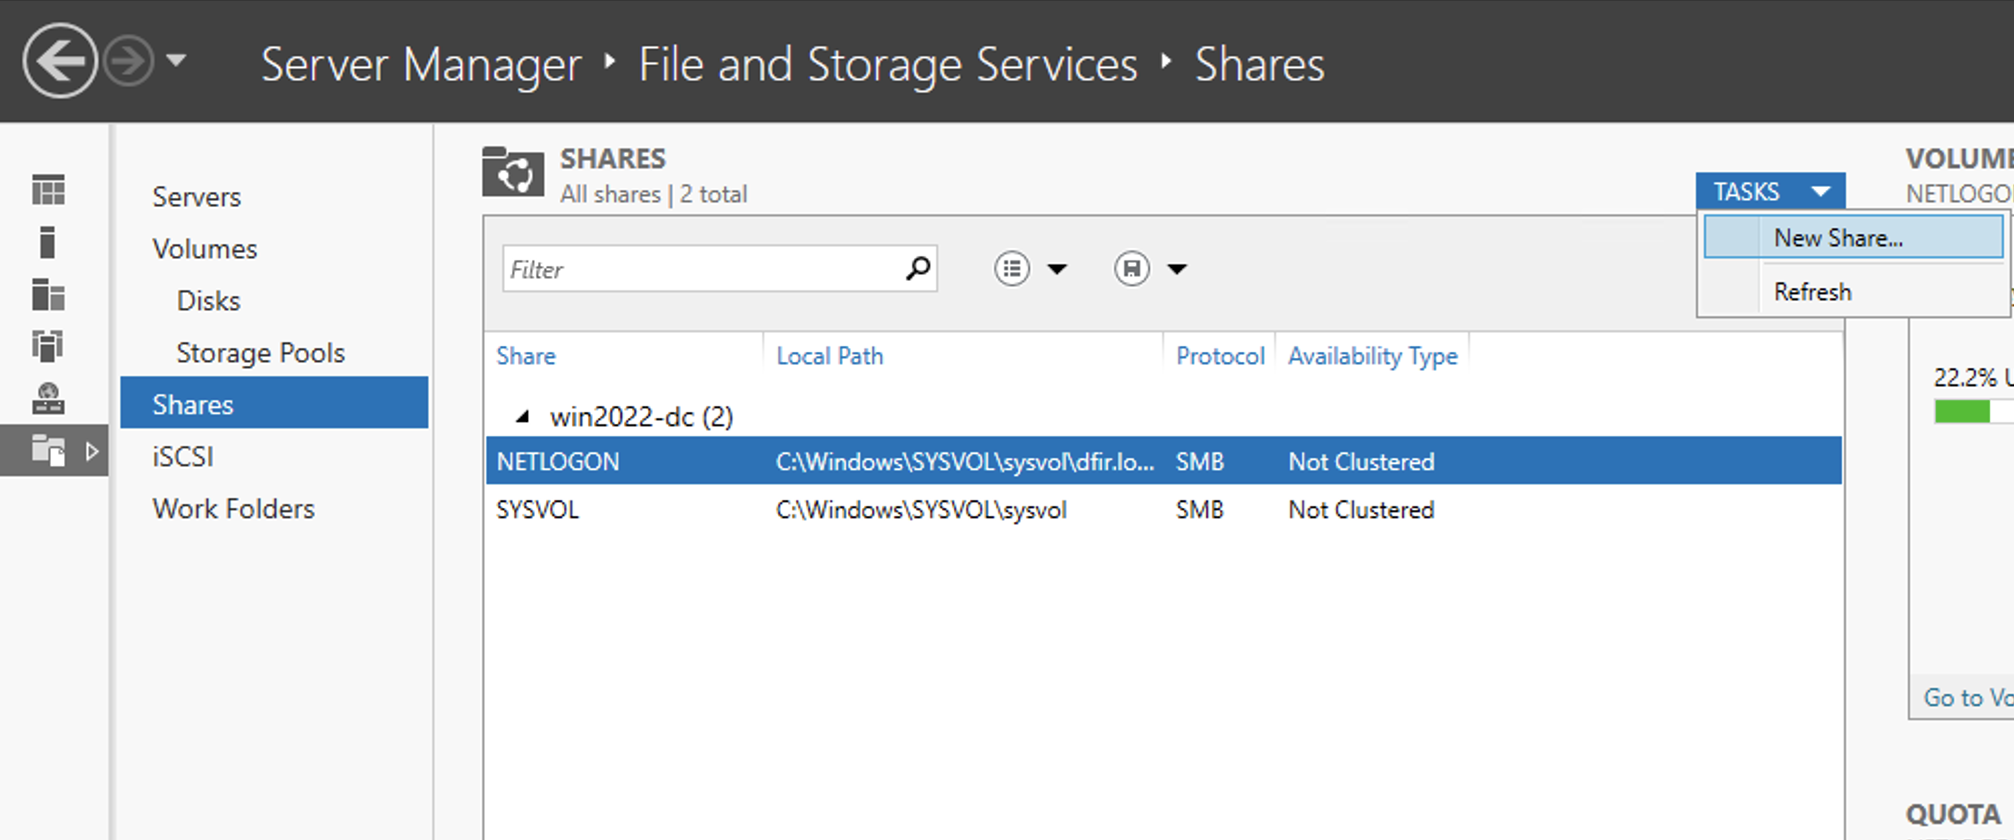
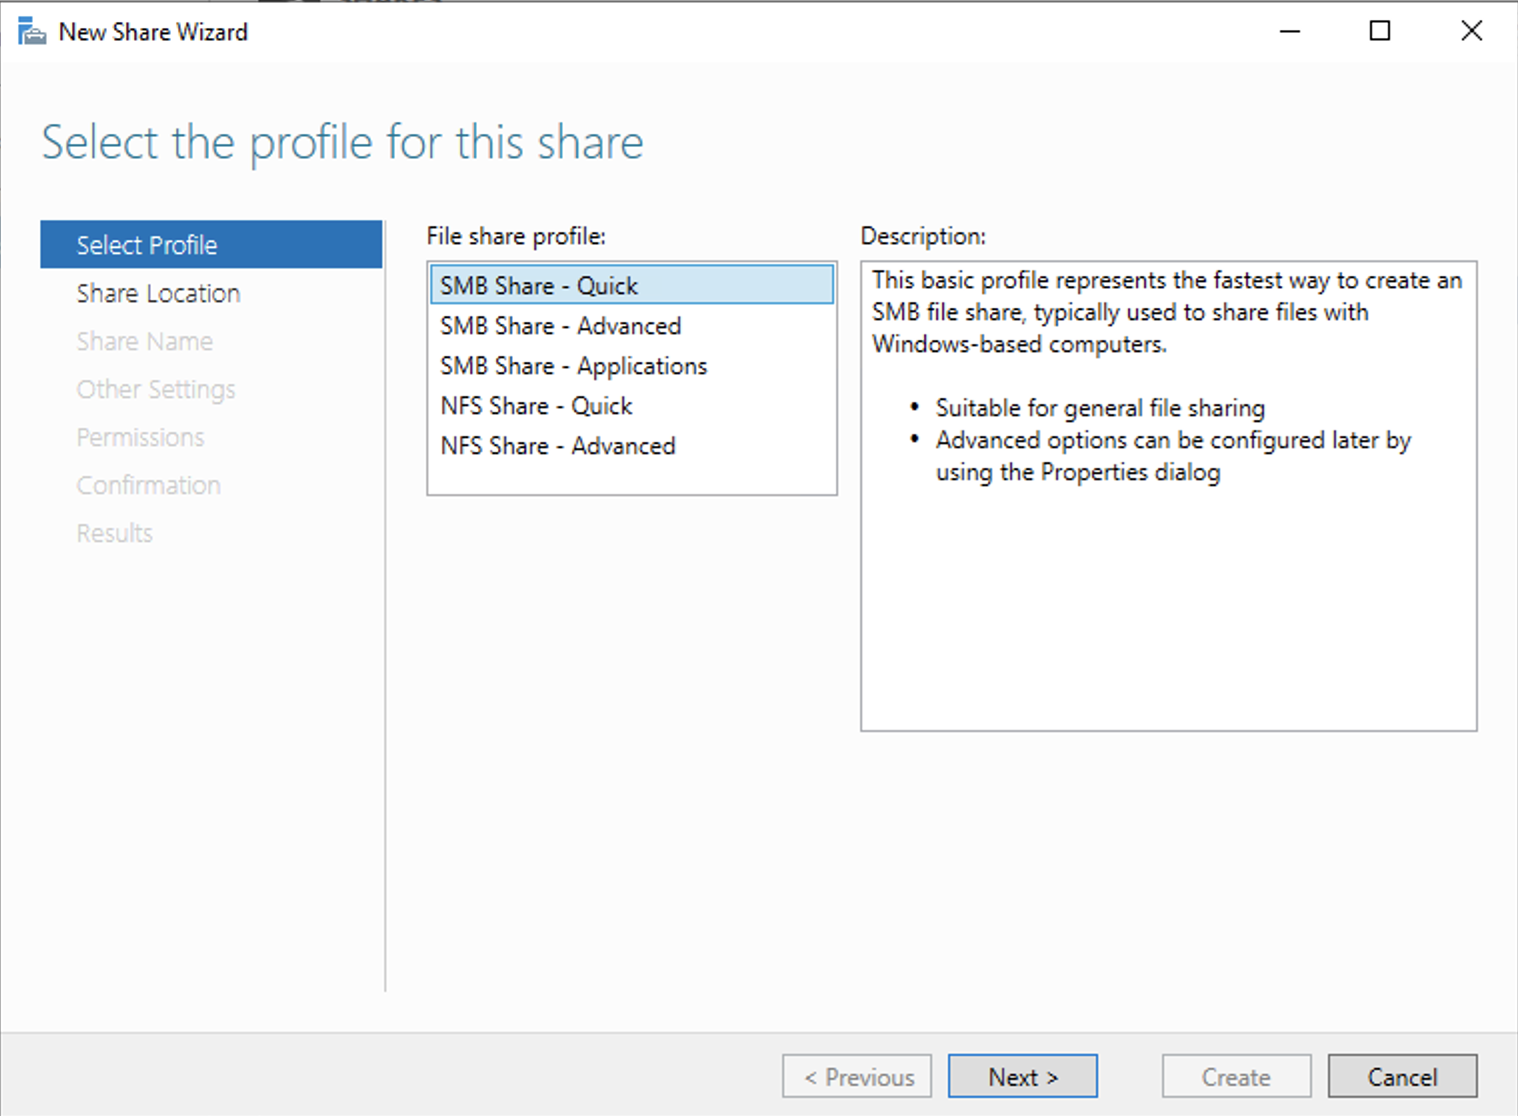
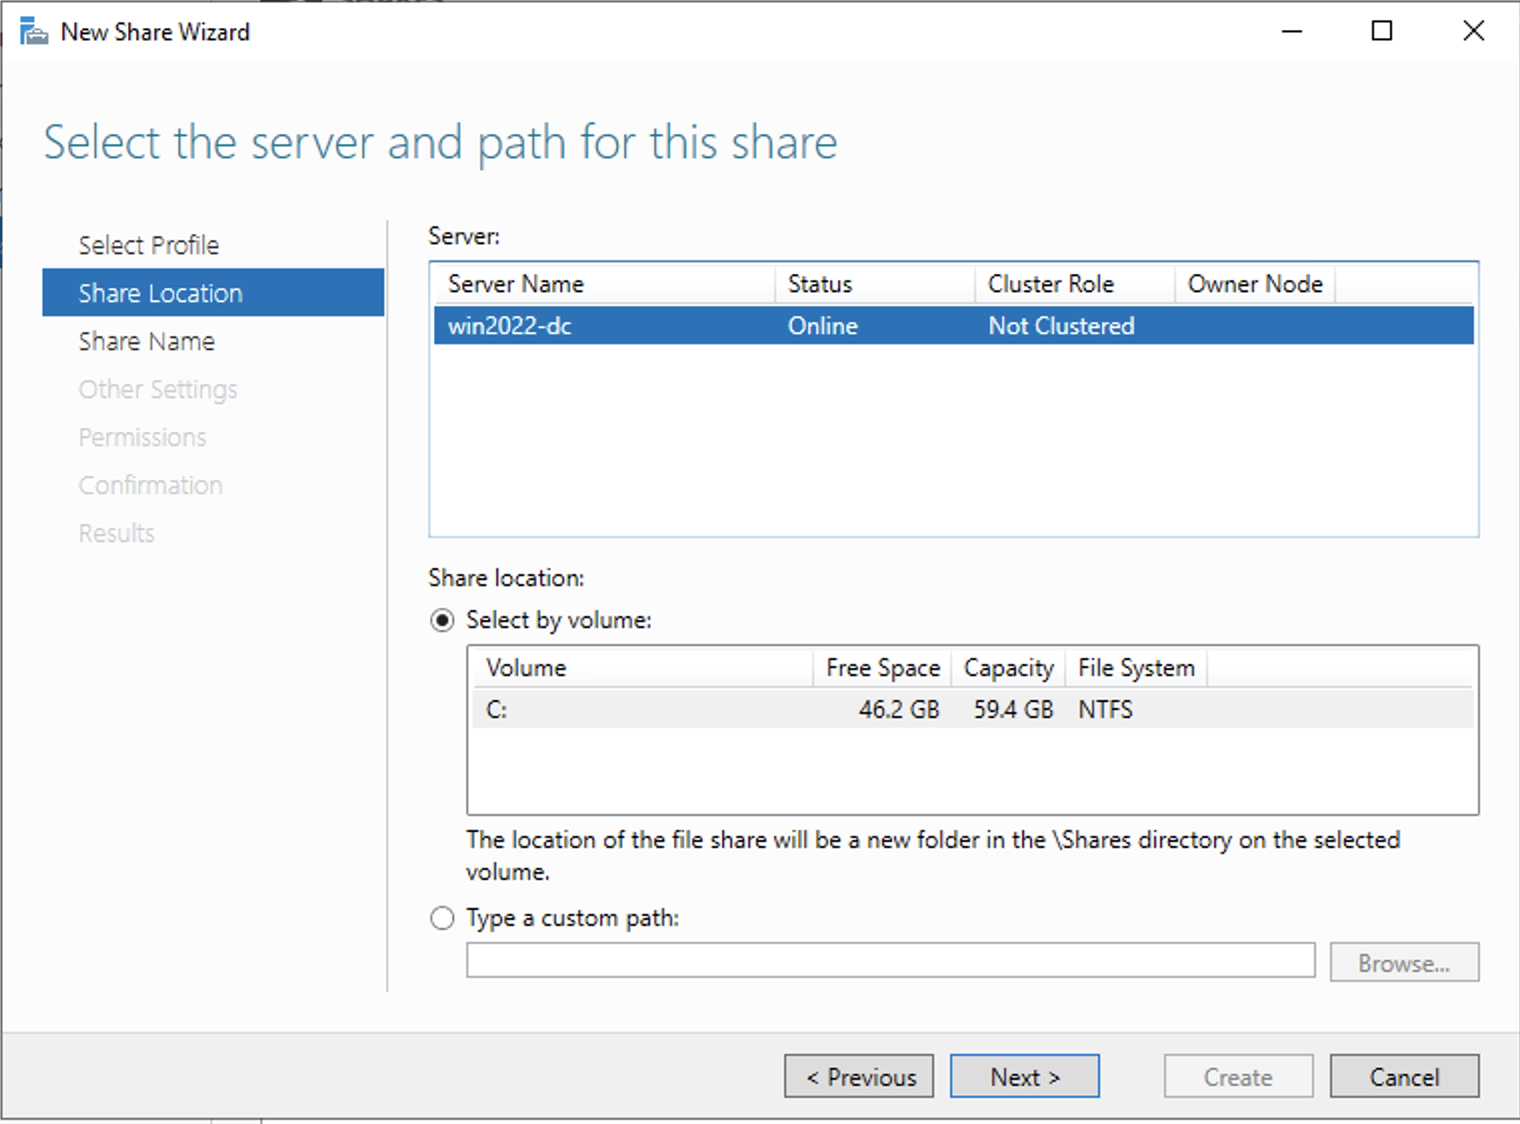
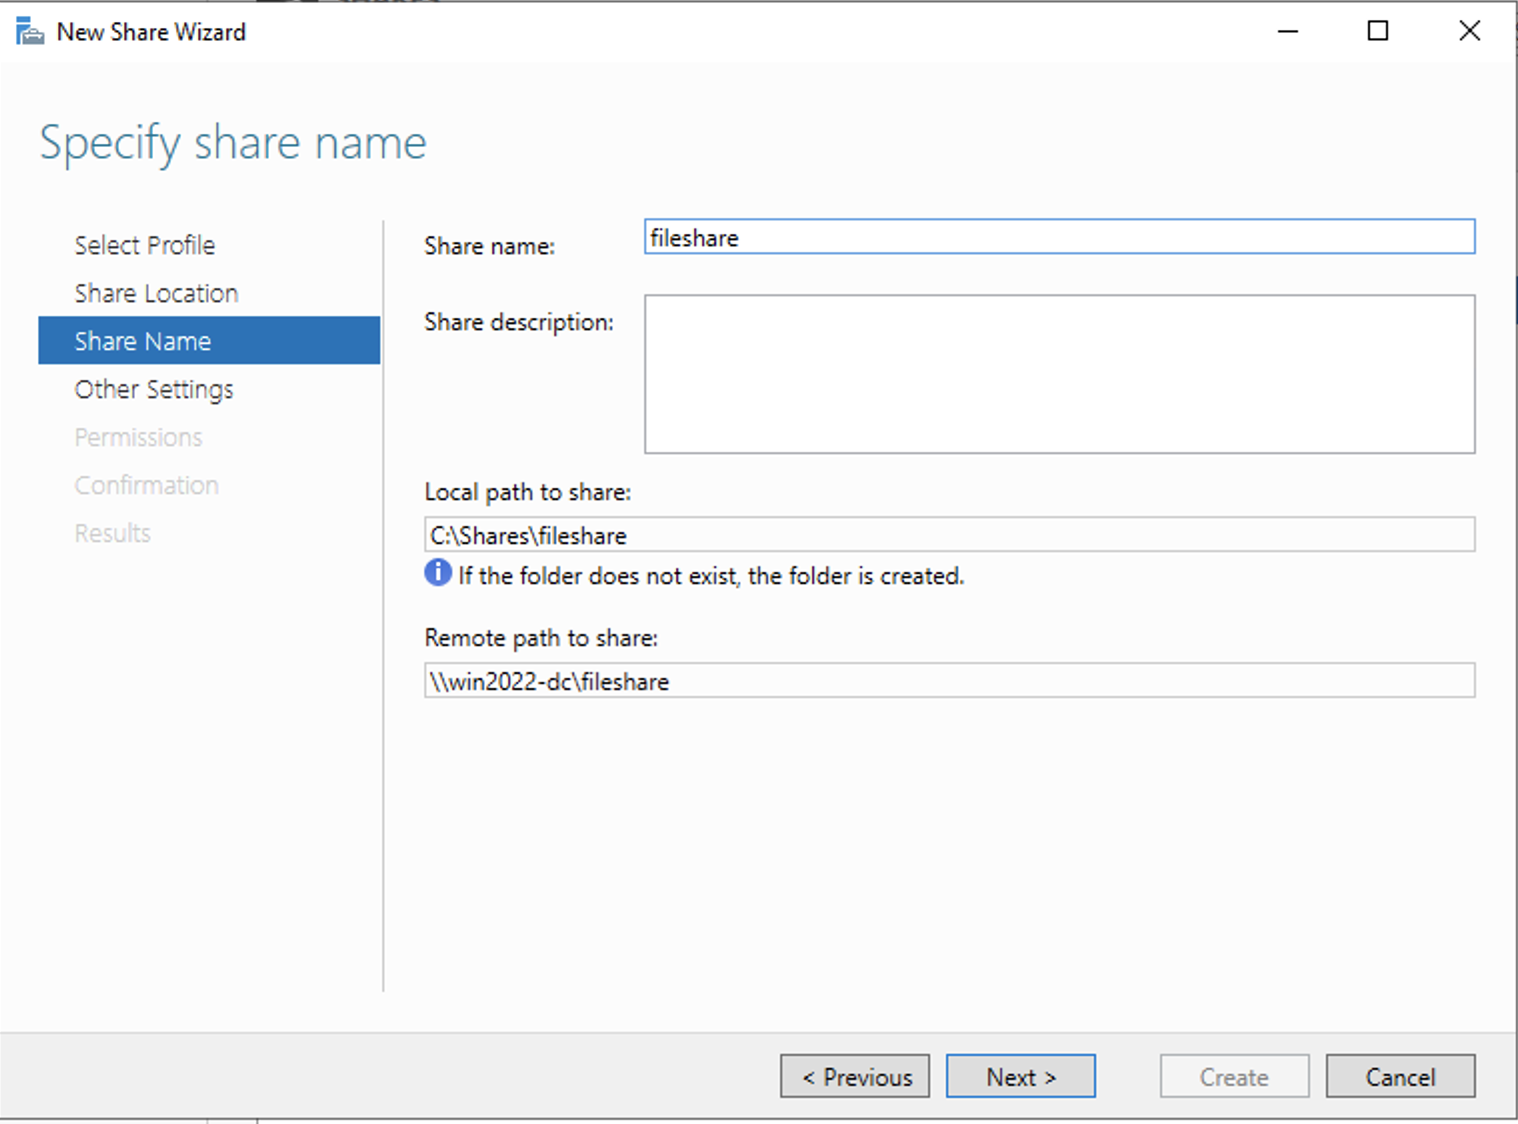
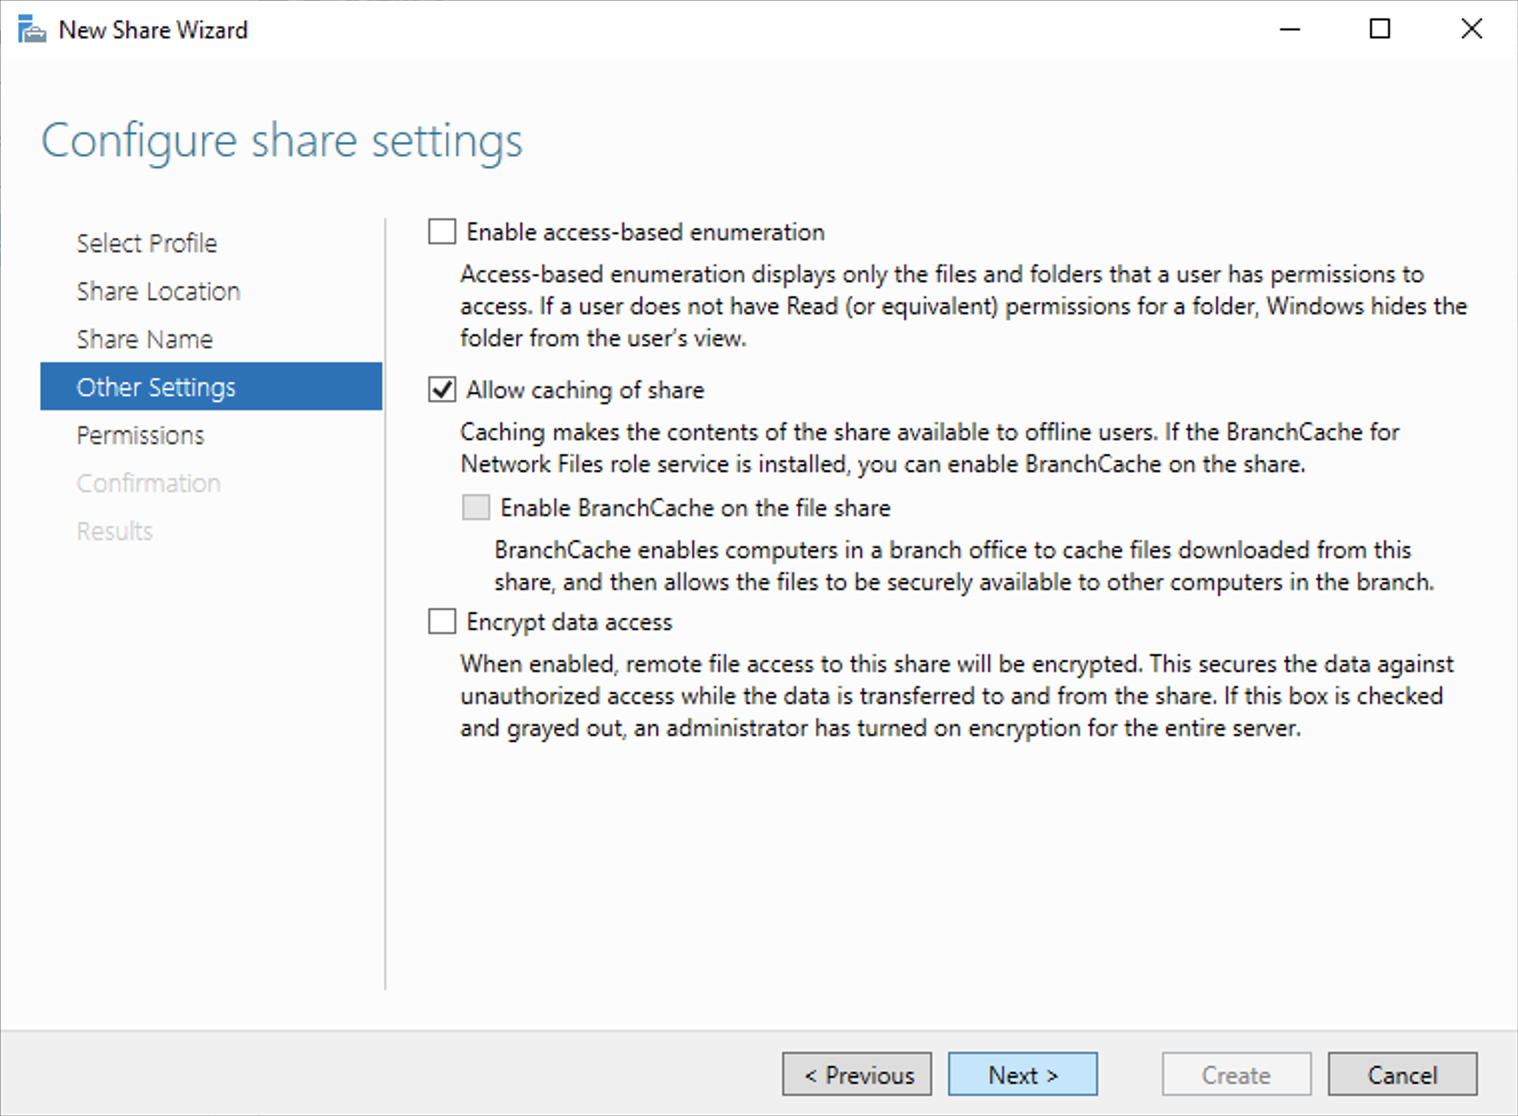
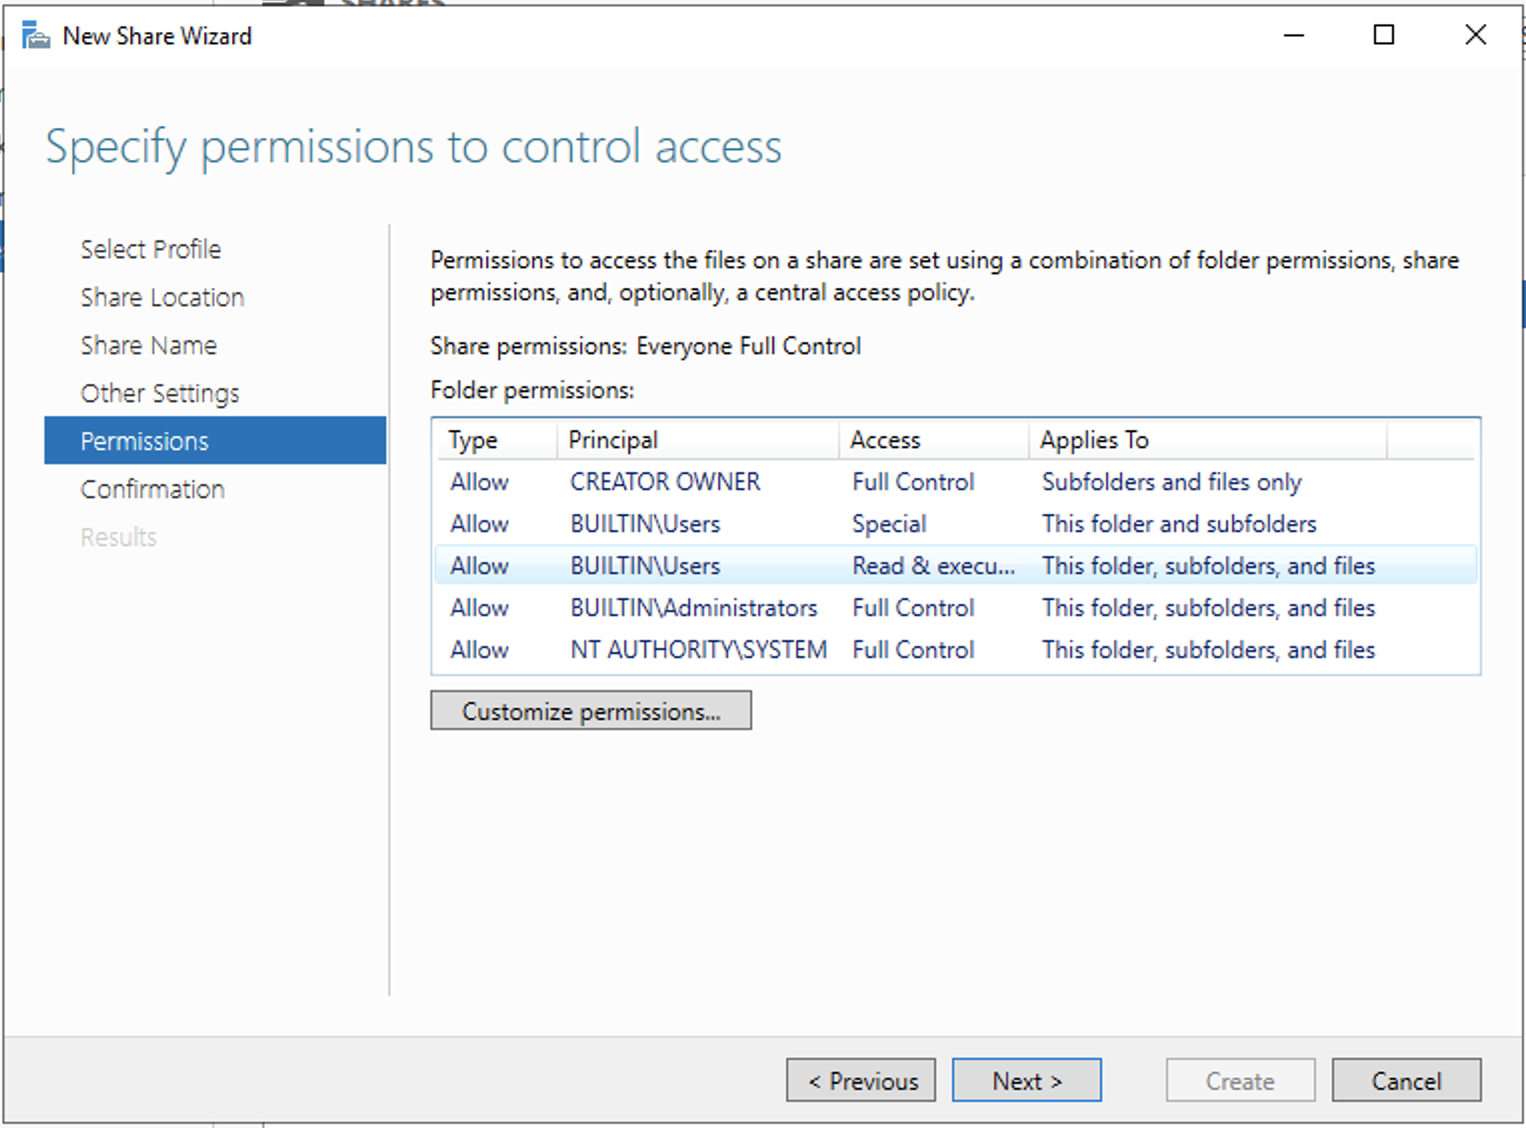
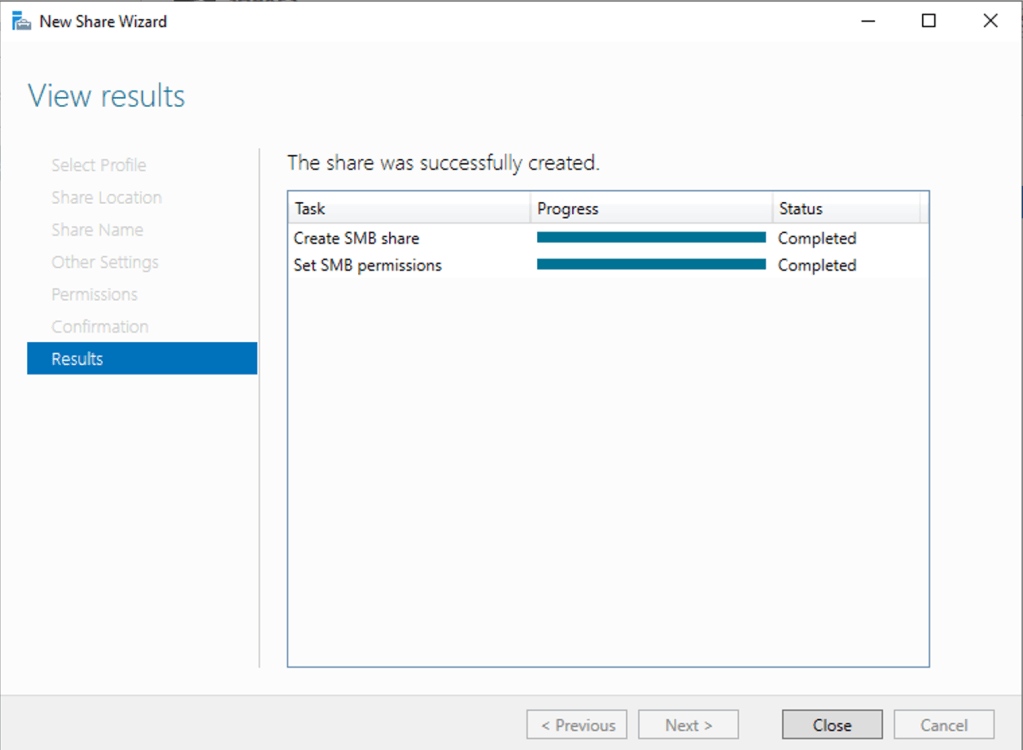
Just like in a normal production environment we’ll create an SMB file share under File and Storage Services.


We will also be playing around with Kerberos based attacks so let’s setup a service principle name. According to Microsoft documentation,
A service principal name (SPN) is a unique identifier of a service instance. SPNs are used by Kerberos authentication to associate a service instance with a service logon account. This allows a client application to request that the service authenticate an account even if the client does not have the account name.
Microsoft
To set that up, we can run the following command. The second command will verify that the SPN has been successfully set.
C:\Users\Administrator> setspn -a win2022-dc/svc-account.dfir.local:60000 dfir\svc-account
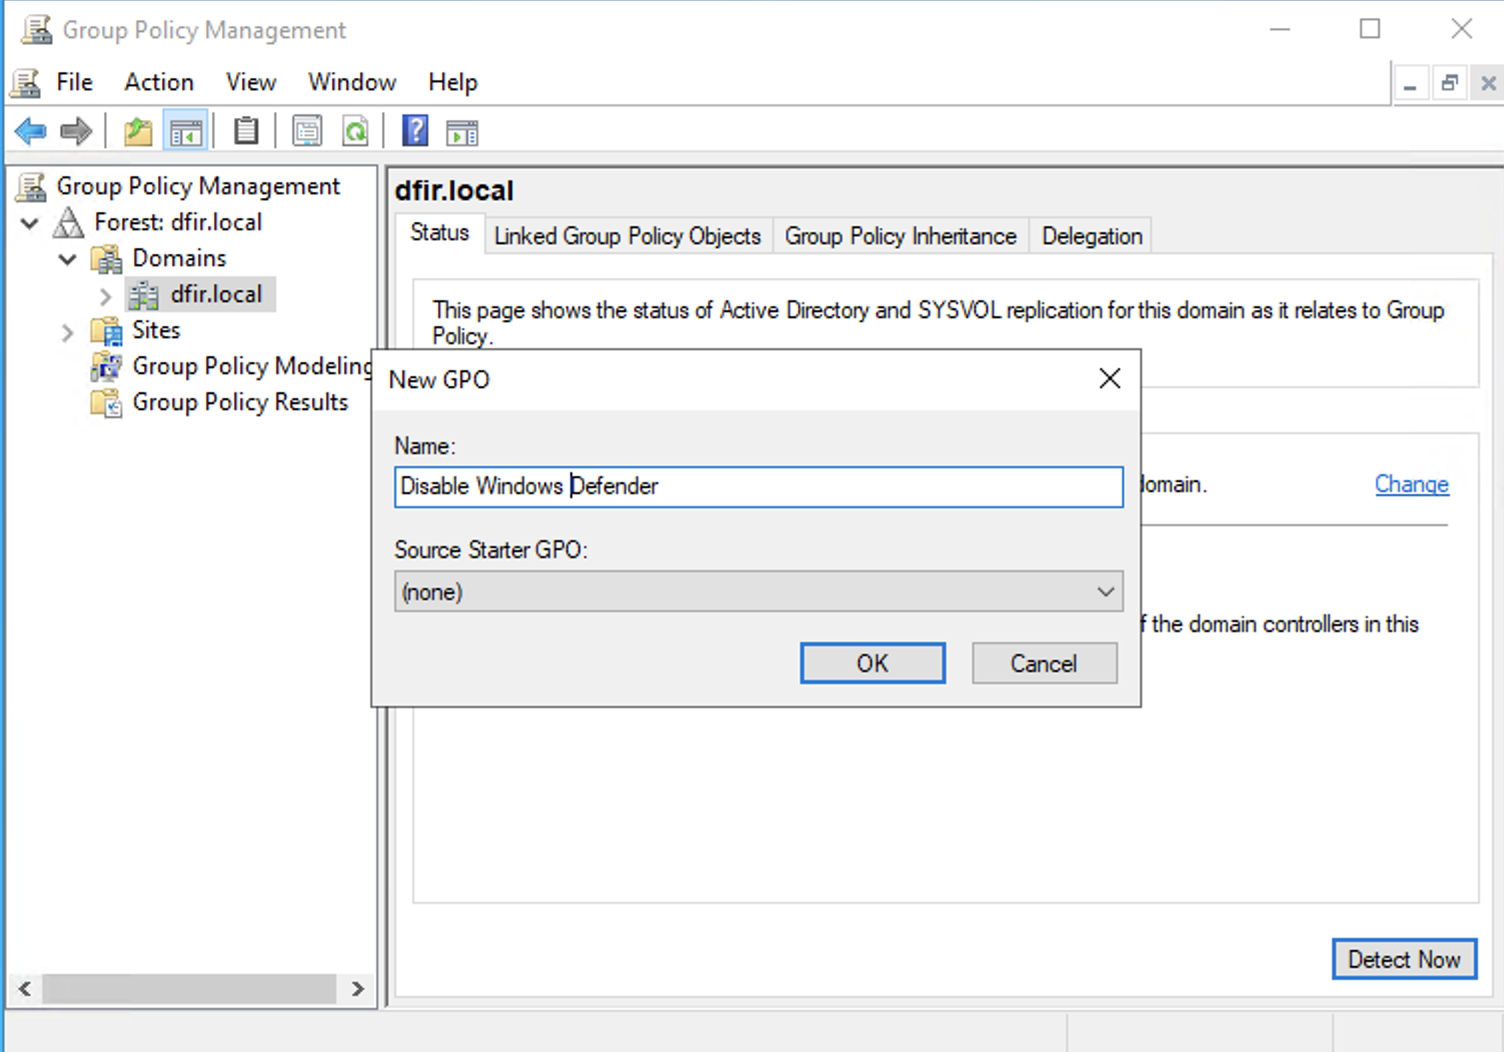
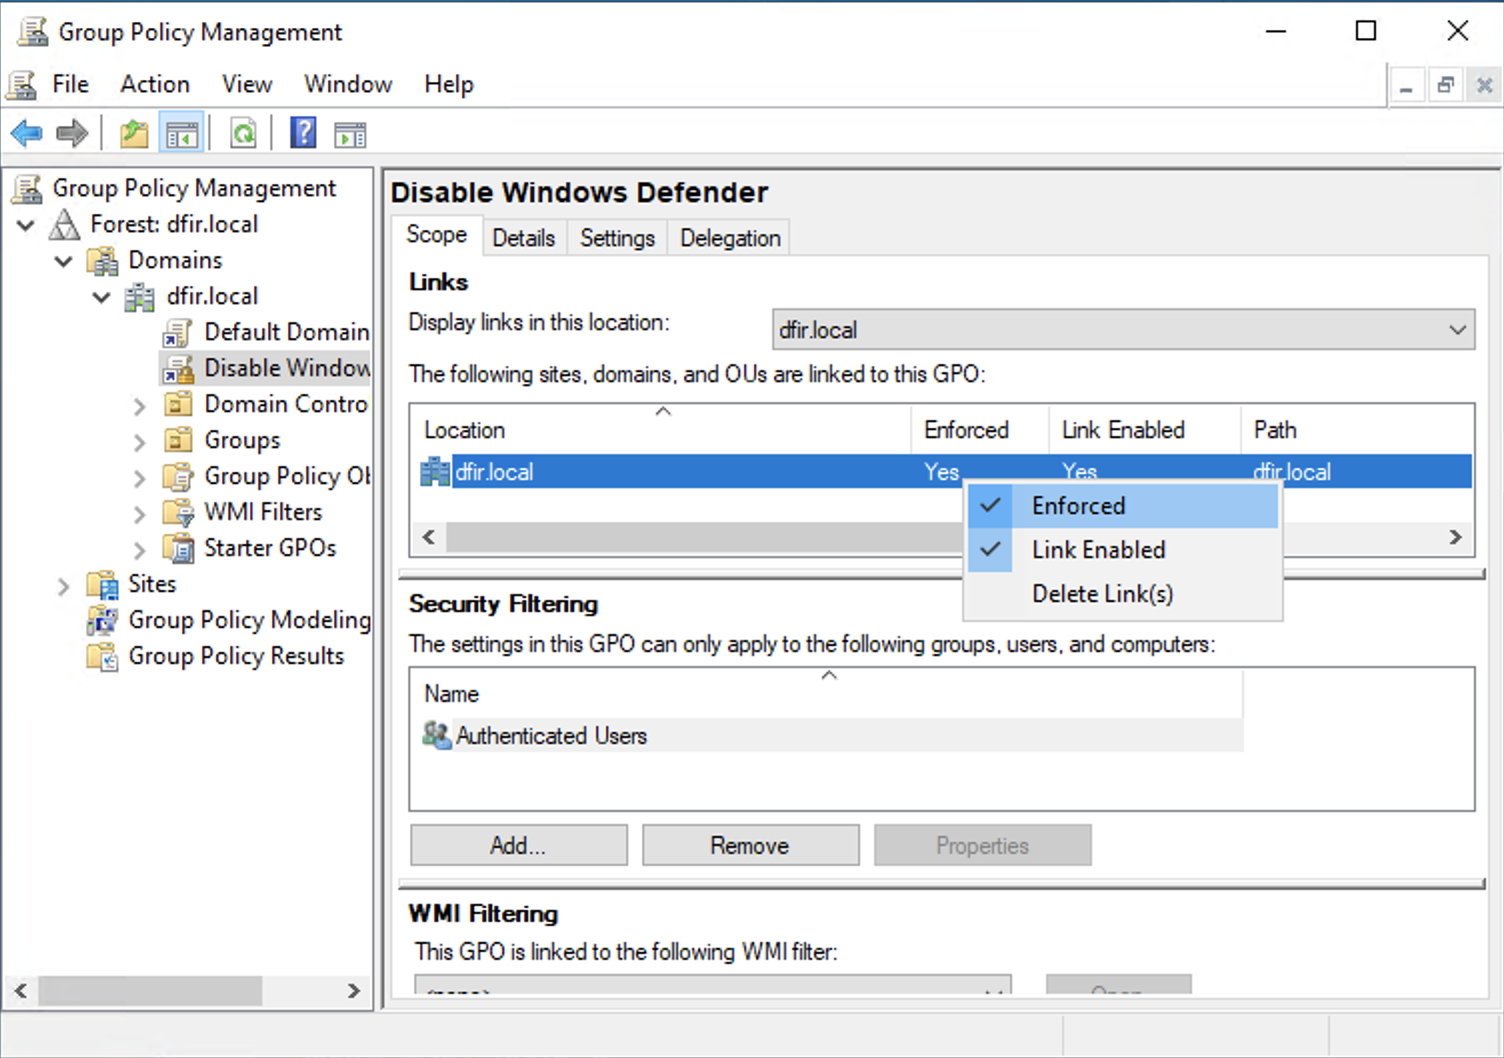
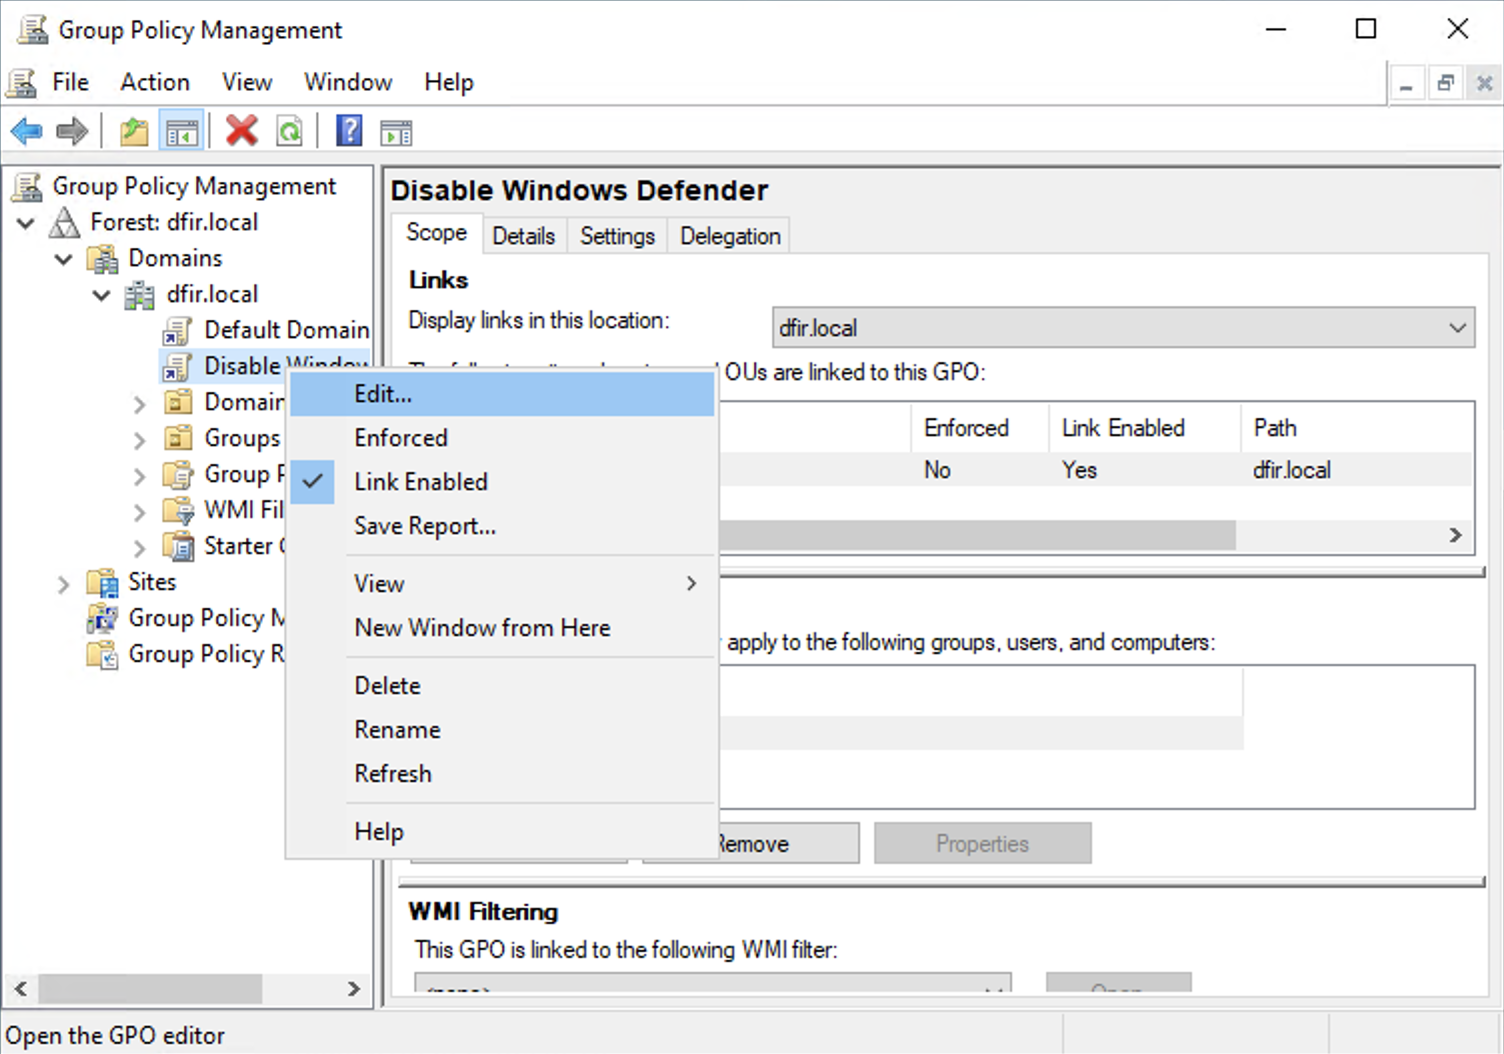
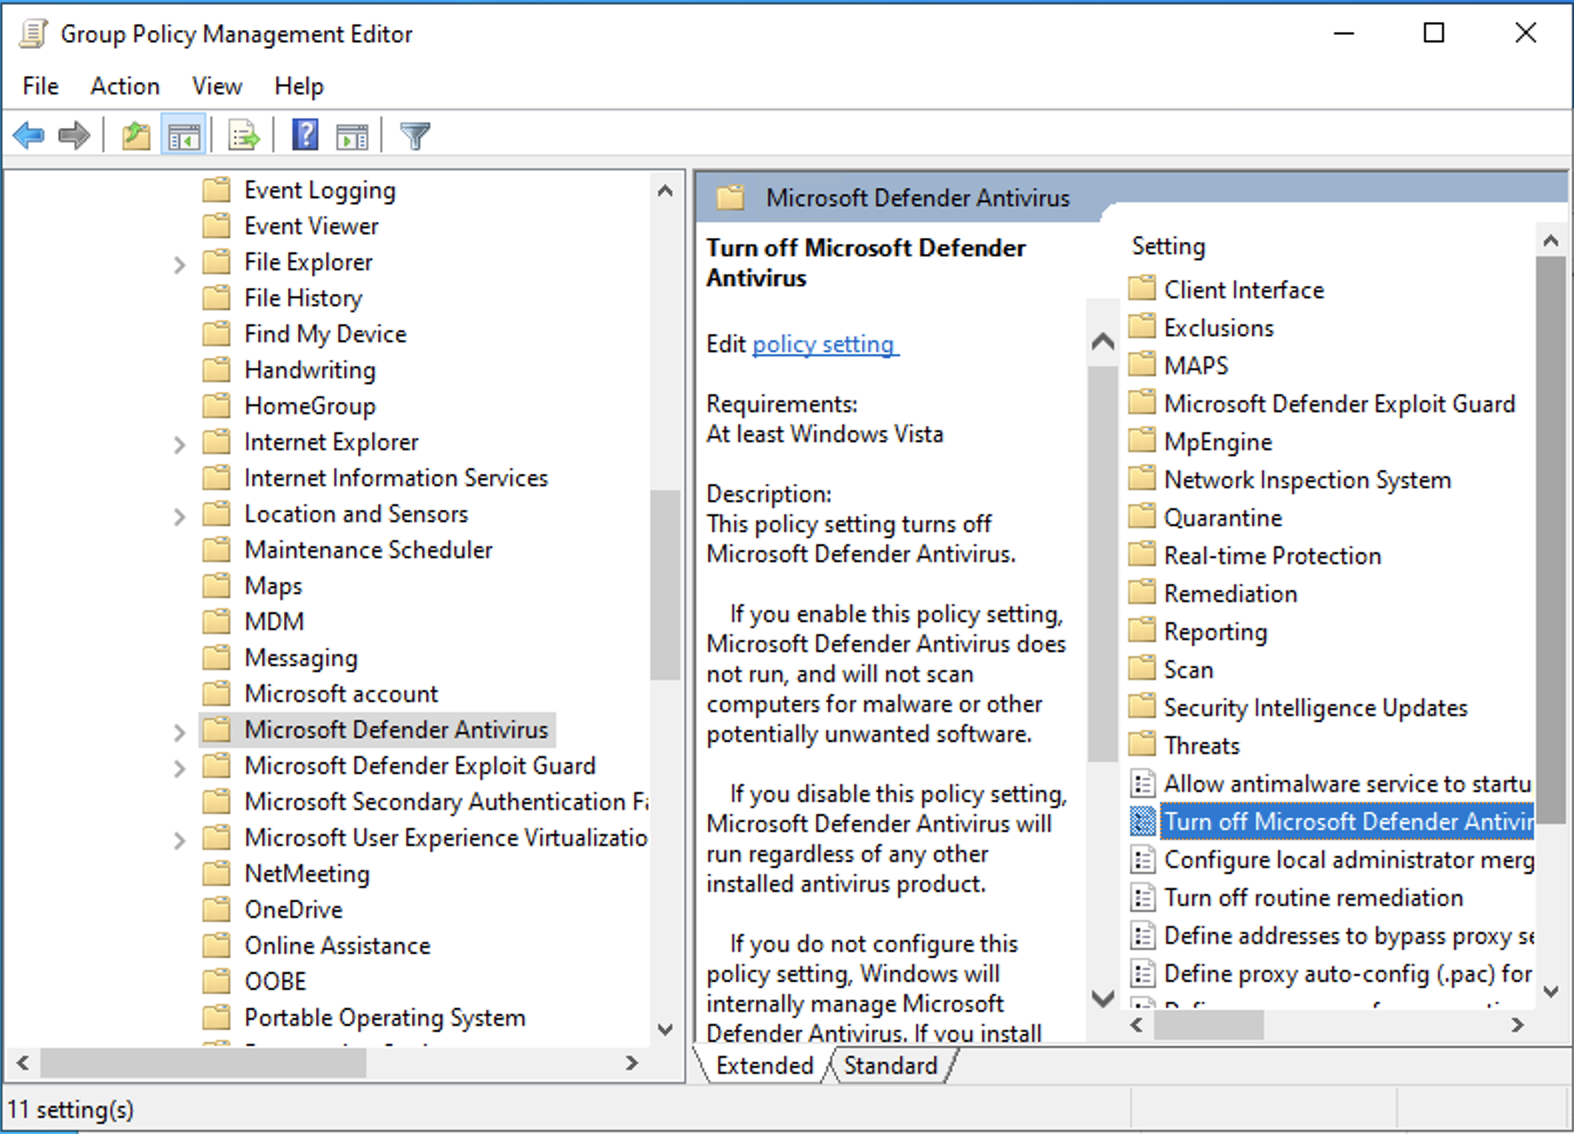
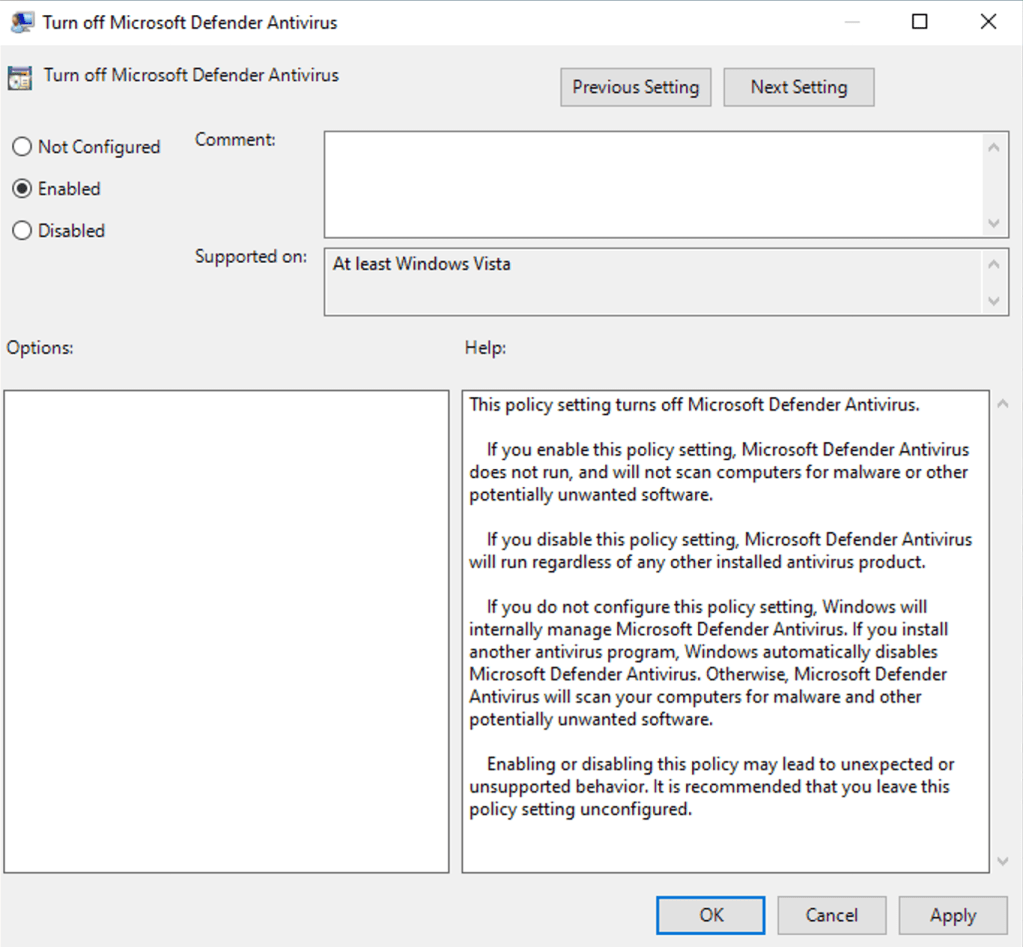
C:\Users\Administrator>setspn -T dfir.local -Q */*Optionally, you can automatically disable windows defender in the lab by navigating to Start > Group Policy Management > Run as administrator and creating a group policy that will be enforced in the domain.


We are all set to start adding client machines to the domain controller.
Windows 10 Client Setup
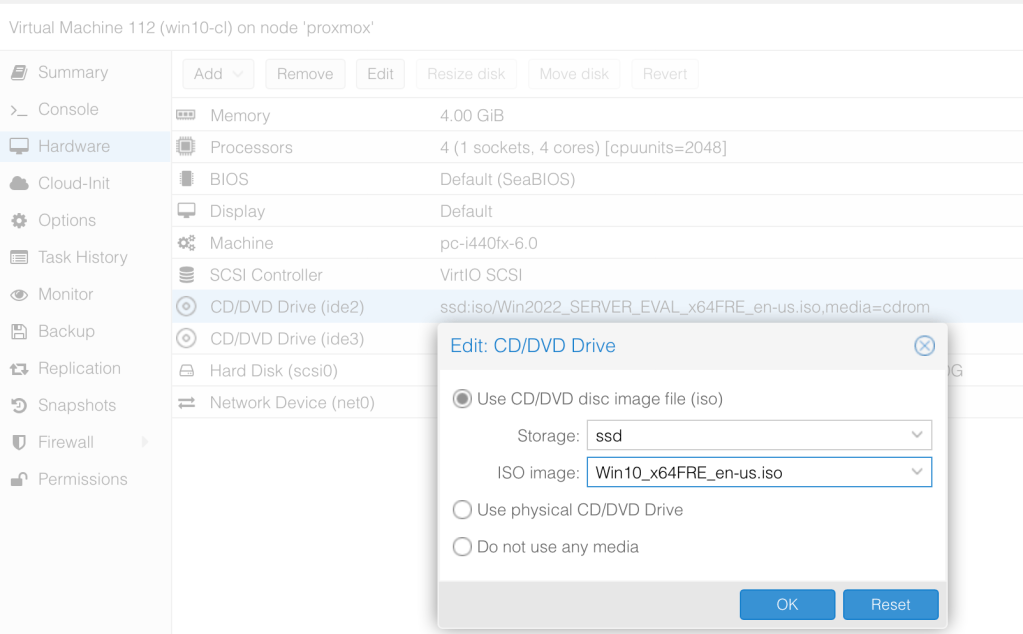
We took a clone of the VM before installing Windows 2022 so we can use it for Windows 10 too as the VM setup is the same. What we need to do is point the correct ISO file.
Repeat the same steps we did to install the hard disk drivers from vioscsi\w10\amd64, network drivers from NetKVM\w10\amd64 and memory ballooning from Balloon\w10\amd64.
If you are interested in the exact steps for installing Windows 10, please refer to my post here. Make sure to install the drivers the same way we did with Windows server. We will then rename the machine to our preferred name and reboot.
I will also enable Windows Subsystem for Linux on the machine. First check to see whether Nested virtualisation is enabled based on your CPU. I have AMD and we see from the response that it is enabled.
root@proxmox:~# cat /sys/module/kvm_amd/parameters/nested
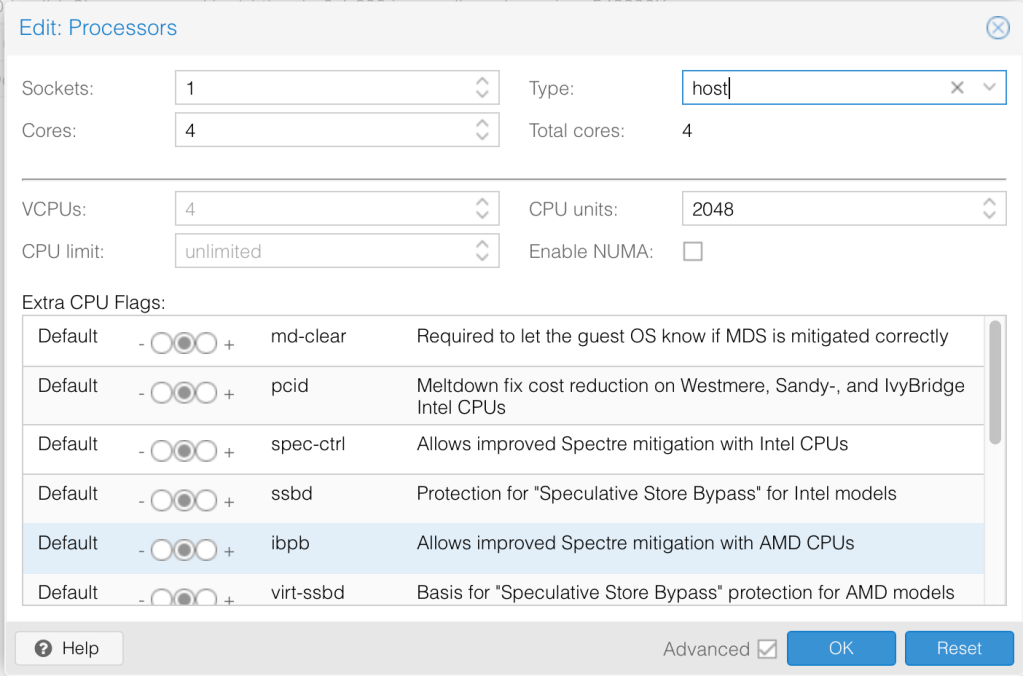
1Next, let’s shutdown the PC and change the CPU Type to host. You need to do this otherwise your installation of Linux will fail.
Please refer to my post here to see how to enable WSL in detail. In our case, we need to make sure that we have done the following:
- Install the Linux Kernel update package from the official Microsoft website.
- Enable Microsoft-Windows-Subsystem-Linux, Virtual Machine Platform and Hyper-V then reboot.
- Install preferred Linux from store
One final task is to enable RDP access as we did with the windows server.
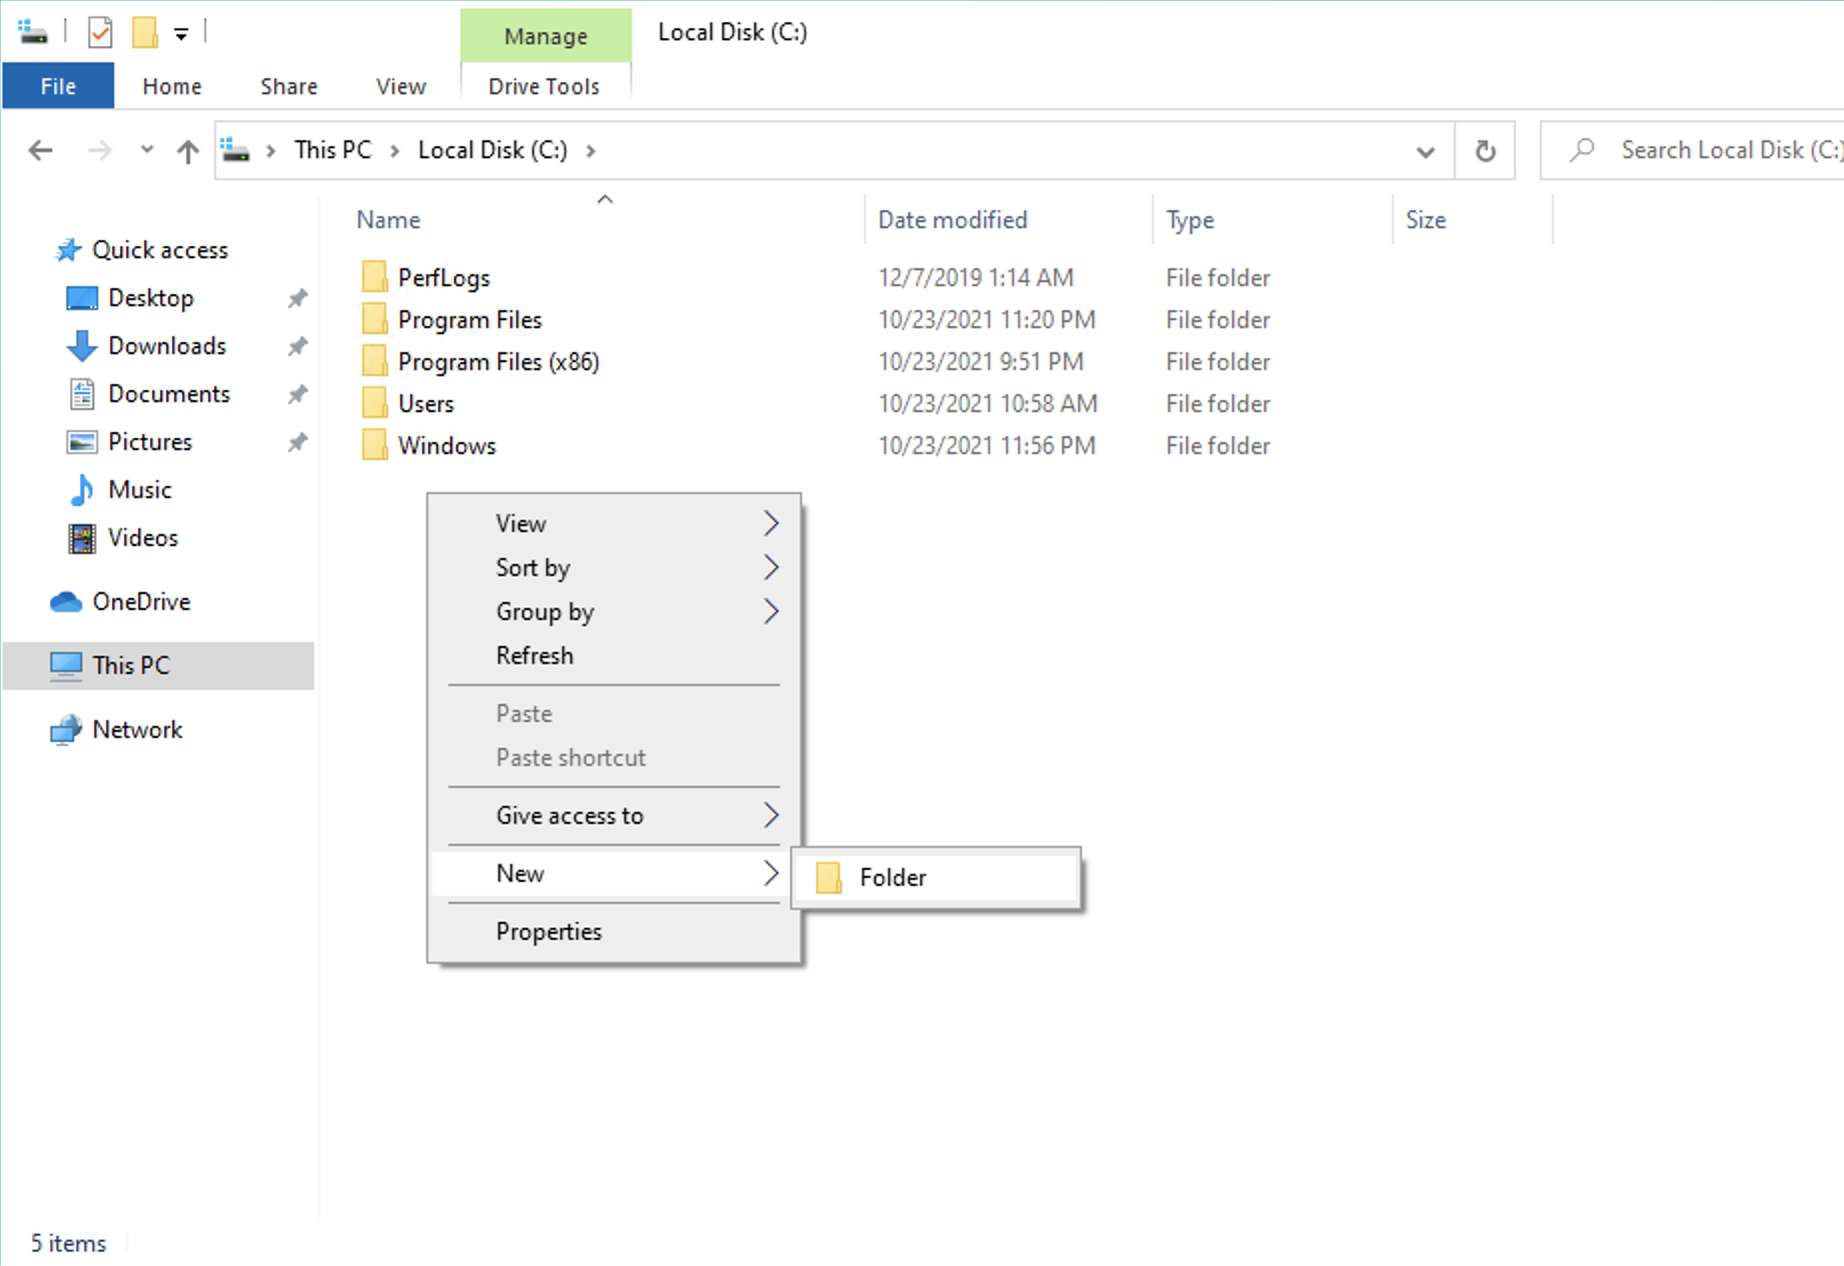
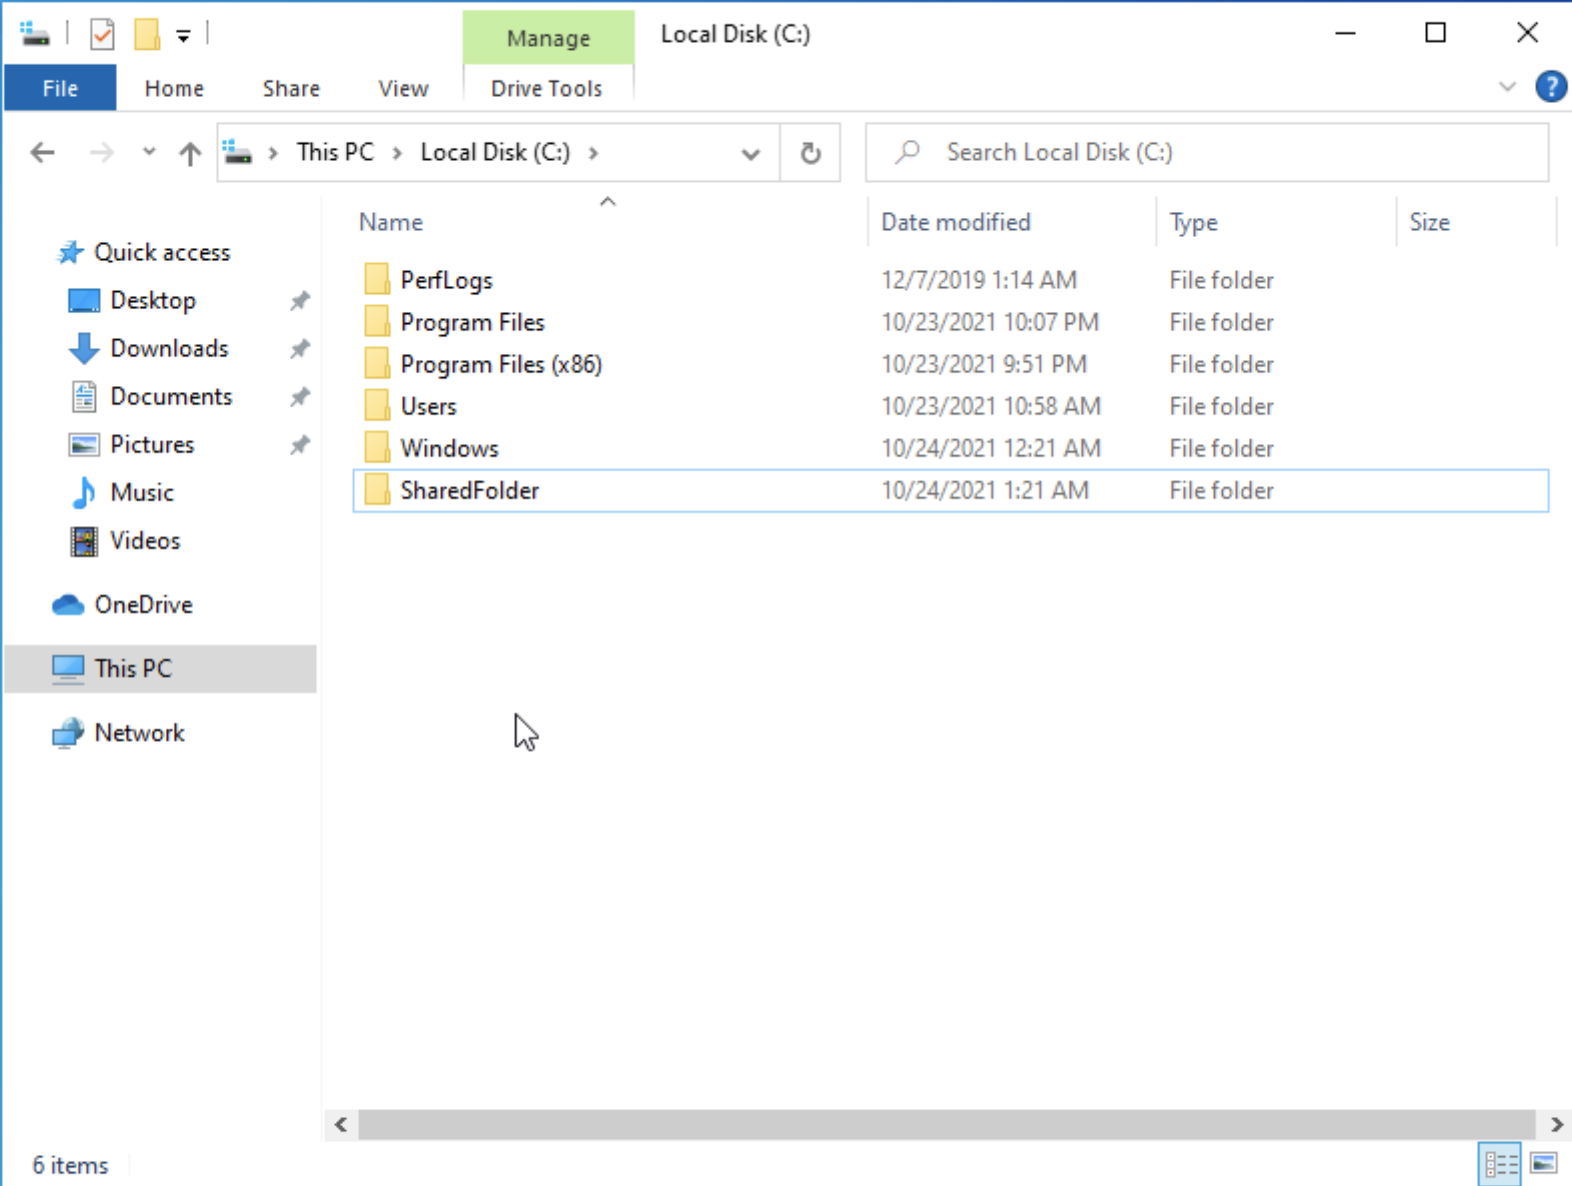
Next, We’ll create a shared folder on the VM to use for attacks.
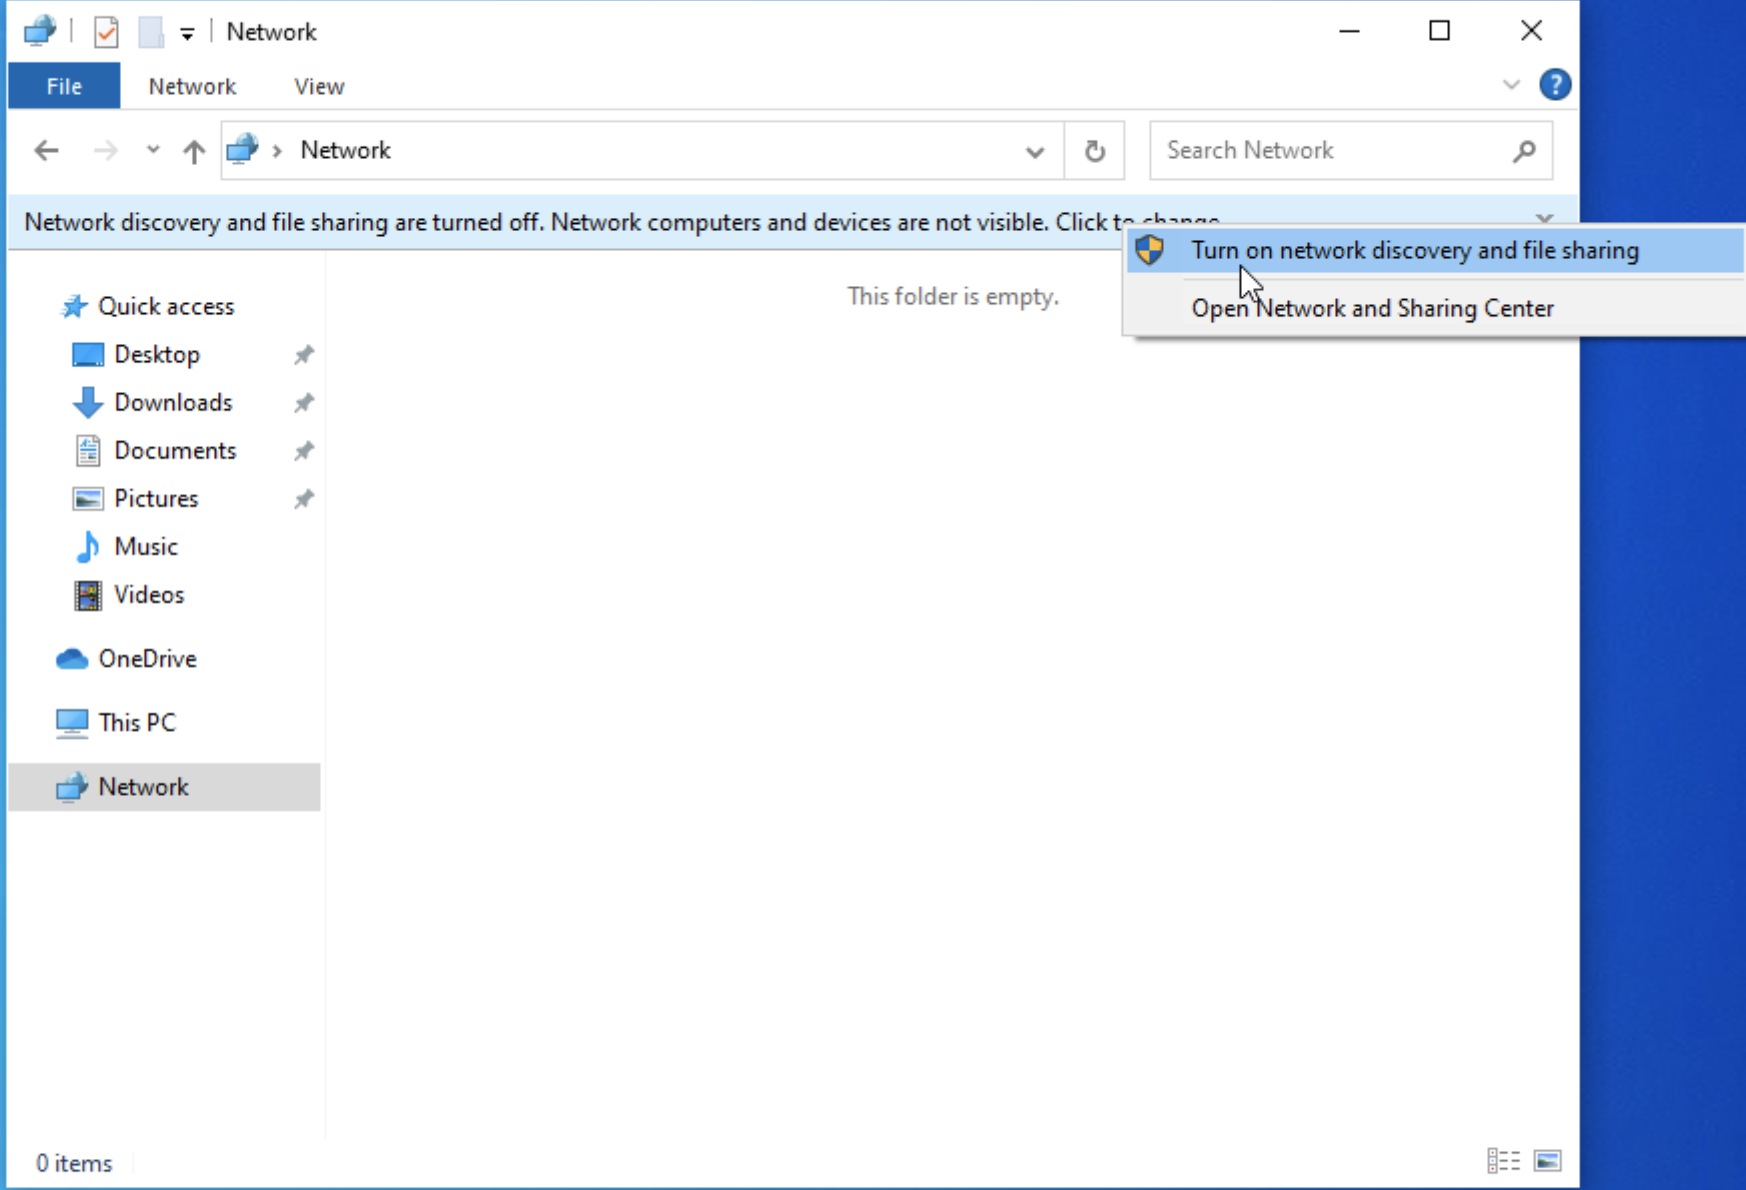
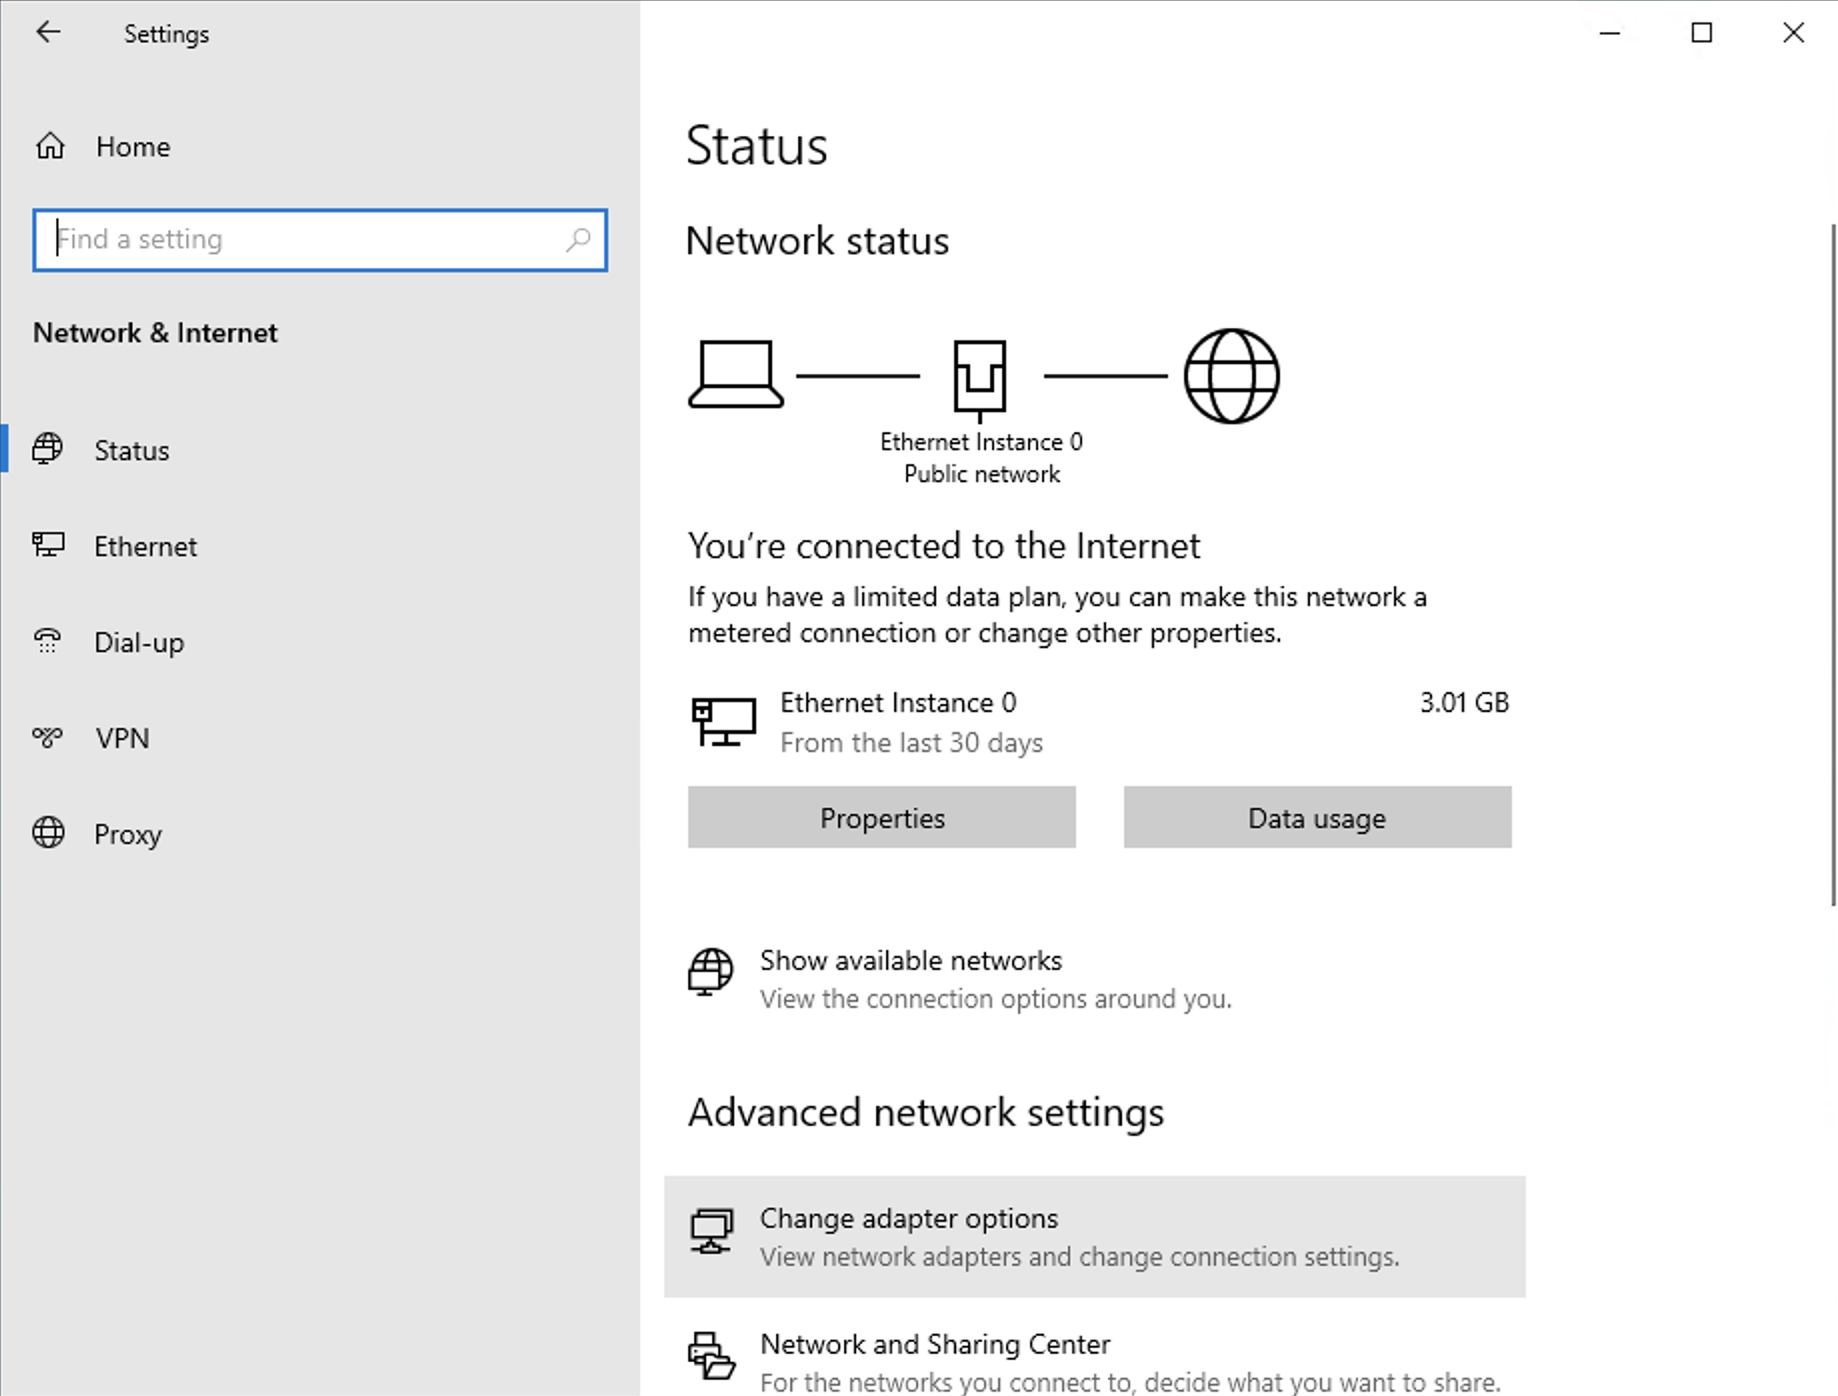
Let’s also make the computer discoverable in the network.

Once that is done, this host should be ready. We can go ahead and clone it.
Join Windows 10 Clients to Domain Controller
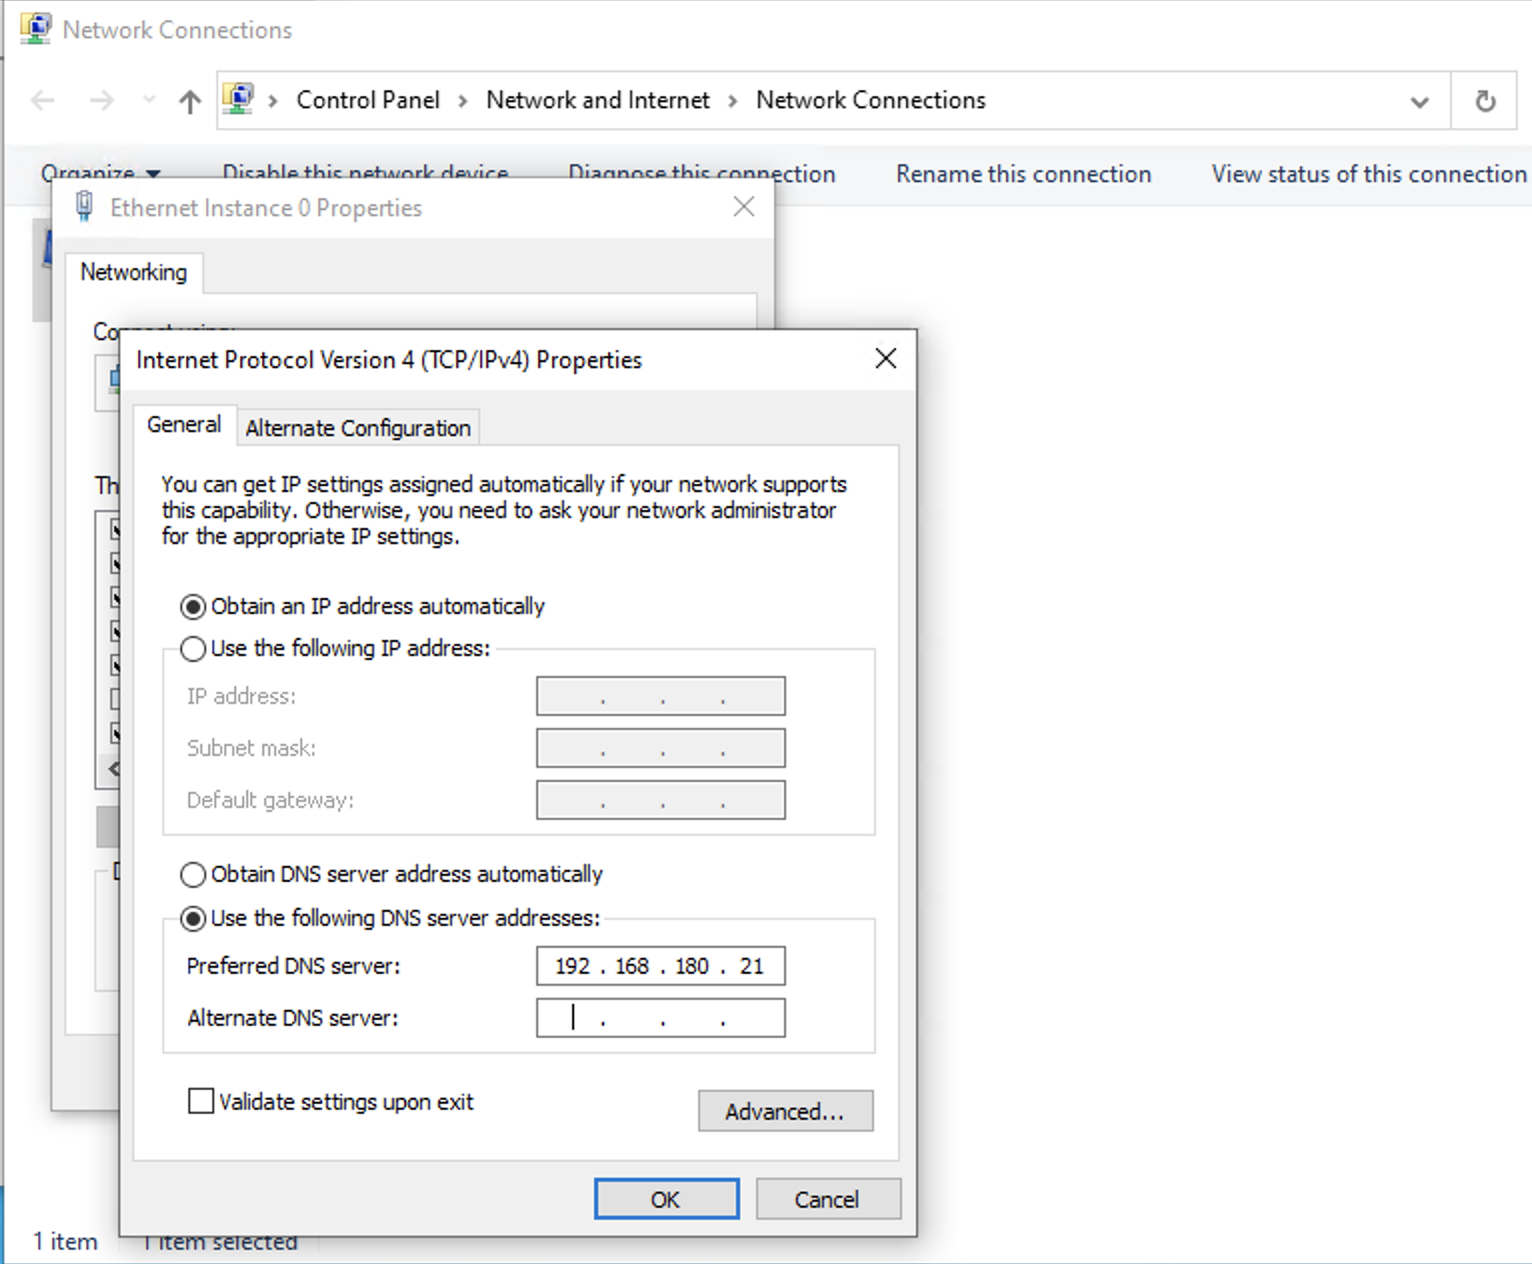
Before we can join the machine to the domain, we need to point the DNS to our Domain Controller’s IP address.
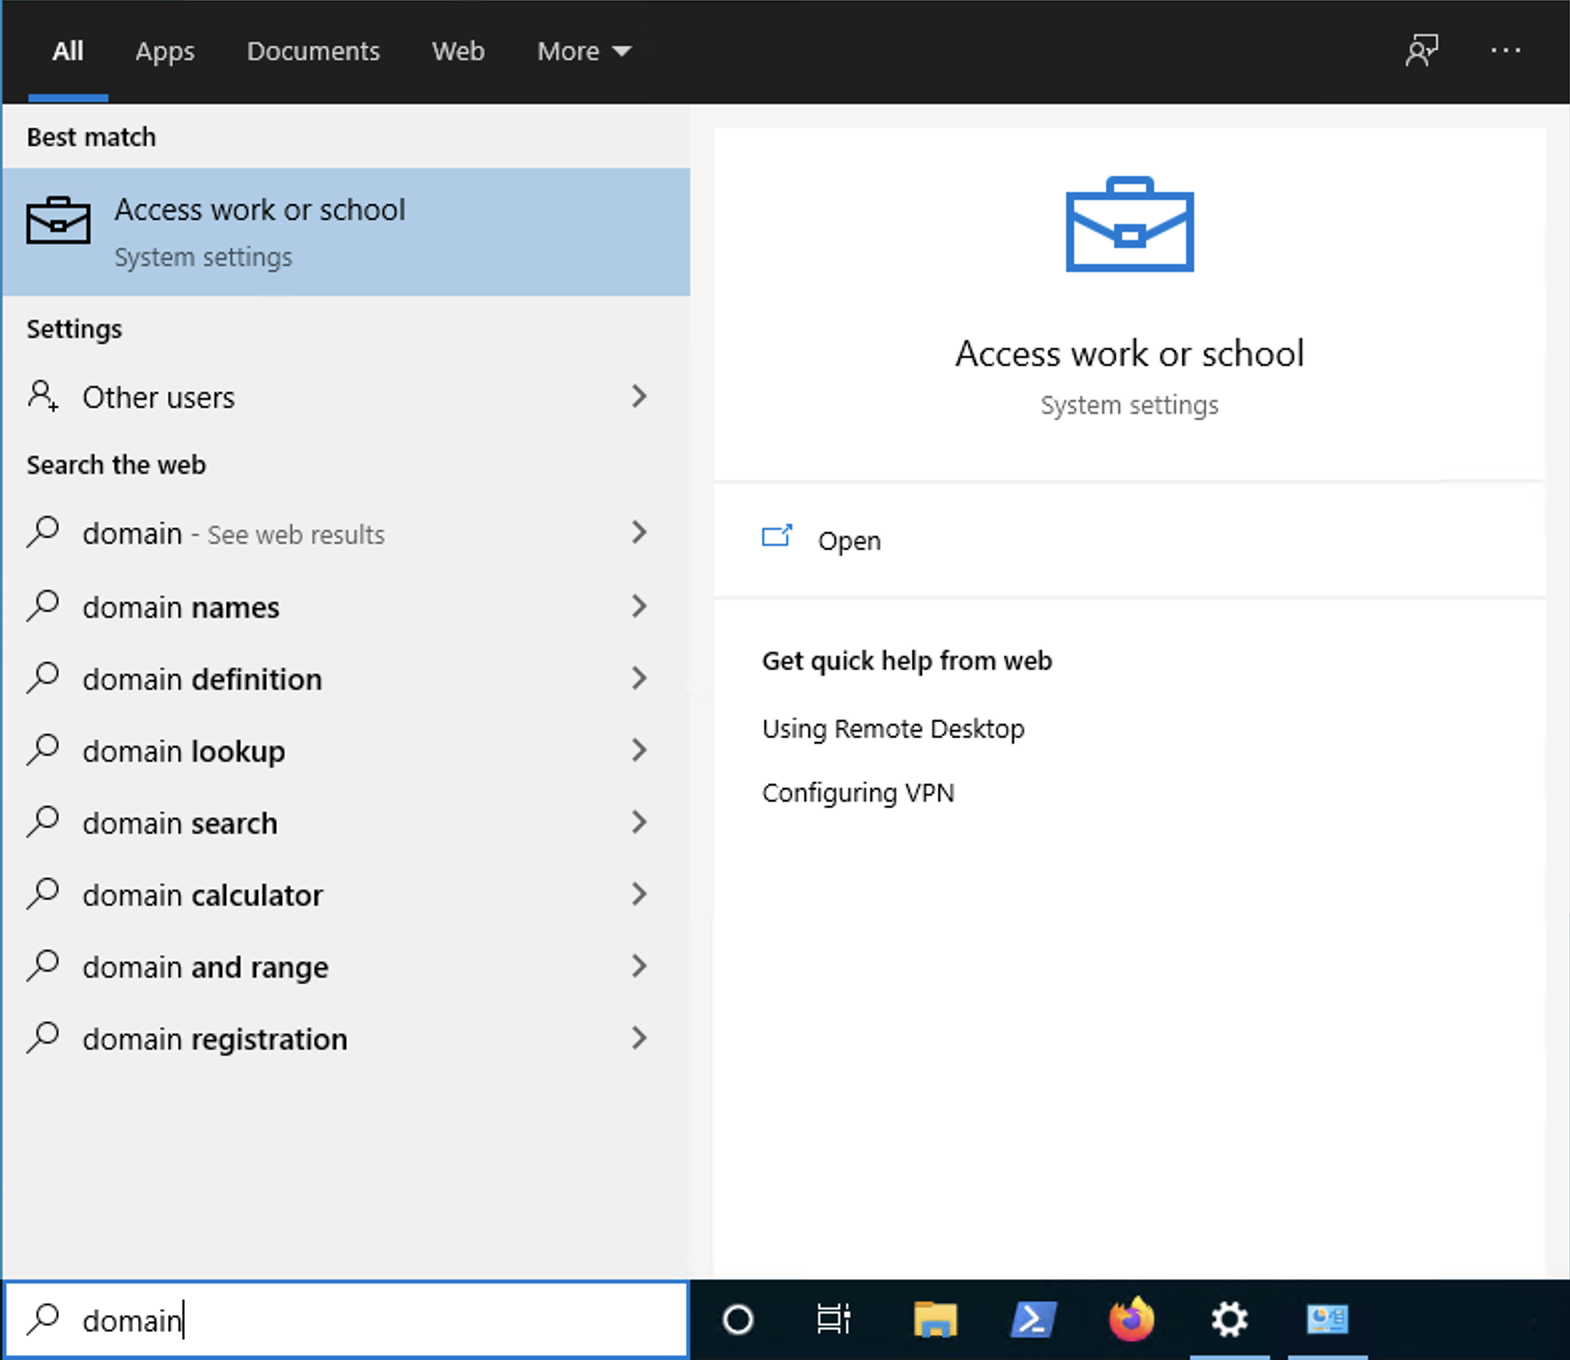
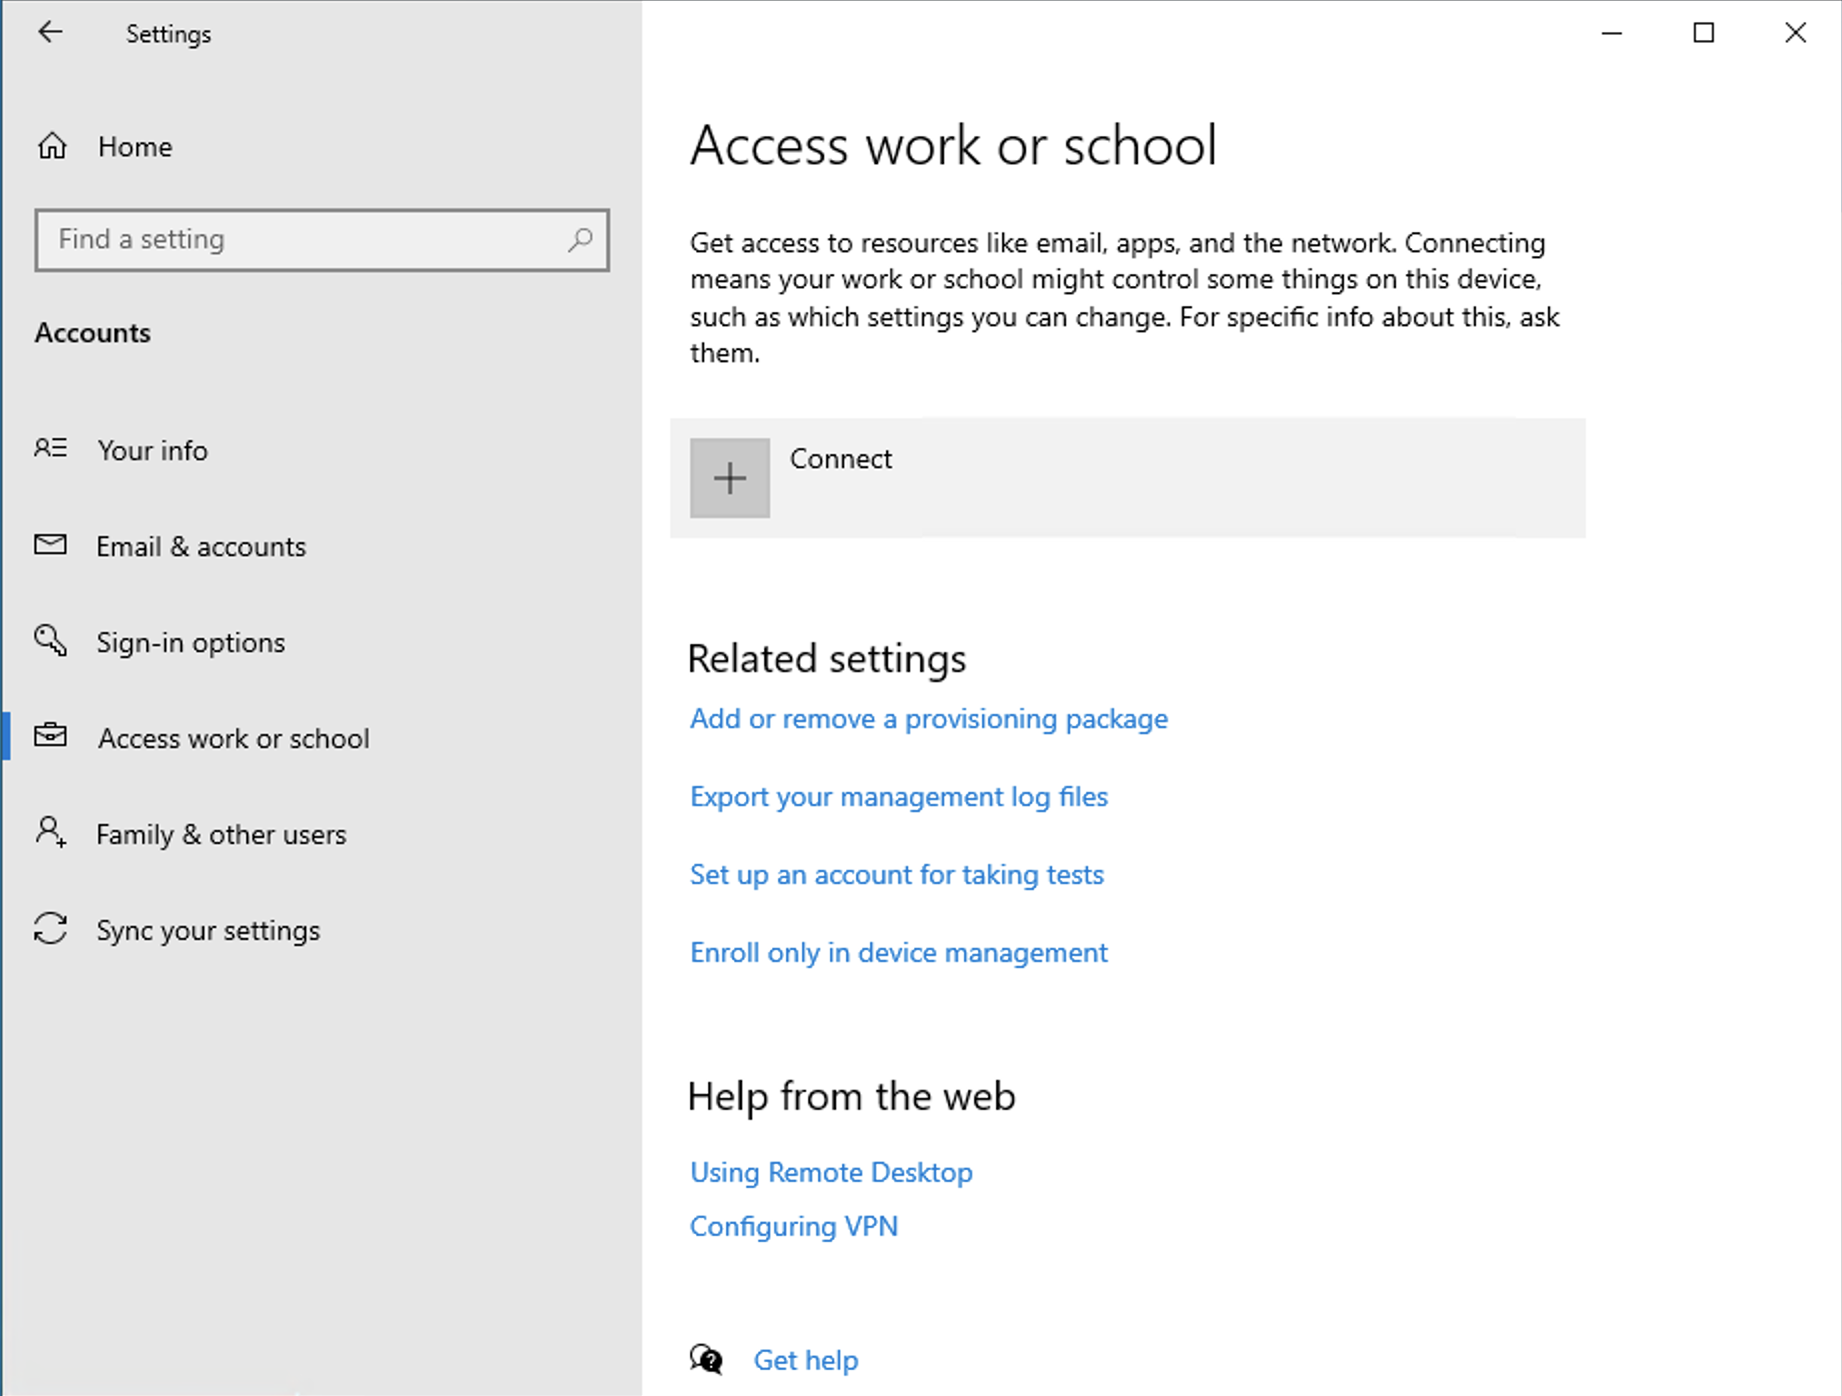
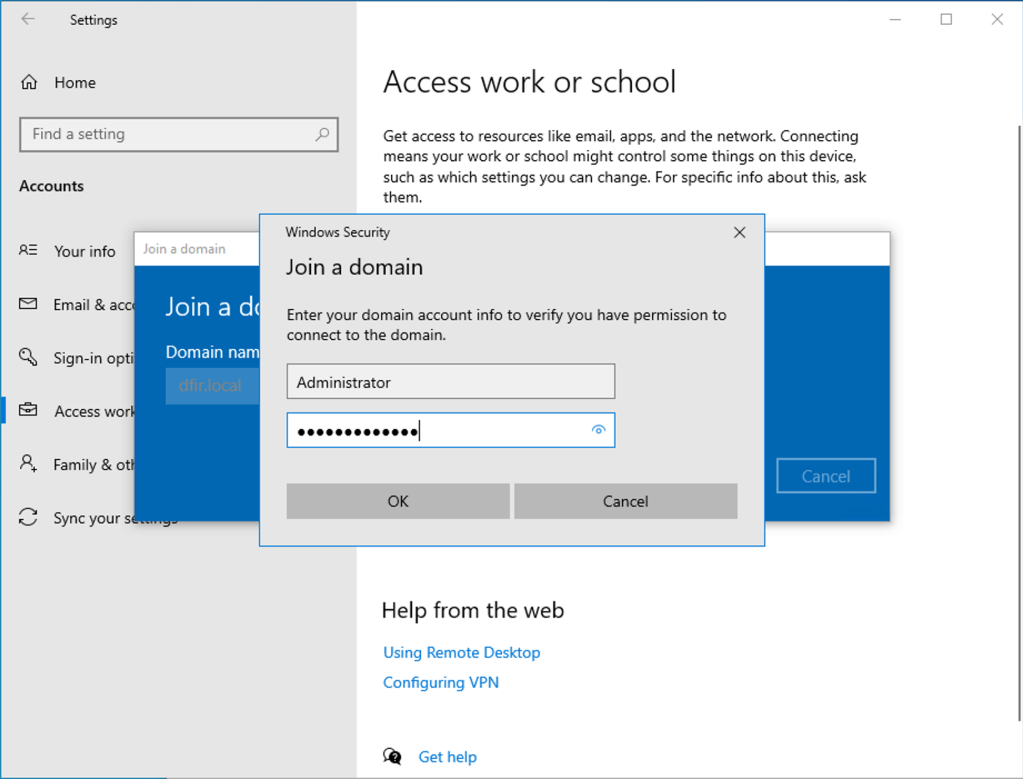
To join it to the domain, search for Access work or school then click Connect.
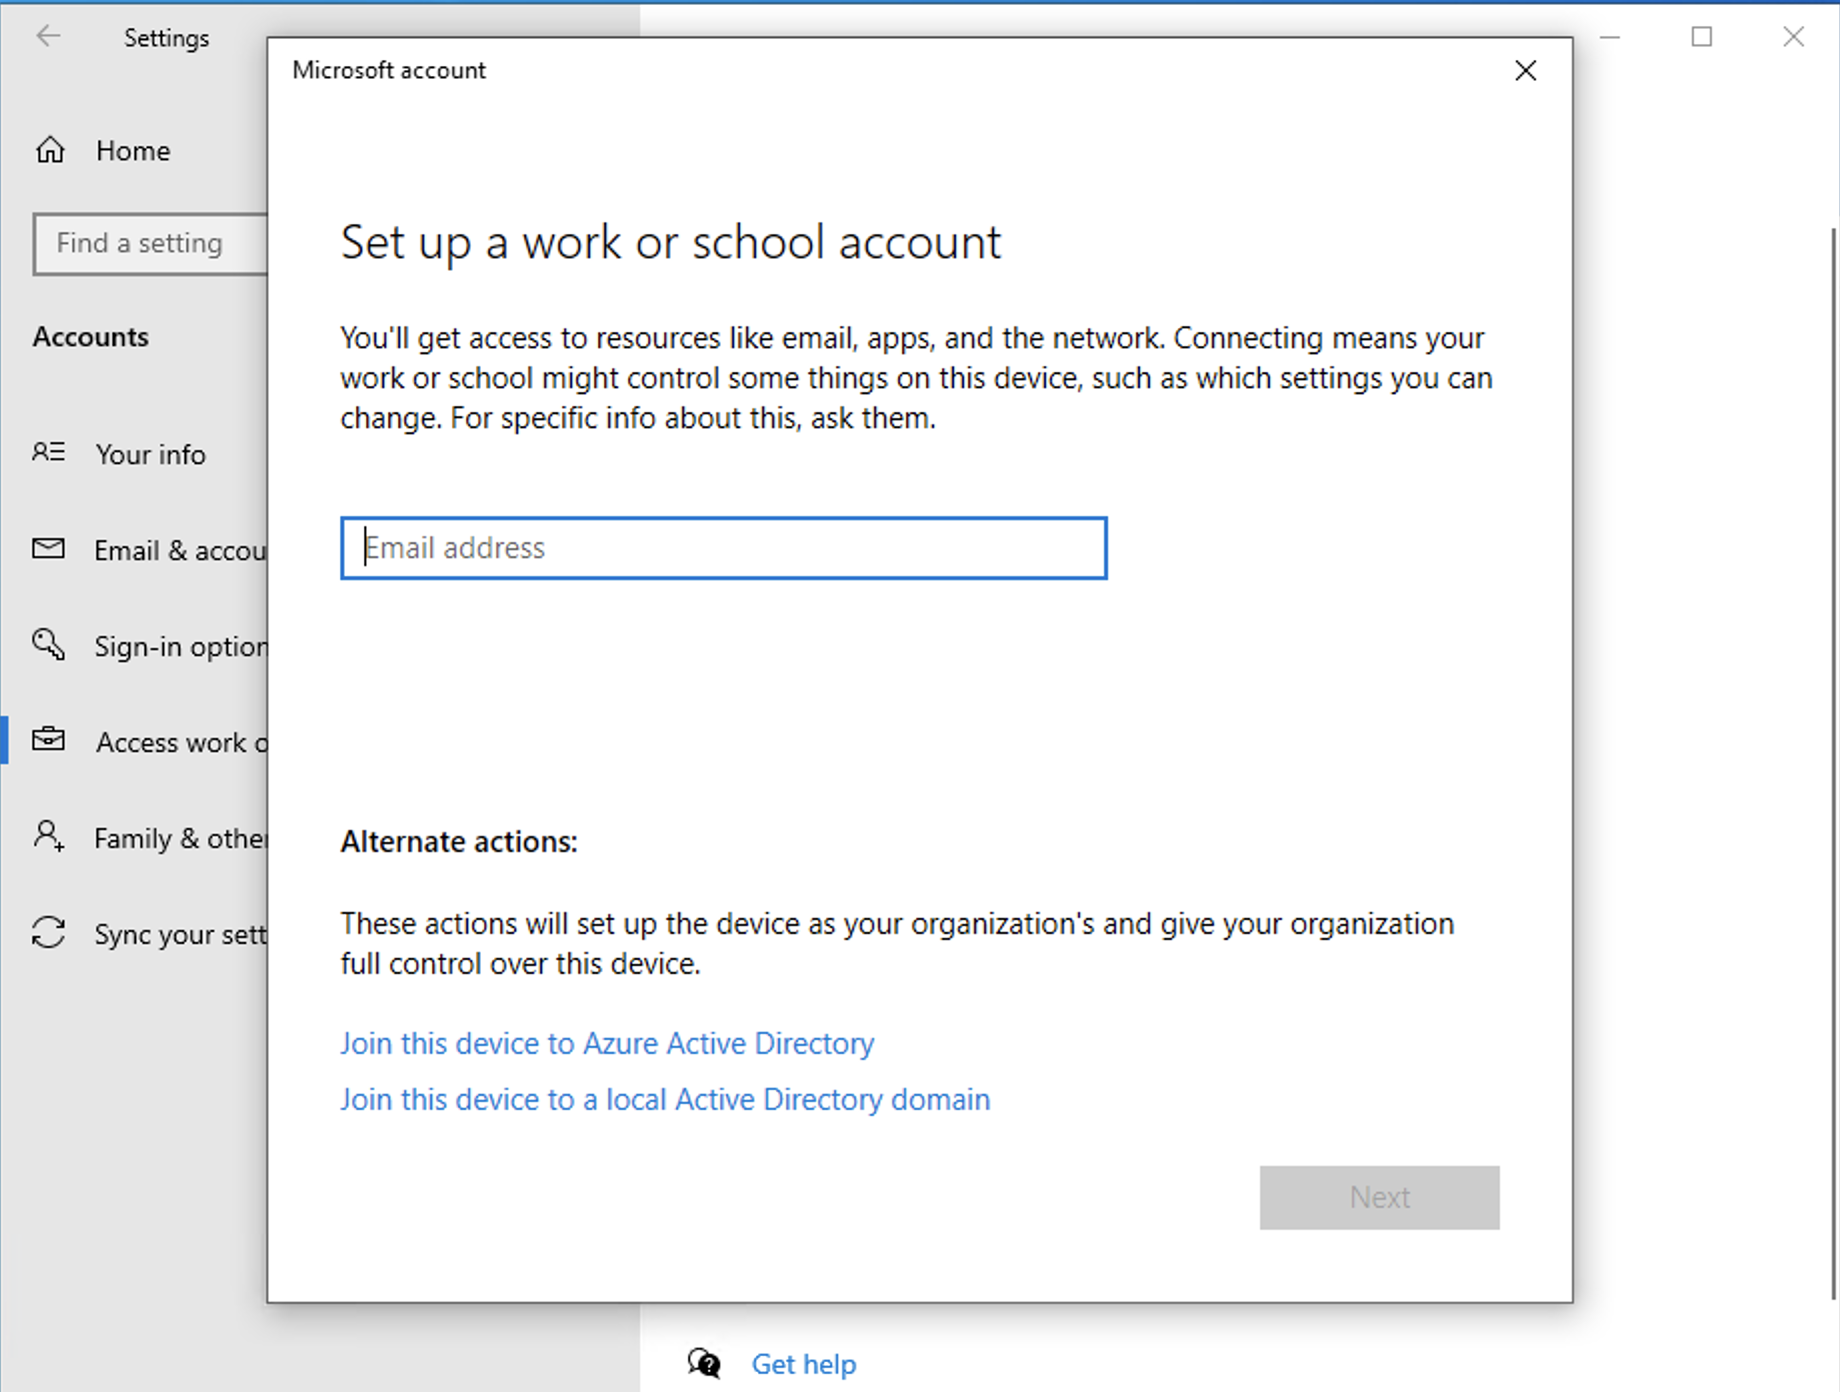
We will opt for the alternate actions > join this device to local active directory domain.

Authenticate using valid domain credentials andif if successful, the machine is now part of the domain.
We will need to reboot the machine to apply the change. Let’s first login to the machine as a domain administrator to make a couple of changes. We will add the win-user domain account to the list of local administrators.


Repeat the same settings on the other Windows clients that we have.
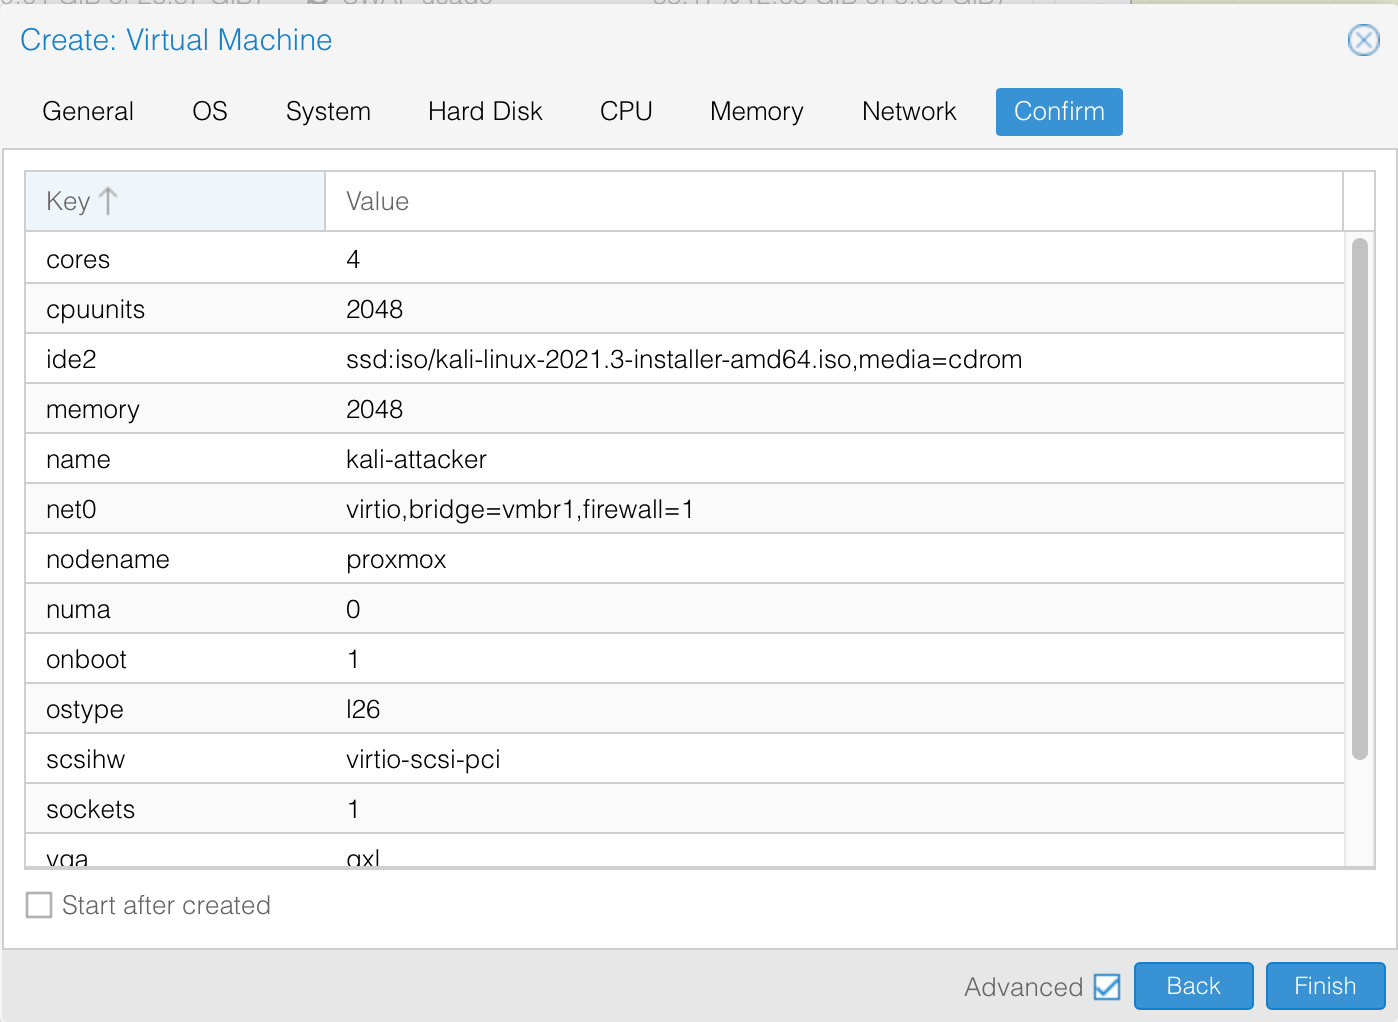
Deploying Attacker Machine using Kali Linux
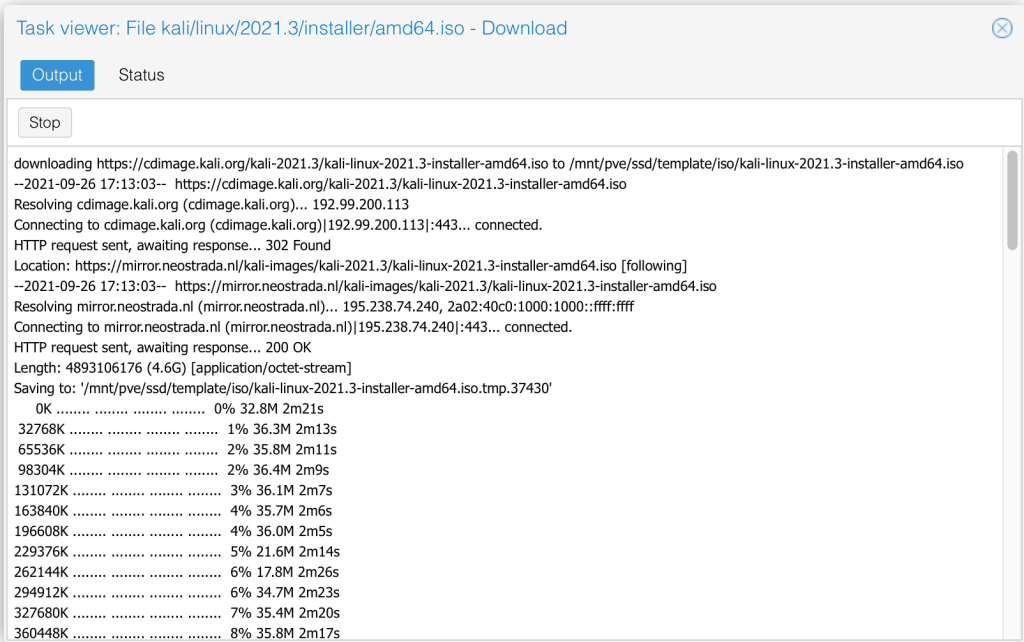
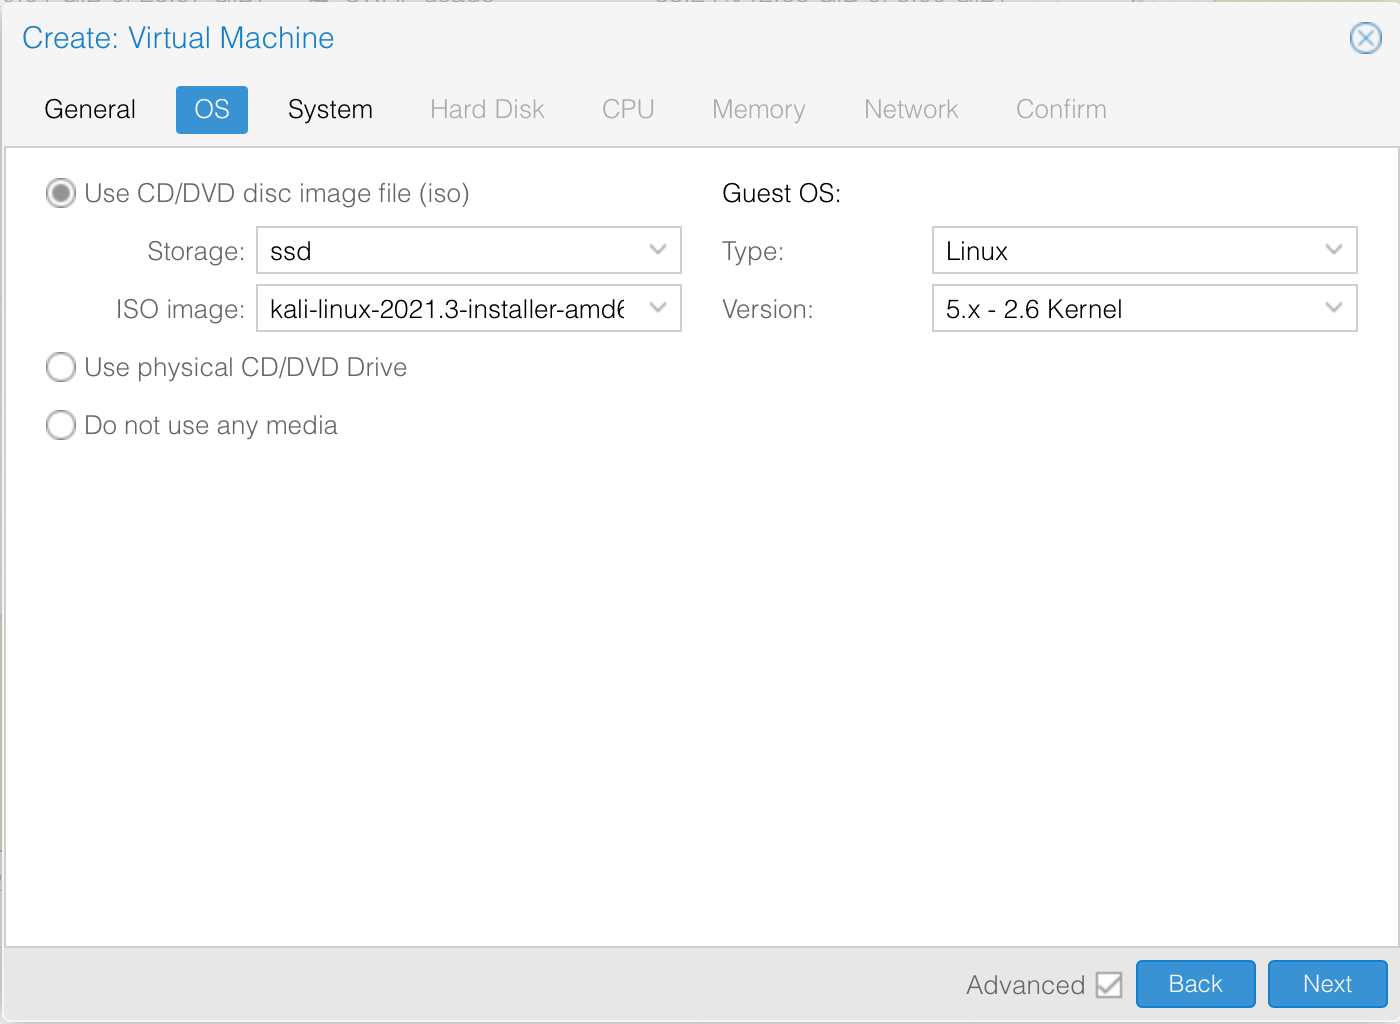
We will directly download the Kali ISO image file from the official repository using the Download from URL option. We are using the bare-metal option and specifying the checksum that it needs to validate.

Once we click on download, the process starts and we can monitor the status of our task.
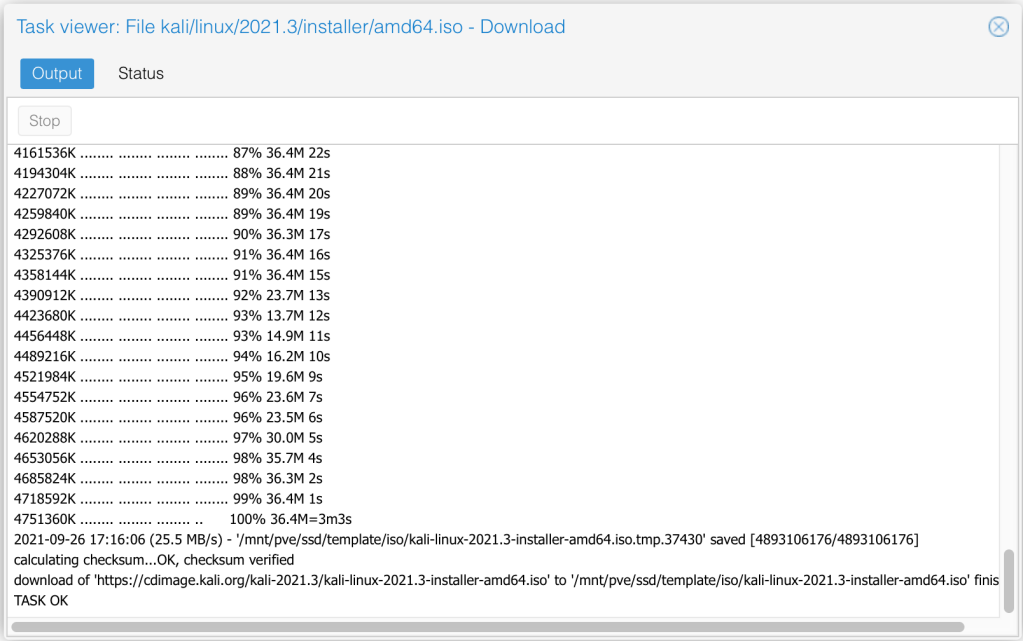
In the end, we see it validates the checksum and if all is fine, task is successfully complete.
Our next step is to use the same steps we have been using earlier to create a VM based on that ISO image. We specify the IOS image
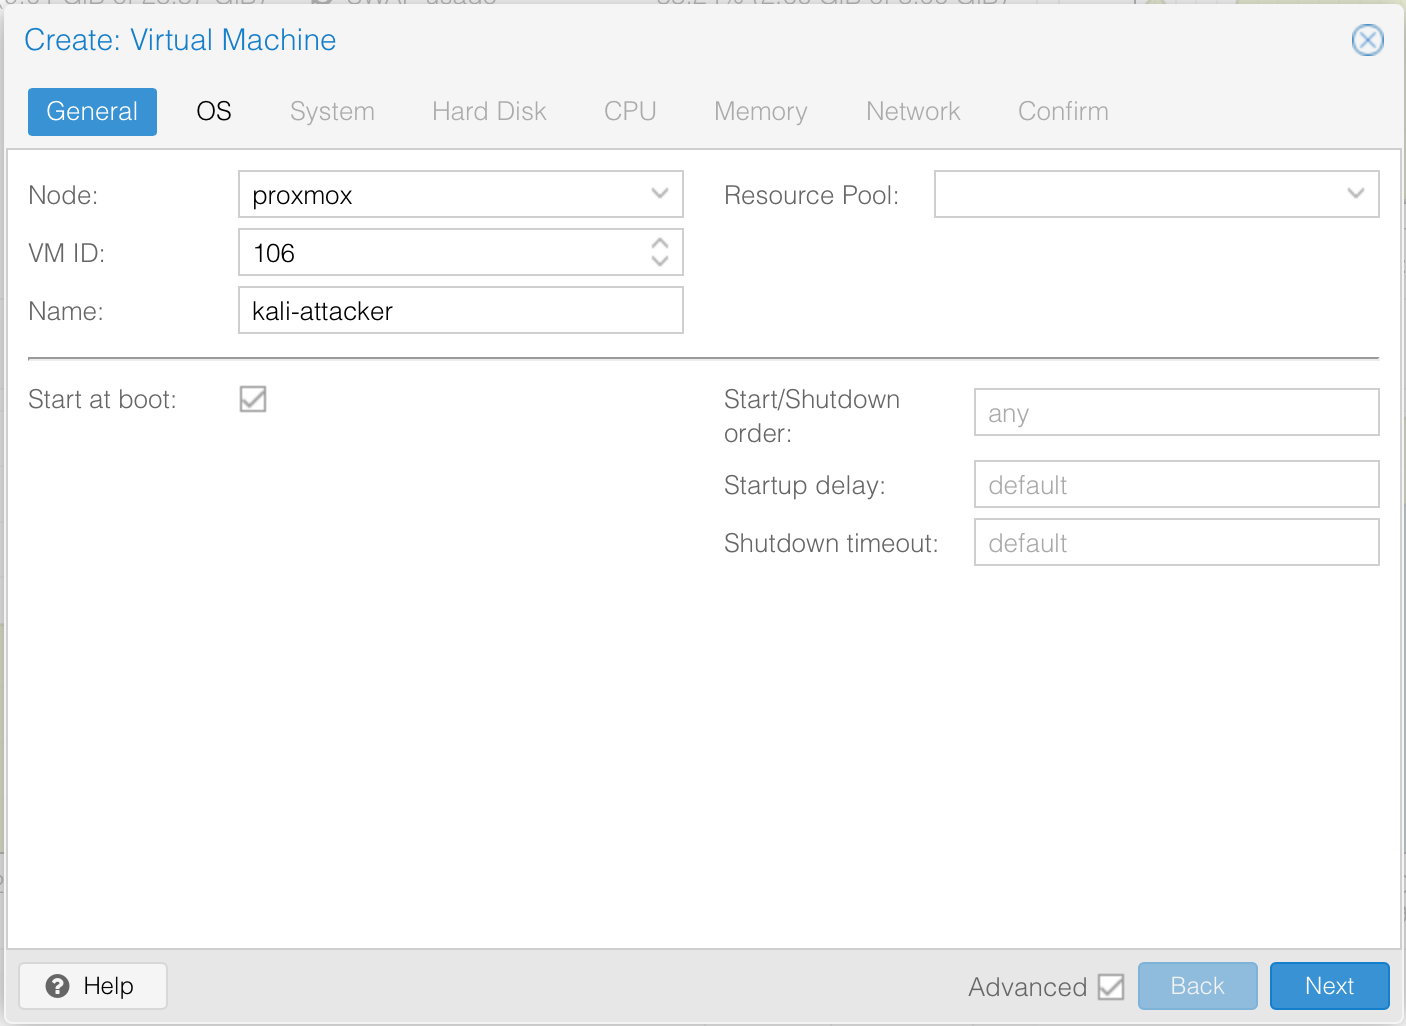
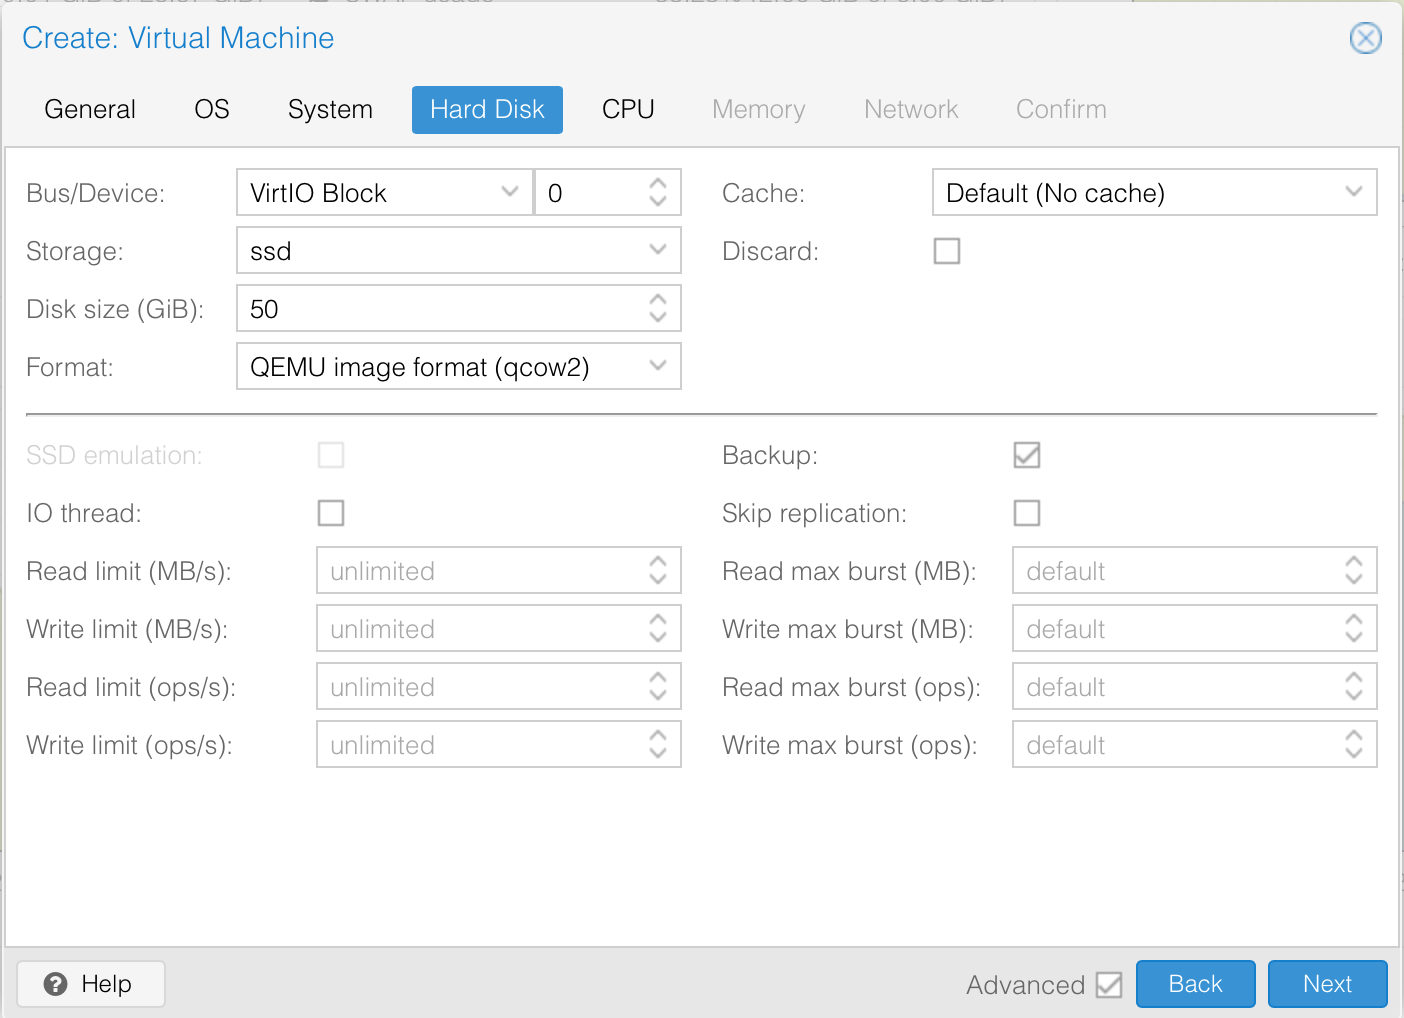
We will use the SPICE graphic card. I’ll set this to 50GB disk space mainly because I do not want to have to increase it soon but I think 30GB is more than enough. My current VM has 40GB allocated of which only 27BG is used up.

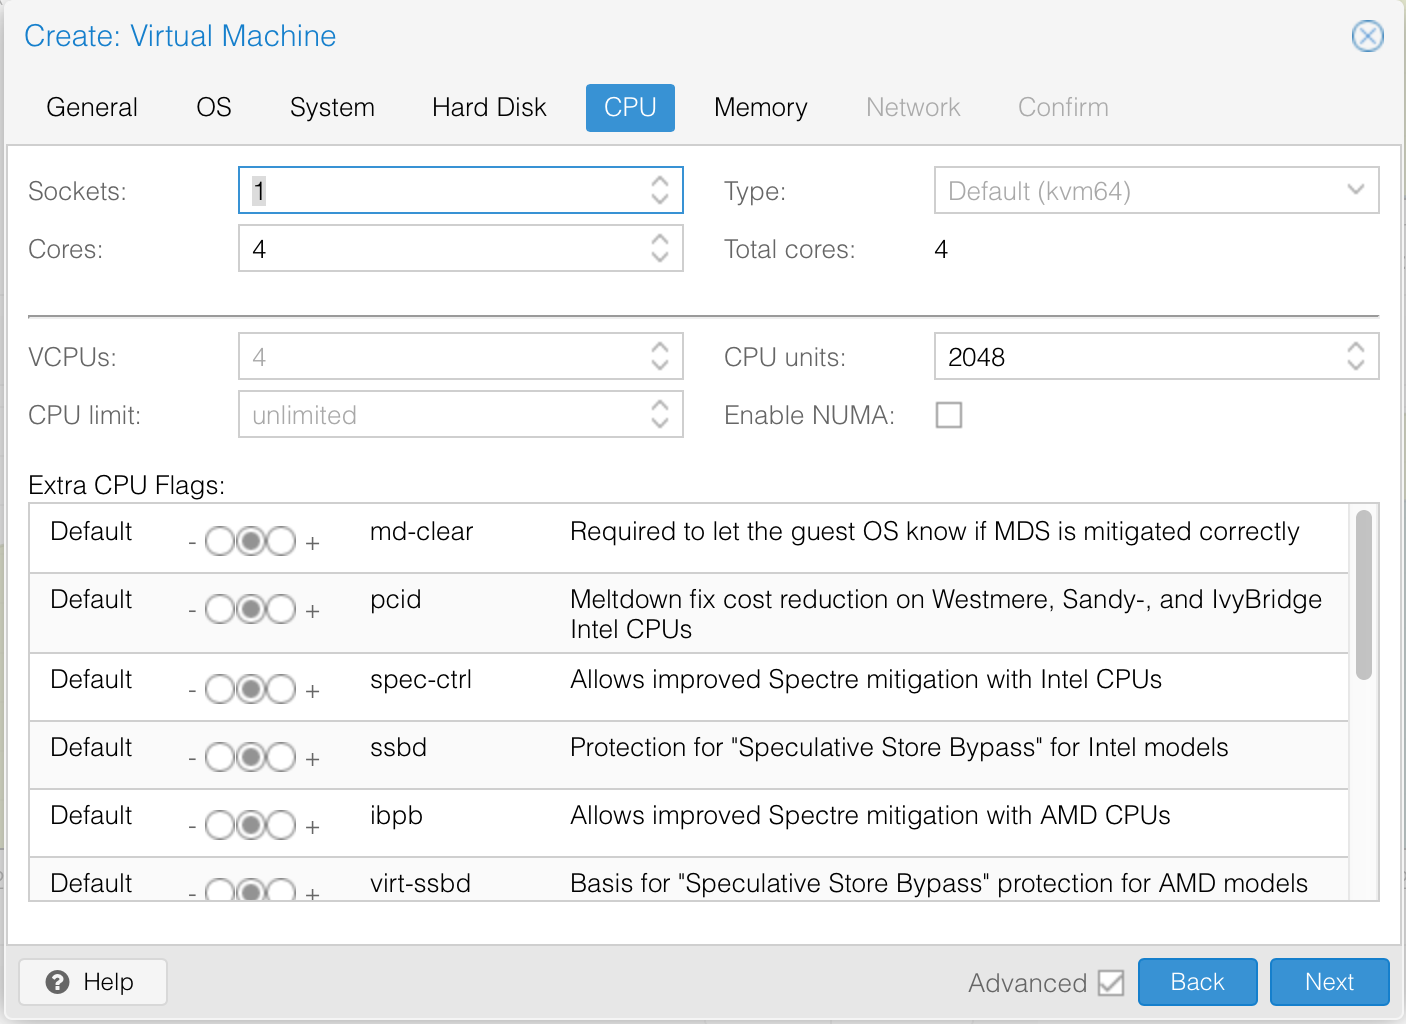
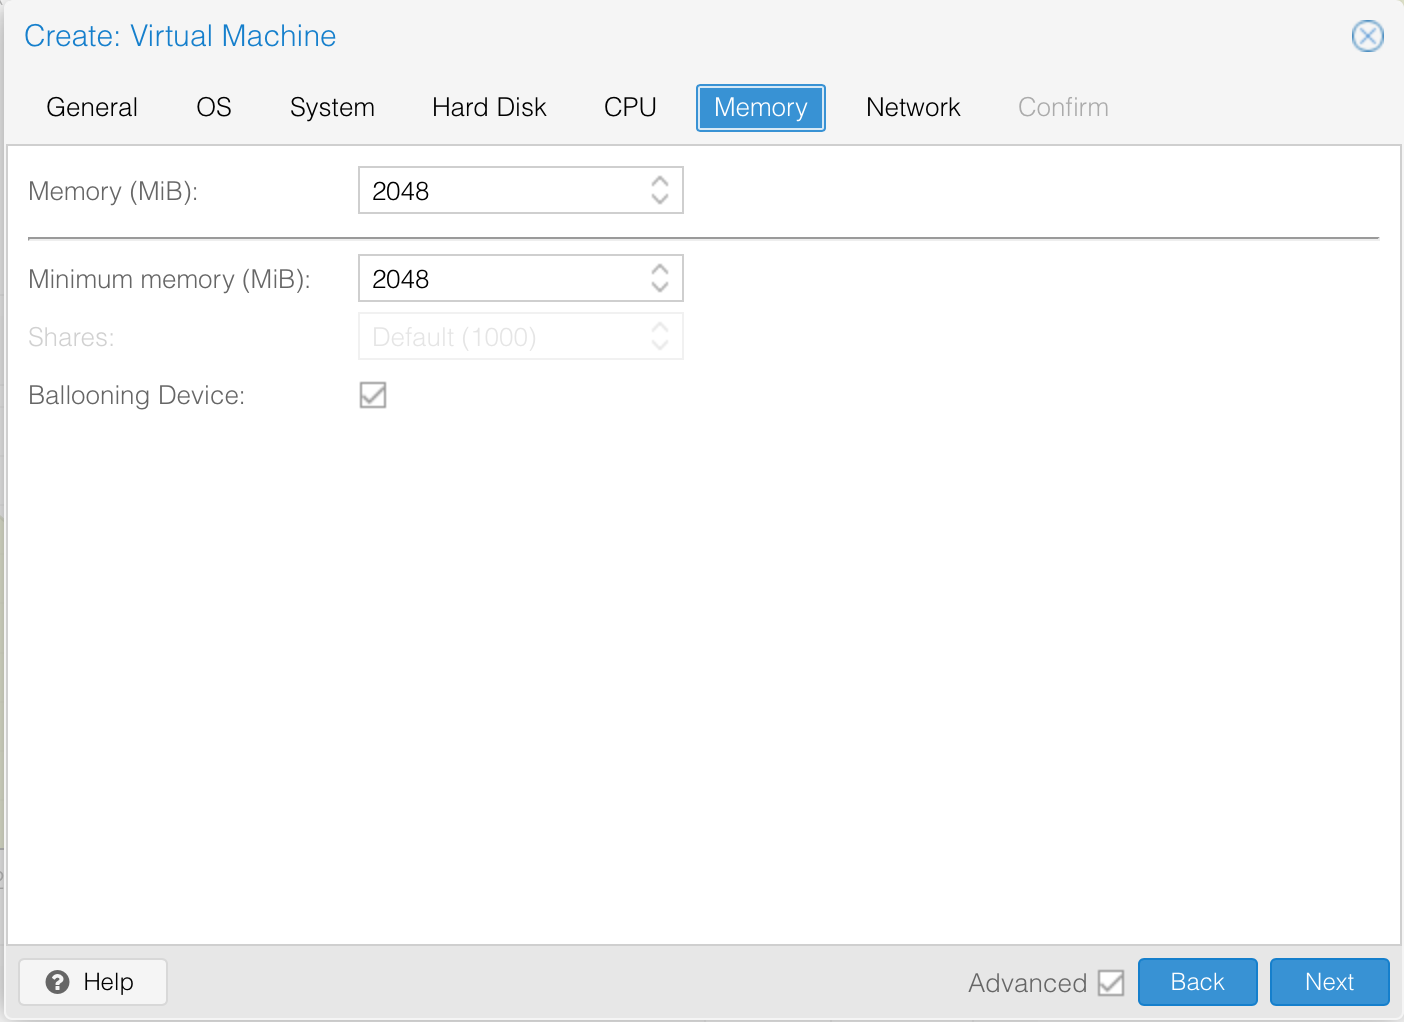
We will allocate 4 cores to the VM since I will be using the desktop. Best to check the recommendations here for your installation. 2GB Memory is more than enough.
For now, I need to get network access for setup so let’s put it in our preferred network.

To start installation select “Install” and follow the graphical wizard.
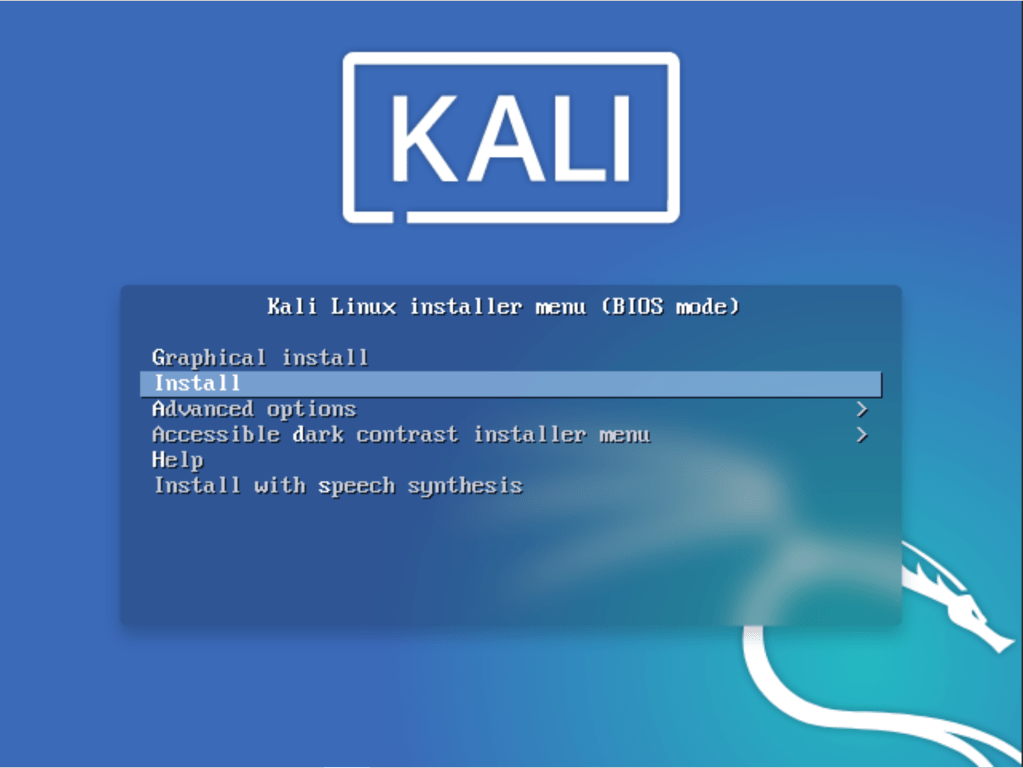
The kali wizard is pretty straightforward. In the beginning, you will need to specify your preferred language, select your location, your locale and your preferred keyboard. I have skipped through those and focused on the interesting parts that could raise questions.
The next thing is to configure the network setting. I did put the VM in a network with DHCP to allow for automatic network configuration. If you do not have DHCP configured yet, select to manually set up the network address. Next, specify the hostname for the VM, the domain and a new user / password to login to the machine.
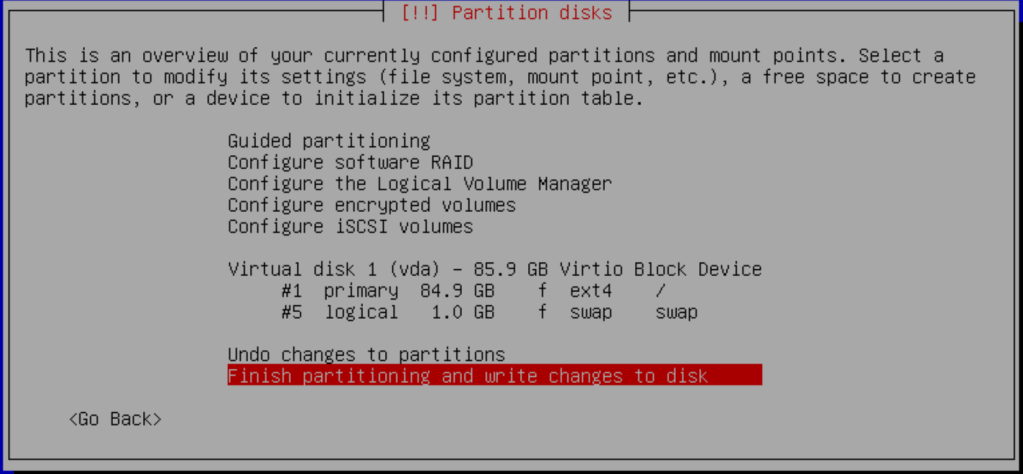
For disk partitioning, I normally just use the whole disk since it is a lab environment.
Accept the setting to install the base system.

Since I would like to have most of the kali tools installed for me, I chose the large installation that has additional tools. The rest of the installation is rather straight forward so not captured here.


Once the installation is complete, the machine will reboot.

To ensure that we have the most recent OS system, let’s run an update and upgrade.
$ sudo apt update -y && apt upgrade -y && apt dist-upgrade -y && apt full-upgrade -y && apt autoremove -y && sudo rebootFinally, so we are able to connect to the machine remotely. we will need to setup and enable RDP on kali. This is similar to what we did with remnux / sift systems.
$ sudo apt-get install xrdp
$ sudo service xrdp start
$ sudo service xrdp-sesman start
$ sudo update-rc.d xrdp enable
$ sudo adduser xrdp ssl-cert
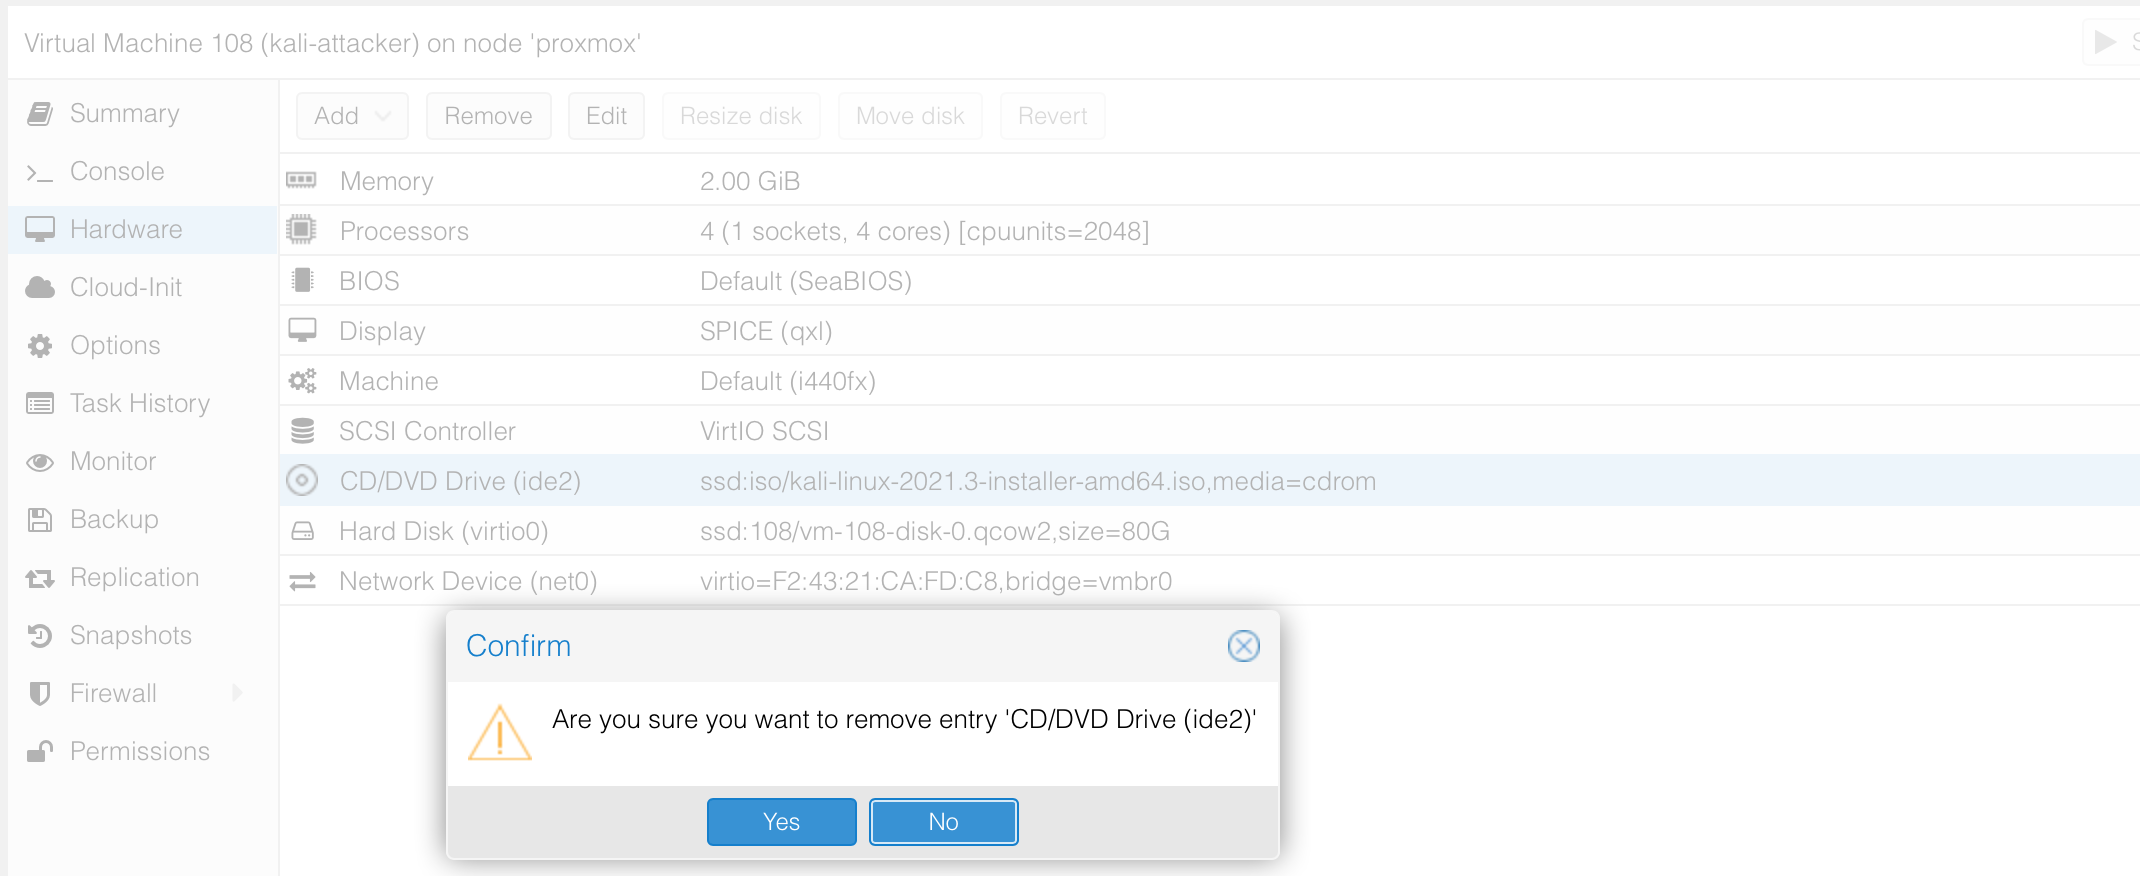
$ sudo vim /etc/xrdp/startwm.shWe now have all the endpoints setup and ready for use. Make sure to clone them just incase you need to recreate a VM.


One thought on “Building my Home Lab part 4: deploying the domain controller and endpoints”